|
Author
|
Topic: Dragon Models 1:72 Saturn V rocket model
|
Docdrew
Member Posts: 25
From: Scottsdale, AZ
Registered: Aug 2013
|
 posted 08-02-2014 01:23 AM
   
After getting the F-1s installed I went about attaching the fins and made sure that they were properly located in relation to the four position numbers on the sides of the first stage. Then I assembled the whole rocket and noticed that the fin positions (i.e. A-D) were in the wrong locations in relation to other external features on the rocket when using my Bandai 1/144 Apollo 11 as a reference. As an example, the large LOX vent fairing on the second stage should be on the same "side" of the rocket as position number 4 (IIII), which is between fins C and D. But on my Dragon model it is located on the "side" labeled position 2 (II). Since the locations of the external features of the rocket and the position numbers are fixed this creates a problem. There have been many posts criticizing the inaccuracies of this model but no one ever mentioned the problem that I am describing. So, to summarize, if I correctly position the fins in reference to the position numbers then the fins are incorrectly positioned in reference to the rest of the rocket. Which way would be best — to have the fins properly located in reference to the position numbers or to the rest of the rocket? I would be interested to know if all of the Dragon (prebuilt) models are like this or if mine is atypical. Thanks. |
sev8n
Member Posts: 236
From: Dallas TX USA
Registered: Jul 2012
|
posted 08-02-2014 11:36 AM
I noticed this problem when I assembled my pre-painted kit but I didn't mention it here, it just seemed like "piling on" with more criticism of the model at the time.Since mine was the pre-painted version I addressed the problem by cutting new alignment slots in the mating flanges of the stages. IIRC I rotated the SII 180 degrees relative to the SIC. I don't remember if I had to rotate the SIVB - the 4D 1/100 SaturnV has similar "clocking" problems and I don't remember which fixes I did to which model. There are other rotational alignment issues with the kit as is, I plan to repaint the entire booster when I incorporate other accuracy fixes. edit: You can't just move the fins/letters because then they won't match the orientation of the center F1 engine relative to the fin letters. You have to rotate the stages relative to each other. I found pics of the mods I made, hope these help: SIC before:  SIC after:  SIVB before (marked for cut):  SIVB after:  |
Docdrew
Member Posts: 25
From: Scottsdale, AZ
Registered: Aug 2013
|
posted 08-02-2014 01:50 PM
Thanks so much for your reply and the photos. I was hoping that I wouldn't have to do any cutting but I might just give it a try. |
Docdrew
Member Posts: 25
From: Scottsdale, AZ
Registered: Aug 2013
|
posted 08-03-2014 12:35 PM
I just noticed something concerning the correction for the S-IVB. It would properly align the third stage (e.g. the APS units) in relation to the first and second stages (after correcting the second stage) but then it will not be in proper alignment relative to the paint pattern on the interstage between the second and third stages. This is because Dragon did not attach the interstage correctly — it needs to be rotated to the same degree that you are rotating the S-IVB when you make your correction. Therefore, if Dragon had properly positioned the interstage no correction would have been necessary. It amazes me how Dragon can produce and build this model without noticing that the second stage is incorrectly rotated 180 degrees and the interstage paint pattern is misaligned relative to the second stage. I think they need to improve their QA process. |
sev8n
Member Posts: 236
From: Dallas TX USA
Registered: Jul 2012
|
posted 08-03-2014 08:33 PM
Docdrew, that's one of the other "rotational alignment issues" I alluded to. Rather than risk damaging the interstage by removing it, I plan to repaint it. Since Dragon also failed to provide retro-rocket fairings on the interstage - and Dragon's poor paint masking of the roll pattern - I plan to repaint the interstage (along with the rest of the Saturn booster). |
mode1charlie
Member Posts: 1170
From: Honolulu, HI
Registered: Sep 2010
|
posted 08-04-2014 12:44 AM
Has someone made a comprehensive list of the inaccuracies in the (both pre-built and unbuilt) model? That would be handy.It would also be quite the ticket if NewWare or RealSpace Models were to offer a PE/resin set to modify the model. I know that NewWare does offer a 1/72 decal set. |
sev8n
Member Posts: 236
From: Dallas TX USA
Registered: Jul 2012
|
posted 08-04-2014 10:29 AM
quote:
Originally posted by mode1charlie:
Has someone made a comprehensive list of the inaccuracies in the (both pre-built and unbuilt) model?
This link contains a description of most (but not all) of the geometry errors, although it does not mention the incorrectly rotated stages discussed above. |
Docdrew
Member Posts: 25
From: Scottsdale, AZ
Registered: Aug 2013
|
posted 08-08-2014 09:50 PM
Now that I've finally finished my minor modifications, and have the beast put together, I'm going to start work on the Detolf display cabinet. Various posts have talked about modifying the base of either the rocket or the cabinet so the rocket will fit. For those of you have the cabinet I would like to know, if you assemble it with the included base and top, what the exact measurement/distance is on the inside between the base and top. Presuming that the rocket is too tall to fit, what if you don't use the base that comes with the rocket and, instead, drill a hole in the Detolf base and place the metal rod into the Detolf base. Would that work? Or do you really have to replace the Detolf base with a thinner one? Thanks. |
sev8n
Member Posts: 236
From: Dallas TX USA
Registered: Jul 2012
|
posted 08-08-2014 11:27 PM
Mine is free-standing in a Detolf case without the kit base or rod. There is maybe 1" between the tip of the LES and the top of the case. |
cycleroadie
Member Posts: 452
From: Apalachin, NY USA
Registered: May 2011
|
posted 08-09-2014 07:27 AM
quote:
Originally posted by Docdrew:
Or do you really have to replace the Detolf base with a thinner one?
I took a wood plaque from A.C. Moore, painted it, laminated on an Apollo 11 patch image, then drilled a hole and epoxied the metal rod to it, the plaque is juts a little over 1/2" thick, and all together leaves me some room at the top.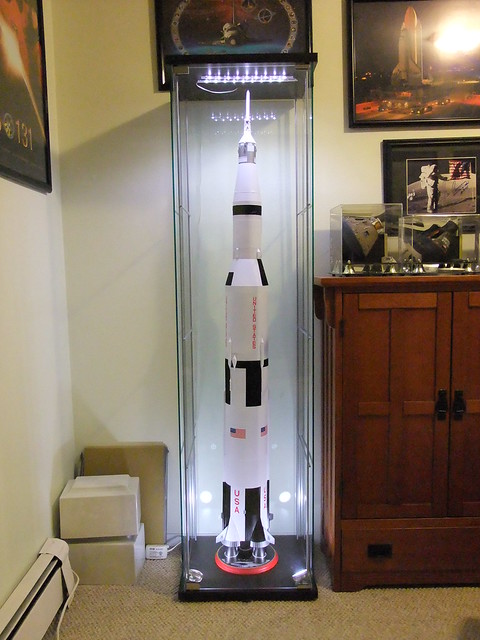 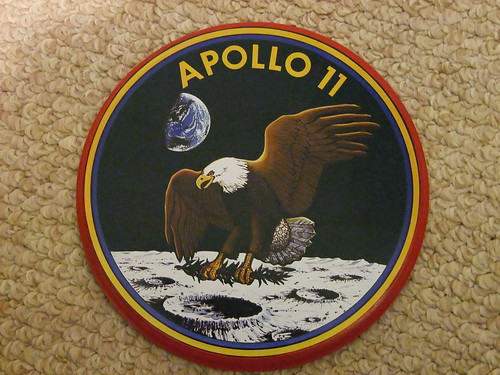
|
rlobinske
Member Posts: 152
From: Crawfordville, FL
Registered: Oct 2014
|
posted 10-17-2014 07:25 AM
I recently started on the kit version and I must say that I am seriously disappointed with it. Dimensional errors, lack of important details, misplacement of parts, and a terrible instruction sheet. To save some of my sanity, I am skipping details inside the interstages since the model will be displayed fully stacked. That avoids fixing the low-quality J-2 engines and thrust plate issues. I just noticed that the communications conduits on the S-I-C stage is in the wrong place. To correct that, the conduits will no longer cover the tank half seams, requiring some additional filling and shaping. Thanks for letting me vent. I had high hopes and well... |
David C
Member Posts: 1024
From: Lausanne
Registered: Apr 2012
|
posted 10-17-2014 08:32 AM
All of Dragon's 1/72 Apollo and Gemini stuff has been very disappointing. I'm hoping that someone who's actually done some research gives it another go in the future. |
Panther494
Member Posts: 408
From: London UK
Registered: Jan 2013
|
posted 10-17-2014 02:10 PM
You can purchase detail resin replacement parts from Martins Models here in the UK. The items require some cleaning up but they certainly improve this frustrating kit. |
moon69man
New Member Posts: 5
From: Newburgh, N.Y.
Registered: Dec 2014
|
posted 12-31-2014 01:07 PM
I would like to purchase the 1/72 LUT back ground for my Saturn V. Does Michael Key still sell them? |
keymichael1855
Member Posts: 176
From: Virginia Beach, VA, USA
Registered: Feb 2012
|
posted 01-03-2015 12:44 PM
Yes, I do still sell the LUT background and the MLP kit for the Dragon Saturn V. If you will send me an email, I'd be glad to get them to you. Thanks! |
rlobinske
Member Posts: 152
From: Crawfordville, FL
Registered: Oct 2014
|
posted 01-04-2015 09:17 AM
Can anyone point me to images or plans of the VAB High Bay layout? Ultimately, I would like to have the interior of the display cabinet look like the High Bay with the viewer looking in from the outside. |
AussiePete
Member Posts: 104
From: Adelaide, South Australia
Registered: Jan 2014
|
posted 01-10-2015 12:50 AM
Been a while. Still playing with my Dragon Saturn. Does anyone have any idea what the color was of the inside of the LEM/Payload shroud? |
mikej
Member Posts: 481
From: Germantown, WI USA
Registered: Jan 2004
|
posted 01-10-2015 07:13 PM
The inside of the SLA was a grey color (I'm not a modeller or an interior designer, so that's as specific as I can get). See this Apollo 7 picture.The inside of the SLA on the JSC Saturn V is basically the same. |
AussiePete
Member Posts: 104
From: Adelaide, South Australia
Registered: Jan 2014
|
posted 01-10-2015 11:09 PM
Thanks Mike. Maybe just bare metal? |
rlobinske
Member Posts: 152
From: Crawfordville, FL
Registered: Oct 2014
|
posted 01-11-2015 07:34 AM
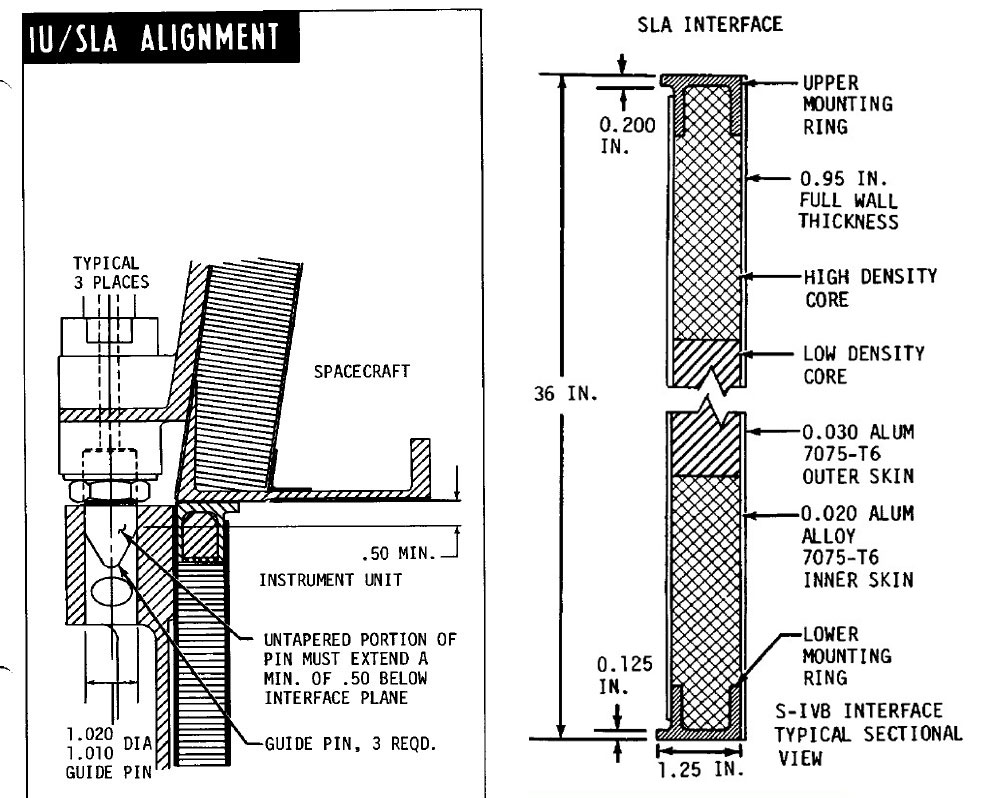
In the Space in Miniature reference on the Apollo CM, the editors report that the early missions had a bare metal interior to the SLA, while later missions with a LM in place had some kind of protective blankets. Based on my photos of the Instrument Unit at KSC, the interior wall was chromate green mostly covered by various pieces of gray or bare metal equipment. |
GACspaceguy
Member Posts: 2489
From: Guyton, GA
Registered: Jan 2006
|
posted 01-11-2015 01:07 PM
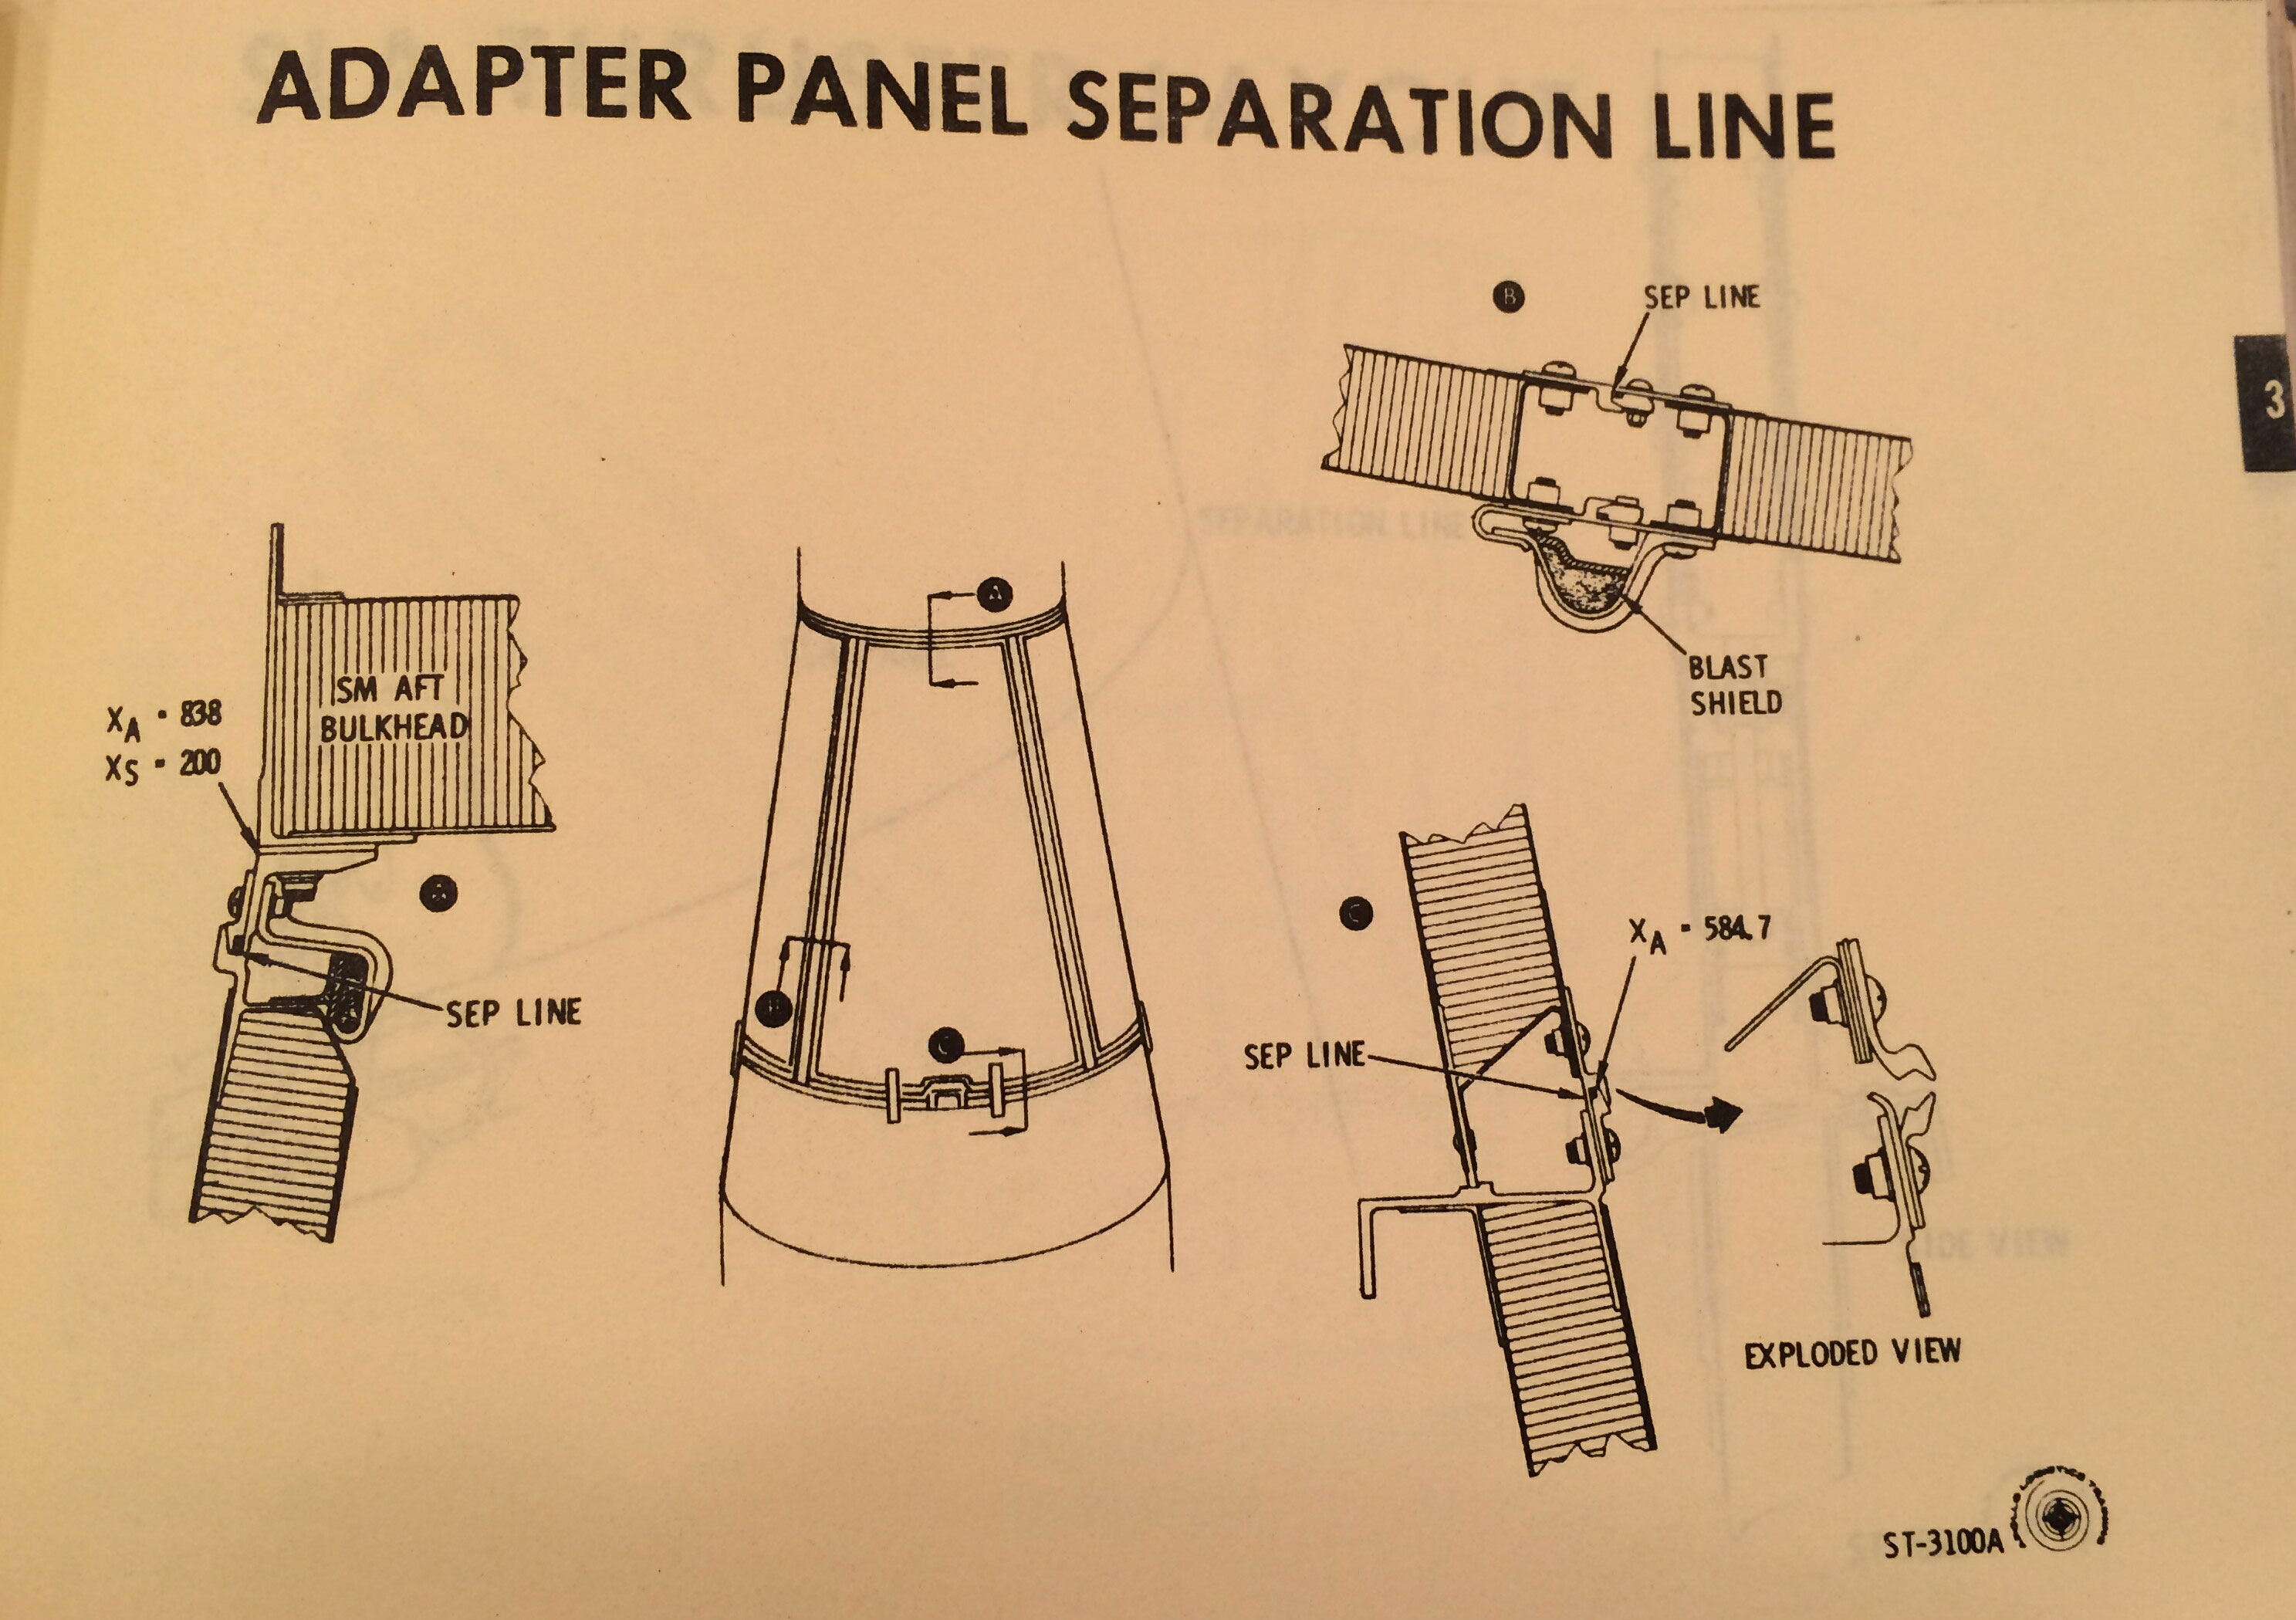
The SLA panel where the world’s largest bonded aluminum honeycomb sandwich panel at the time. Each of the four panels was larger than the panels being produced for Lockheed’s C-5A aft cargo doors. I only know this because I had worked for Canadair in Montreal in the late 70s and they had built the cargo doors as a sub contract for Lockheed. The fellows that had been around for a while told the story of how they had the record for the largest bonded assemblies until the SLA panels were produced.All that to say that for that type of construction the skins would be anodized for bonding and corrosion control. That would make it a light grey with a slight green tint from the chromates in the treatment.
|
AussiePete
Member Posts: 104
From: Adelaide, South Australia
Registered: Jan 2014
|
posted 01-11-2015 04:07 PM
Might I be right in thinking the SLA that were used prior to carrying the LEM may have just been steel. While those used when the LEM was carried were honeycomb? If so the non LEM were plain steel while the honeycomb were chromate?Having worked on the P3 for nearly 20 years all underside of honeycomb was chromate. I tried all weekend to find photos of Apollo 11 shots showing the open SLA. I only found Apollo 7 with the bare metal. |
AussiePete
Member Posts: 104
From: Adelaide, South Australia
Registered: Jan 2014
|
posted 01-11-2015 05:23 PM
Okay, I found details. Seems from what I can gather all SLA were honeycomb with cork insulation on the outside. Internal colour was more likely bare fibre glass over honeycomb giving a greyish colour (opaque fibre glass over aluminium).How to mimic that on a model? Or just leave it the metal colour I have painted it already? |
rlobinske
Member Posts: 152
From: Crawfordville, FL
Registered: Oct 2014
|
posted 01-13-2015 08:39 AM
Based on that description, Tamiya XF-56 Metallic Gray would be a good match. |
rlobinske
Member Posts: 152
From: Crawfordville, FL
Registered: Oct 2014
|
posted 01-13-2015 11:33 AM
Looking at some of the Apollo 17 photos of the LM prior to extraction, it looks like at least the lower portion of the SLA had what looks like 2 mil Kapton or something similar lining the interior. |
Planetary
Member Posts: 24
From: Huntington Beach, CA, USA
Registered: May 2013
|
posted 01-14-2015 08:11 PM
The SLA at the Saturn V exhibit at KSC in Florida is basically a dummy mockup. The flight SLA's for all Apollo missions was never painted gray on the inside, the rule of thumb for all spacecraft/rocket structures being "if it doesn't need paint to protect from exposure to space, leave it bare metal to save weight." The description in an earlier post in this thread about the inside being anodized metal is correct, although the metal is heat treated and chem-milled inconel which is slightly darker with a green/brown tint and unpolished flat in nature. Depending on how the light hits a panel in unfiltered sunlight in space, it can looks gray, green/gray bronze or even silverish. The "detail" bonded strips inside each panel (that divide each panel into 9 "sections" and around the two access panel doors is a flat brass/copper color. There's dozens of really detailed photos of the inside of the panels and inside the lower part of the SLA, Instrument Unit and the SIVB tank dome from Apollo 7 and there are a few photos from Apollo 12 that show a SLA panel drifting off in space that verify the inside of the SLA panels stayed pretty much cosmetically the same. I believe dark gold Kapton was used as a liner around the upper "framework" of the Instrument Unit for Apollo 15 - 17 and the 3 manned Skylab SIVBs. |
GACspaceguy
Member Posts: 2489
From: Guyton, GA
Registered: Jan 2006
|
posted 01-15-2015 08:15 AM
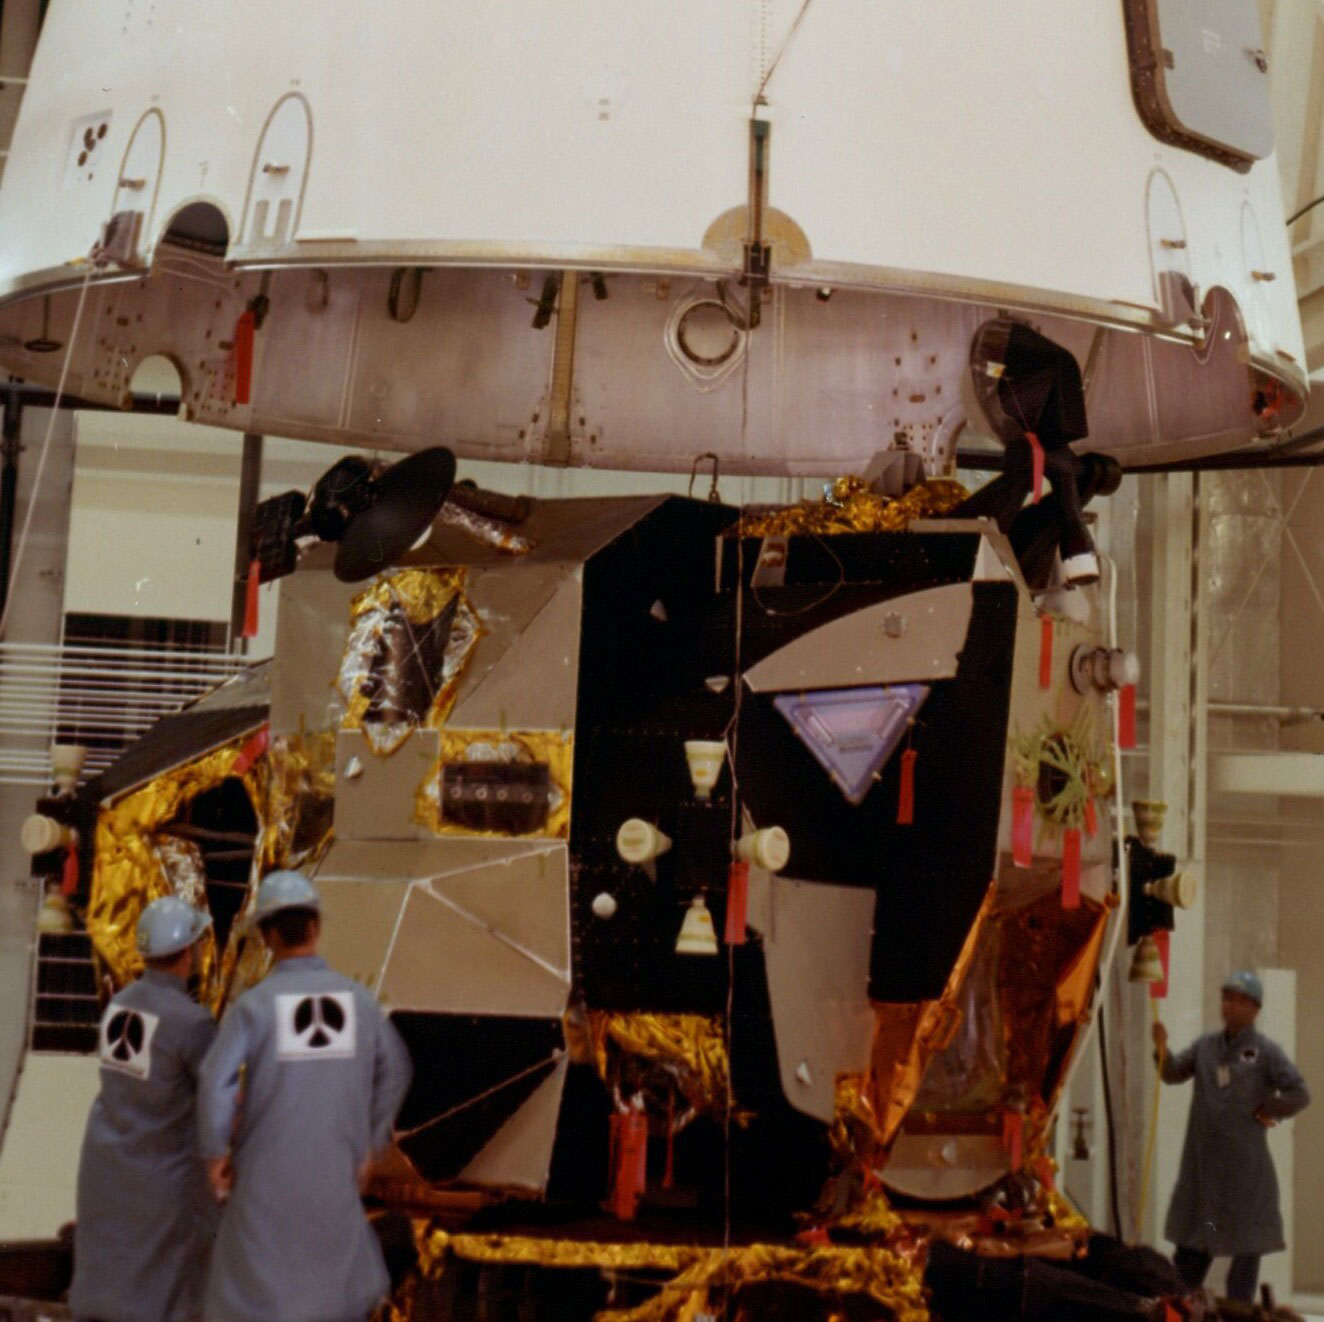
I found a couple of diagrams and a photo that may help. The inside skin is metal for sure, not fiberglass. I think it is not inconel though, as it would not be anodized or chem milled (but if there is data showing so, I would like to see it). The four strips that make up the sections have that goldish color of alodine and that would be because it is a mechanical "exploding" joint for the panel separation. The bonded strips may have a color variation as it looks like they have some adhesive flow on the edges as they would have been bonded using a film adhesive that would flow out during the bonding process in the autoclave.
Take a look at the attached photo showing the SLA over what appears to be a flight configured LM.  

|
AussiePete
Member Posts: 104
From: Adelaide, South Australia
Registered: Jan 2014
|
posted 01-17-2015 03:26 AM
quote:
Originally posted by GACspaceguy:
Take a look at the attached photo showing the SLA over what appears to be a flight configured LM.
Thanks for the help guys.From the photo there it looks like it may have just got a quick spray of white. Very patchy though. I ended up going with a metal colour. |
GACspaceguy
Member Posts: 2489
From: Guyton, GA
Registered: Jan 2006
|
posted 01-17-2015 04:45 AM
It was not white, metal was the way to go. |
cspg
Member Posts: 6215
From: Geneva, Switzerland
Registered: May 2006
|
posted 02-06-2015 04:05 AM
Is Dragon re-issuing this model? Dragon Models USA announces one for April 2015 and it looks the same as the original but with a different item number (50402 for the new one, 50388 for the original). |
milkit1
Member Posts: 271
From: Springfield Illinois USA
Registered: Sep 2015
|
posted 10-21-2015 09:13 PM
Sorry if this has been covered but I didn't see it in any of these threads. When this arrived, is the rocket in sections that then piece together? I am thinking of getting this autographed and was wondering if I could just take a section to get signed as opposed to carrying the whole thing around. |
cycleroadie
Member Posts: 452
From: Apalachin, NY USA
Registered: May 2011
|
posted 10-22-2015 06:53 AM
quote:
Originally posted by milkit1:
When this arrived, is the rocket in sections that then piece together?
Yes, stages are separate. |
jutrased
Member Posts: 65
From: North Smithfield, RI USA
Registered: Aug 2003
|
posted 11-19-2015 11:16 AM
For anyone still looking to buy the Dragon Saturn V, the Flying Mule has it on sale today only at 25% off. $186.95 (was $249.95). Model #50402 which I believe is the display version, not the build-it kit. |
jutrased
Member Posts: 65
From: North Smithfield, RI USA
Registered: Aug 2003
|
posted 07-11-2016 03:32 PM
Flying Mule once again has this on sale today only for $186.95. |
velocity
Member Posts: 41
From: Scotland
Registered: Oct 2017
|
posted 07-12-2019 12:02 PM
quote:
Originally posted by keymichael1855:
I do still sell the LUT background and the MLP kit for the Dragon Saturn V rockets.
Michael, are you still selling the LUT background kits for the Saturn V 1/72 scale model? |
keymichael1855
Member Posts: 176
From: Virginia Beach, VA, USA
Registered: Feb 2012
|
posted 07-12-2019 12:51 PM
Thanks for asking about the LUT and MLP kit. Yes, I am still selling them! You can either buy from eBay (293116641494) or feel free to contact me directly. Since you are in Scotland, you'll be better off contacting me directly. The Global Shipping Program is nice for sellers, but the buyers end up paying much more than necessary. I will look forward to hearing from you! 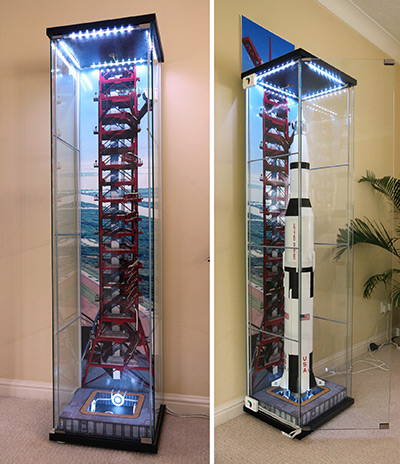 |
Space Cadet Carl
Member Posts: 211
From: Lake Orion, Michigan
Registered: Feb 2006
|
posted 10-31-2019 01:34 PM
Good news! Dragon has announced that the Apollo 11 Saturn V is going to be re-released and it will cost about $140. During the last few years, a couple resin part companies have released aftermarket upgrade kits in an attempt to correct many of the original shortcomings of this kit. |
Daugherty54
Member Posts: 594
From: Cabot, Arkansas, USA
Registered: Sep 2010
|
posted 10-31-2019 03:45 PM
is this the prebuilt or the model kit? |
Space Cadet Carl
Member Posts: 211
From: Lake Orion, Michigan
Registered: Feb 2006
|
posted 10-31-2019 04:24 PM
Dragon says it's the unbuilt kit. |
crash
Member Posts: 318
From: West Sussex, England
Registered: Jan 2011
|
posted 11-01-2019 02:47 AM
Can someone confirm that this re-release is not yet available (but clearly imminent)? But if you have found it could you provide a link please? |