|
Author
|
Topic: Dragon Models 1:72 Saturn V rocket model
|
apolloprojeckt
Member Posts: 1452
From: Arnhem, Netherlands
Registered: Feb 2009
|
 posted 02-20-2012 12:45 PM
   
The weather was nice weather outside to spray, temperature above 5 degrees Celsius is needed to spray with spray cans, so today the top of Skylab in the paint sprayed, tomorrow the third stage masking and then spraying the Skylab and upgrade ready. 
|
Cunumdrum61
Member Posts: 38
From: Australia
Registered: Jan 2012
|
posted 02-20-2012 01:42 PM
Your Skylab conversion is looking good. I am working on resin parts for this and the Saturn V that Dragon forgot to include in their kit. Nice paintwork also on the shroud. |
history in miniature
Member Posts: 600
From: Slatington, PA
Registered: Mar 2009
|
posted 02-21-2012 06:02 PM
Pascal, your Skylab conversion is beautiful. |
DMScott
Member Posts: 355
From: Lexington, MA, USA
Registered: Dec 2005
|
posted 02-26-2012 05:31 AM
Thank you to apolloprojeckt, oldbru, and Larry McGlynn. After reading this thread, I got my model, swapped out the CSM for the Apollo 10 one by following the directions here, then put the model into the IKEA cabinet with the black backing and LED light set. It looks stunning. And it was this group coming together to share ideas that made it happen because there is no way I would have known about the model or thought about display without this group. Thank you. |
Cunumdrum61
Member Posts: 38
From: Australia
Registered: Jan 2012
|
posted 02-26-2012 11:10 AM
Looks pretty darn good in the cabinet with the lights and the black backing, doesn't it. The model needs work to be completely accurate but it is a very good starting point for those that do not have the time or can not scratchbuild one in this scale. Enjoy your Saturn V. |
cycleroadie
Member Posts: 452
From: Apalachin, NY USA
Registered: May 2011
|
posted 03-01-2012 06:06 PM
David Maier's (EDU-Craft Diversions) heavy paper model kit of the Launch Umbilical Tower (LUT) and Mobile Launcher Platform in 1:72 scale is now available (see his listings on eBay under the ID d-condave). |
Cunumdrum61
Member Posts: 38
From: Australia
Registered: Jan 2012
|
posted 03-01-2012 07:54 PM
Thanks for the heads up. I just ordered one and will use it along with the NASA plans to build it from plastic. I have seen one of his LUTs built up and with careful work it can look really great. It is a pity Launch Complex Models never continued and released everything that they had promised. Their stuff was really good. |
Cunumdrum61
Member Posts: 38
From: Australia
Registered: Jan 2012
|
posted 03-01-2012 11:00 PM
I am working on new decals for the Dragon Saturn V if you feel like repainting it. They are dry transfers. Then I will work on the resin pieces and umbilicals that are missing on the kit. |
the clocks running
Member Posts: 382
From: Rochester, NY
Registered: Jan 2012
|
posted 03-01-2012 11:23 PM
I am very interested in a mod kit for the 1/72 Saturn V kit when it comes out. It is coming I hope? |
Cunumdrum61
Member Posts: 38
From: Australia
Registered: Jan 2012
|
posted 03-02-2012 04:00 AM
Yes, I am working on the new decals now and hope to have them ready for the printer in about a week.I have the sep rockets done for the Saturn V and a few other pieces. I have just started drawing up the umbilical panels etc. I am hoping to do them in photoetch which will be more expensive but I think more accurate. I'm sorry but I can not give you a definate date as to when they will be ready. I will post them here when they are done though. |
mode1charlie
Member Posts: 1176
From: Honolulu, HI
Registered: Sep 2010
|
posted 03-02-2012 06:10 AM
Count me in as interested as well. Good choice on using photo etch - will definitely look better.Has anyone put together a collated list of all the inaccuracies and/or missing features on this model? It would be helpful to have them all in one place for easy reference. I have reasonably good modeling skills, but I don't know of an easy way to mask off the stringer ("corrugated") sections needed to reprint and correct the overspray problem. Anyone have any brilliant solutions? |
Cunumdrum61
Member Posts: 38
From: Australia
Registered: Jan 2012
|
posted 03-02-2012 06:27 AM
The best way to overcome the black paint bleeding under the masking tape is once you have masked it seal it really good with a something blunt such as a Popsicle stick. Then the trick is to first spray a light coat of clear flat varnish or sealer and wait for that to flash off. Then spray your black. The clear will seal the tape and prevent bleed through onto the white paint behind. It works for me. |
apolloprojeckt
Member Posts: 1452
From: Arnhem, Netherlands
Registered: Feb 2009
|
posted 03-02-2012 07:20 AM
Maybe a tip: use primer before the black block painting otherwise sure it will come off. There is also a other option for people how not have the scale to painting, there is in hobby craft shop's flat black A4 sticker sheets. It's very thin and with a hobby knife and ruler the work is easy. |
Cunumdrum61
Member Posts: 38
From: Australia
Registered: Jan 2012
|
posted 03-02-2012 09:16 AM
It depends on the paint that you use. I never use a primer on a standard kit as I think it is one extra coat of paint that only hides the detail. If I am working in different materials and will. I use normal hobby paint such as Floquil or the Tamiya synthetic lacquers that I decant from their spray cans and then push it through and airbrush. I always use lacquer thinner with my paints and they dry fast and do not peel or pull up with tape. Tamiya lacquers do not harm plastic at all and you can use their thinner to clean plastic before you paint. |
kosmo
Member Posts: 391
From:
Registered: Sep 2001
|
posted 03-02-2012 09:51 AM
I have found the best way to keep black from bleeding or under spray, is to first to outline the area to be painted first with a fine tip black magic marker (on the painted side) using masking tape as a guide (on non-painted side). Then using liquid mask brush a wide band up to the marker line (on the non-painted side). Once this has dried, apply masking tape on the non-painted side as close to the marker line as possible (you will need to mask off the other areas that you don't want paint on also), if done carefully, this will keep under spray off the side you don't want paint on and give you a nice crisp line (the eye won't be able to see the marker). This works really well in corrugated areas. |
history in miniature
Member Posts: 600
From: Slatington, PA
Registered: Mar 2009
|
posted 03-02-2012 09:54 AM
Use Tamiya masking tape. You will experience absolutely no bleeding at all. If it is to be placed over an irregular surface, spray a little clear over the tape to seal it but with Tamiya tape, this is never really needed. |
robert_l
Member Posts: 168
From: Dundee,Scotland
Registered: Jul 2008
|
posted 03-06-2012 10:14 AM
Saturn V arrived this morning! I would like to thank every one on this forum as found out about it here!Assembled with no major problems, only footery bit was the RCS thrusters, which I had to glue on. I was frightened of braking the F1 engines pushing them into holes. Fins went on no problem. I take it the launch escape tower dues not separate? It looks really impressive. I am planning to get the Ikea display cases. |
cycleroadie
Member Posts: 452
From: Apalachin, NY USA
Registered: May 2011
|
posted 03-06-2012 11:39 AM
I glued my thrusters on also, I glue them on all the CSMs as if one got lost, might never find it. No the escape tower does not separate on this model. |
GACspaceguy
Member Posts: 2501
From: Guyton, GA
Registered: Jan 2006
|
posted 03-06-2012 04:09 PM
I have removed the LES/BPC assembly on both of the models I have. Once again the adhesive is minimal and I could slide my fingernail under the edge of the BPC stating at the umblical cover and carefully work your way around the edge and off it comes. Under it is a silver CM with the hand holds, no docking probe and one had the windows painted and the other did not. The marks from the adhesive was minimal as well. The removed BPC/LES fit on the die cast version of the Apollo 10 just like the original. |
DMScott
Member Posts: 355
From: Lexington, MA, USA
Registered: Dec 2005
|
posted 03-07-2012 02:44 AM
Can I ask a basic question? I'd like to glue my thrusters on too. What is the best glue to use for this purpose. Thanks.
|
alexbaja
Member Posts: 448
From: Naxxar, Malta
Registered: Dec 2010
|
posted 03-07-2012 03:46 AM
If you want a removable bond, use white glue, but if you want a permanent bond use superglue. |
apolloprojeckt
Member Posts: 1452
From: Arnhem, Netherlands
Registered: Feb 2009
|
posted 03-07-2012 05:17 AM
I use Bison Montagekit Super Grip, the super second glue can give white spots on the black paint. |
apolloprojeckt
Member Posts: 1452
From: Arnhem, Netherlands
Registered: Feb 2009
|
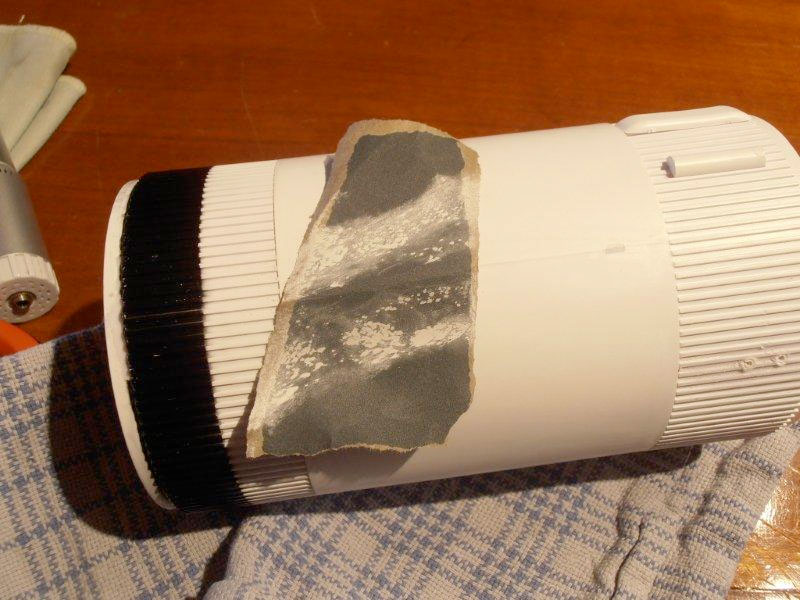
posted 03-07-2012 08:10 AM
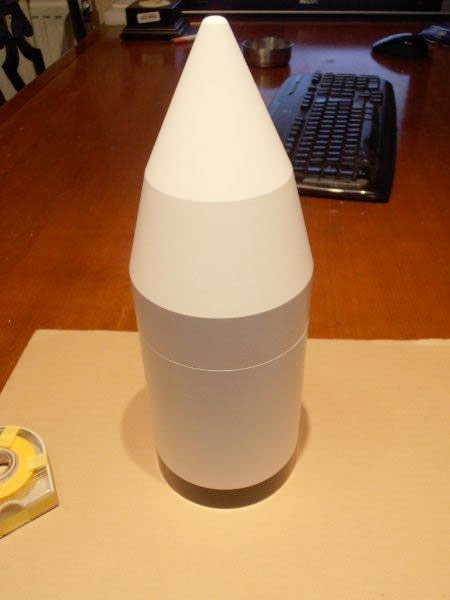
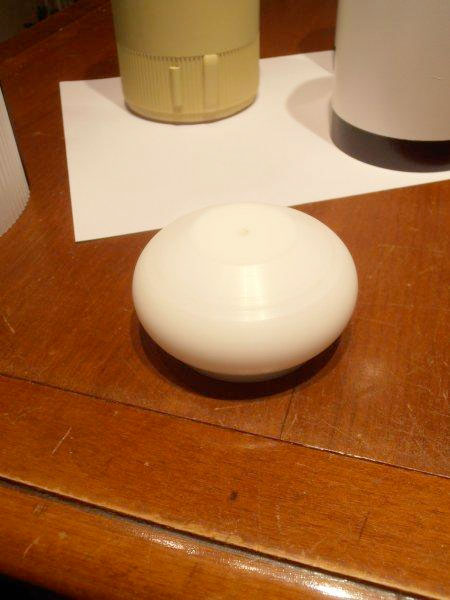
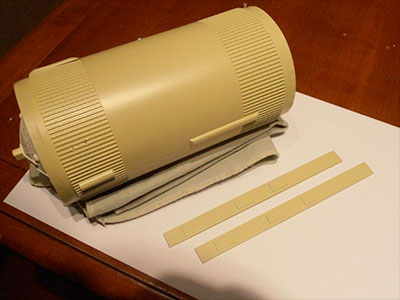
Here some progress conversion to Skylab version, I get a part on the side gently removed. Then everything sanding and two solar panel made from styrene, all in the first coat of primer put, this morning some good after sanding. 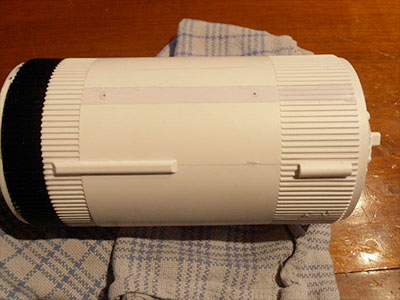

|
Cunumdrum61
Member Posts: 38
From: Australia
Registered: Jan 2012
|
posted 03-07-2012 02:30 PM
Pascal, that's looking real sweet. Can't wait to see more as you progress and please post more photos as you go! Your work is really nice and thanks once again for your help. |
the clocks running
Member Posts: 382
From: Rochester, NY
Registered: Jan 2012
|
posted 03-07-2012 02:43 PM
I really enjoy watching your progress on these models Pascal. Thank you for sharing. |
apolloprojeckt
Member Posts: 1452
From: Arnhem, Netherlands
Registered: Feb 2009
|
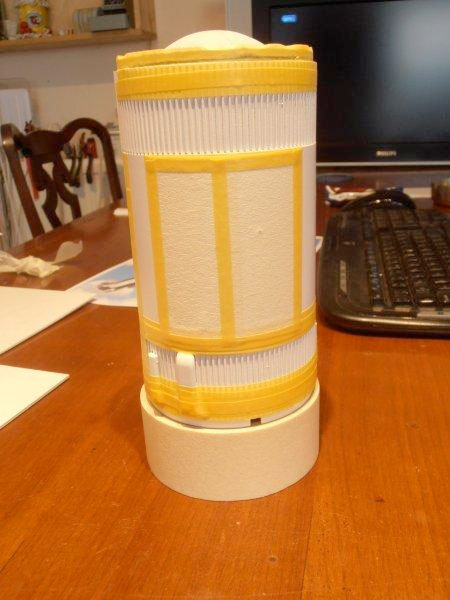
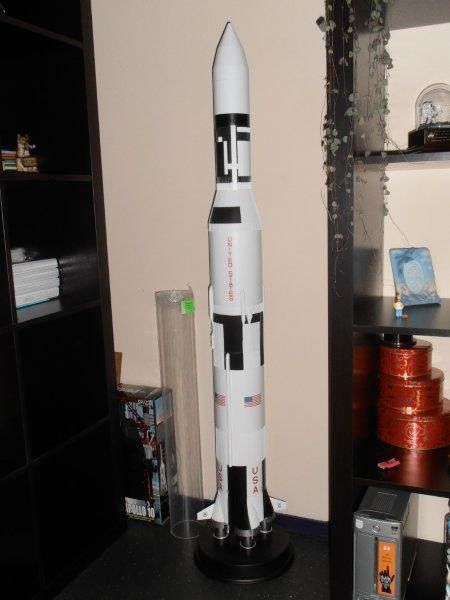
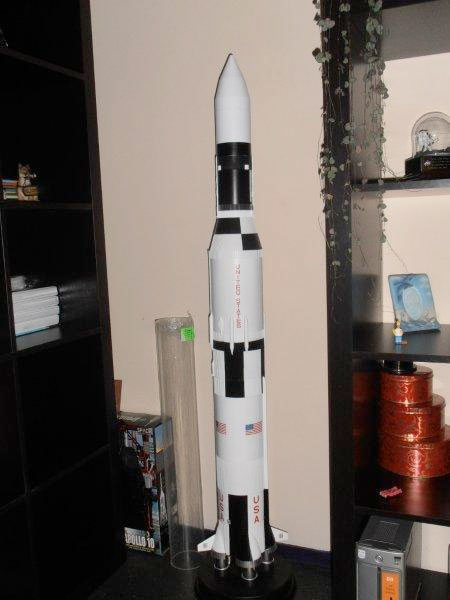
posted 03-11-2012 10:58 AM
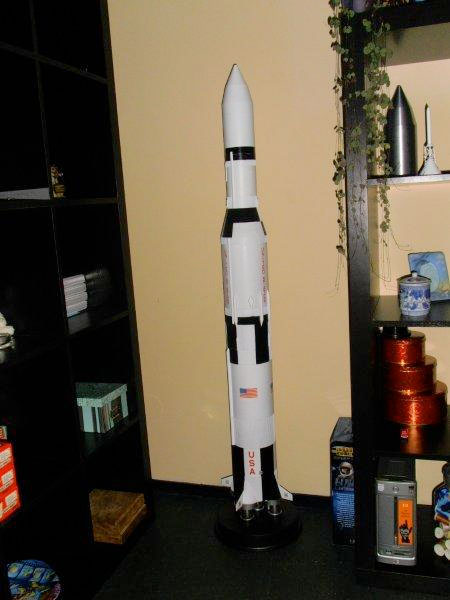
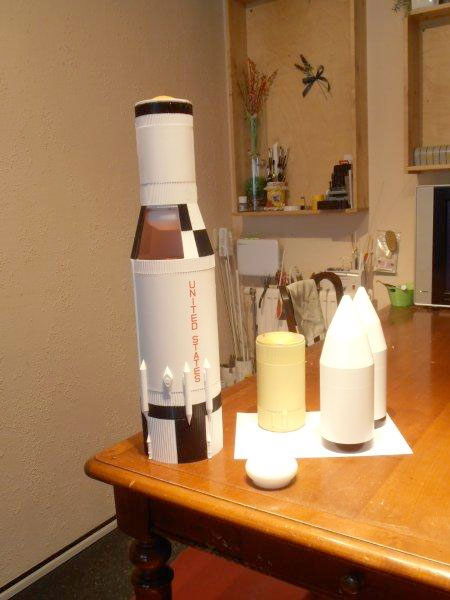
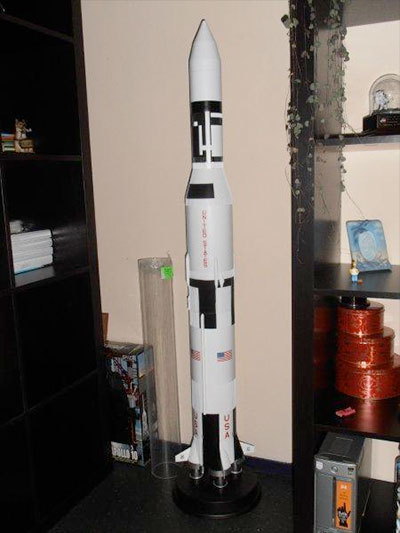
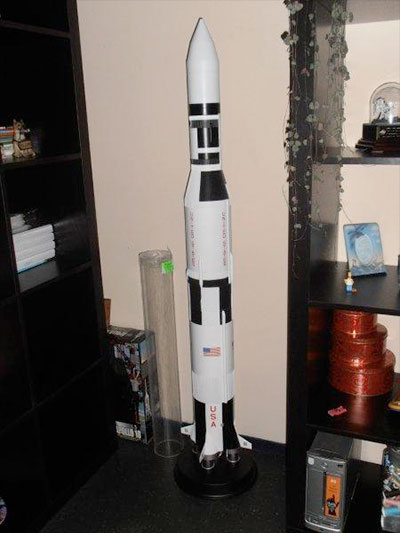
After the primer coat, came a few layers of white paint on it, let it dry a day or two and it could be painted black pattern, when the solar panels on it, and little project Saturn V/Skylab change is ready!  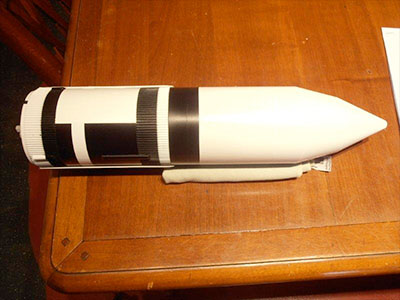
|
apolloprojeckt
Member Posts: 1452
From: Arnhem, Netherlands
Registered: Feb 2009
|
posted 03-11-2012 11:00 AM

|
Cunumdrum61
Member Posts: 38
From: Australia
Registered: Jan 2012
|
posted 03-11-2012 02:20 PM
Looking good Pascal. It certainly makes the Saturn V look different. |
Jay Chladek
Member Posts: 2272
From: Bellevue, NE, USA
Registered: Aug 2007
|
posted 03-11-2012 02:59 PM
Excellent conversion work. And once Dragon does the Saturn V kit, you'll have a nice matching set of Saturns (both similar, yet different). |
apolloprojeckt
Member Posts: 1452
From: Arnhem, Netherlands
Registered: Feb 2009
|
posted 04-16-2012 08:38 AM
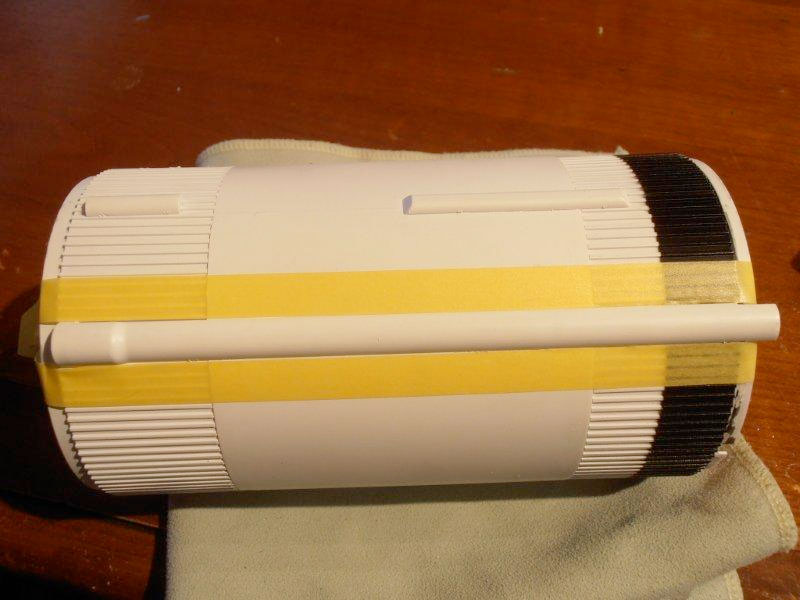
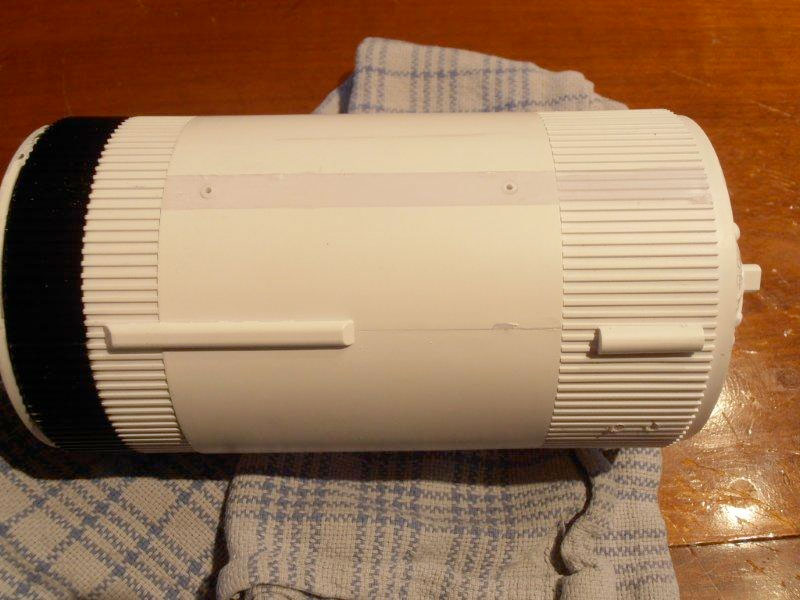
I have a couple Skylab shrouds for cS members changed, now I thought I let a waste tank underneath places with a radiator plate, someone else wanted the Saturn V in a cutaway version, if you have the Saturn v 180 degrees to the other side is he was in a totally enclosed version presentable.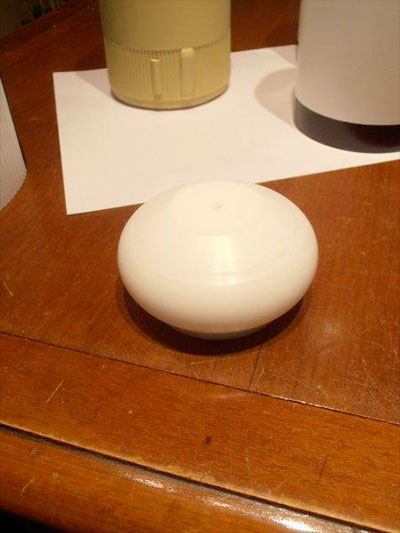 
|
robert_l
Member Posts: 168
From: Dundee,Scotland
Registered: Jul 2008
|
posted 04-22-2012 03:31 PM
I have now got the Saturn V in a Detolf Case, I bought two, you can see some of my collection of space models and toys also a Sony TC50, the Apollo cassette recorder.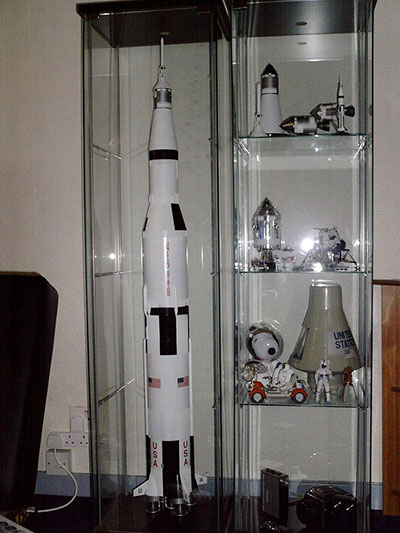 |
Ironman One
Member Posts: 73
From: Ormond Beach, FL USA
Registered: Sep 2011
|
posted 04-24-2012 08:12 PM
I just purchased my Saturn and as previously posted regarding the tight fit of the engines etc., a little "plastic friendly" lubricant works wonders. Very easy installation and removal. |
model maker
Member Posts: 130
From: NEVADA , USA
Registered: May 2012
|
posted 05-23-2012 09:31 AM
I am from Colorado and new here and have lurked for awhile. This is an outstanding forum. I also purchased the Dragon 1/72 Saturn V and I am very impressed with the overall appearance of it. The visible seams and black overspray get less noticeable as time goes by. I still have to paint my fins silver and will also use clear masking tape to mask of the letters. What kind of cement does everyone use when cementing things like the fins in place since the surfaces to be mated are "pre-painted? I used Ambroid Pro-Weld on the SM thrusters and that was difficult because the stuff dries before you can mate the surfaces even when you try quickly to do it. That stuff is best for capillary action and attaching the little thrusters was not capillary. I am thinking about replacing the top section with the Apollo 10 but need to make sure I do it right and that it will come off and Apollo 10 section goes on easily. What kind of cement did everyone use to do this? I know regular Testors model glue will not work well on pre-painted surfaces. I have some clear Loc-Tite but not sure how well that stuff will work. I have my Saturn V in a corner and up on a 2 ft. by 2 ft. by 6 ft. long display shelf that is supported by two speakers and against the wall with a nice blue cloth and a black poster board wall with a large moon map incorporated into the black wall and ceiling section. The shelf sits at a height of 28 1/2 inches off the floor and the tip of the escape tower is 1 inch from the ceiling. It sits next to a 1/100 shuttle stack and a 1/48 CSM and LEM docked together. I also have another display shelf cabinet that measures 6 ft. long by 6 ft. high by 2 ft. deep with three 2 ft. wide shelves and one 12 inch shelf that sits between the top and middle shelves. That way I can put tall models in front of the 12 inch shelf and place smaller models on the 12 inch one. I will have to try and post a couple of pictures if I can. |
Mike Okuda
Member Posts: 12
From: Los Angeles, CA
Registered: Jul 2009
|
posted 05-25-2012 12:13 AM
Can anyone tell me the overall height of the model, including the display base? In other words, the distance from the bottom of the display base to the tip of the LES tower? |
Robert Pearlman
Editor Posts: 43351
From: Houston, TX
Registered: Nov 1999
|
posted 05-25-2012 03:06 AM
The model stands 62.5-inches from the bottom of the stand to the top of the tower. |
model maker
Member Posts: 130
From: NEVADA , USA
Registered: May 2012
|
posted 05-25-2012 12:57 PM
Yes, it is very tall especially where I have it on a shelf that sits just below my pants pocket when I stand next to that shelf and my Saturn v is on that shelf and the tip of the escape tower is one inch from the ceiling. I have it in a corner and since my walls are white I tacked black poster paper on both corner walls and on the ceiling itself so the white Saturn V would stand out. |
Mike Okuda
Member Posts: 12
From: Los Angeles, CA
Registered: Jul 2009
|
posted 07-16-2012 09:51 PM
My 1/72 Saturn V arrived today. I love it! |
divemaster
Member Posts: 1376
From: ridgefield, ct
Registered: May 2002
|
posted 07-16-2012 10:49 PM
Curious as to what parts are metal and what parts are plastic.And did the shipped version come with white fairing fins and black F-1 engines? (I know, I'm picky.) |
Robert Pearlman
Editor Posts: 43351
From: Houston, TX
Registered: Nov 1999
|
posted 07-16-2012 11:02 PM
There are no metal parts, the entire model is plastic (with the exception of the metal pin to stand the model on the base).The fins are white, the F-1 engines are dark gray. |
TheBillhelm
New Member Posts: 1
From: Atlanta
Registered: Jul 2012
|
posted 07-18-2012 09:59 AM
Thanks to everyone for the detailed and informative posts. You sold me. Mine just arrived and was waiting for me when I got home from work last night. I am absolutely thrilled with it. The Detolf is a perfect fit. I did a little custom lighting (cut wood blocks and the Ikea Dioder), and I also added a wall decal from Wall Monkeys. |