|
|

|
|
Author
|
Topic: Storing and displaying space patches
|
embangloy
Member Posts: 75
From: Nashville, TN, USA
Registered: Aug 2007
|
 posted 08-15-2007 02:40 PM
   
I am looking for other recommendations to store and display my patches. Since the 1980's, I have managed to keep them all in a cool and dark place, in a Rubbermaid container laying flat, all separated in individual CD sleeves. I have always tried to keep touching the patches to a minimal. I have heard of using those CD-style books for this purpose, but I have more than enough invested into my collection and would like to give it the respect that it deserves. Also, has anyone insured their patch collection? Any comments or suggestions would be grateful. |
Robert Pearlman
Editor Posts: 44073
From: Houston, TX
Registered: Nov 1999
|
posted 08-15-2007 03:35 PM
There are some high end CD-style books made from leather, wood, and even metals such as titanium, so that might be an option... |
Bill Hunt
Member Posts: 401
From: Irvine, CA
Registered: Oct 2002
|
posted 08-15-2007 03:42 PM
I use the same basic method you do for storage - Rubbermaid plastic cases with the patches in individual CD sleeves. For displaying the real gems in my collection, I frame them under UV glass against black, acid-free (museum quality) card stock. Using a laser printer, I create little description stickers (white font on black background), which I affix underneath the patch. To hold the patches immobile in the display, I use double-sided fabric tape - the kind you get at fabric or sewing supply stores. You need to test it with the backing carefully, but I've found over the years that it works best for the vintage, fabric backed patches. It doesn't leave a sticky residue and it's designed to be removed from fabric and reaffixed. It holds well, but doesn't leave any kind of a mark on the patch when you remove it later. And if you're going to be framing the patches, even with UV glass or plex, the best thing to remember is don't hang them anywhere they're going to be exposed to direct or near-direct sunlight. |
Voyager1975
Member Posts: 188
From:
Registered: Dec 2008
|
posted 02-10-2009 12:40 PM
I am curious to know how some of you are storing or displaying your patches? I have just been keeping mine in a bunch of boxes and separating the patches in the boxes by categories. Such as Shuttle patches, anniversary and commemorative, flag patches, NASA logo patches, and off course Mercury/Gemini/Apollo, Skylab, Apollo/Soyuz and so on. Editor's note: Threads merged. |
Kevmac
Member Posts: 273
From: College Station, TX
Registered: Apr 2003
|
posted 02-10-2009 07:11 PM
In my last house that I moved out of last year, I used low-adhesive poster tape on the back to hang the manned mission patches on the wall along the highest point of the ceiling in my office (the tape didn't stick very well to some patch material so I had to use double-stick). Starting in one corner, the lowest row was the Mercury patches. Just above that, starting in the corner was the row of Gemini patches. Above that in a row were the Apollo patches then Skylab, then ASTP. Then I started at the high point just below the ceiling with the Shuttle patches, and went all the way around the room. When they came all the way around to the starting point, I dropped down a row and started back the opposite direction. It was a great visual depiction to see all the manned missions hung up on the walls. It was a fun conversation piece when friends visited. Now I'm in a new house and the office ceiling is much higher and it would be more difficult to see the patches from the distance. Hope this helps give you some ideas. |
tombohnstedt
Member Posts: 19
From: Pasadena, California, USA
Registered: Jan 2010
|
posted 01-14-2010 09:31 AM
For a while I scratched my head over the best way to store my collection of spaceflight patches.
Originally I tried mounting them on black cardstock using some kind of rubber cement used for book binding. I wish I had never done that; if you want to remove them for some reason it takes an eternity to rub the sticky gum residue off the back, and even if you do you are risking damaging the embroidery on the front because of excess handling. I also tried those double-sided sticky pad things, which worked okay, and come off easier, except they don't stick as long. Also, one of them was stuck on so well I had to slice it off the back, and in so doing damaged the threads coming into the back (this one did not have a protective plastic coating on the back), and I had to replace the patch. So this is also not a very good idea.I tried sandwich baggies with Ziplocs, and although it kept them safe from coffee spills, it wasn't very tidy. I also tried the paper CD sleeves with the transparent windows. This wasn't much better than the Ziploc baggies. They were smaller and easier to stack end to end in a box, but the fact that it was paper made it more vulnerable to liquids. Also, there were a few spaceflight patches that were just a little too big for the sleeves and they couldn't be closed. And finally, they weren't entirely viewable. I did some research and hit on this solution, not so much for open display, but for storage. This is a useful way to store your patches, but still be able to handle them and look at them if you're married and your wife doesn't want you turning her home into an aviation and space museum with stuff all over the walls. I purchased from a company called Clearbags (www.clearbags.com) some transparent "bags" that are really more like sleeves. These turned out to be perfectly ideal (and NO, I don't work for the Clearbags company). I bought two sizes; 4.625 x 5.75 + flap, Crystal Clear Bags Protective Closure (PC) (117x146) (100 pack) [B54PC], and 3.75 x 5.125 + flap, Crystal Clear Bags Protective Closure (PC) 95x130) (100 pack) [B3H5SPC]. It cost me $10.00 for a pack of 100 of the larger ones, and $5.00 for a 100 pack of the smaller ones. These are slim, thin, but very crystal clear. The larger ones work for every 4" patch I have. There were a couple of snug fits here and there, but they all fit. The smaller sleeves work for all 3" patches. Yes, I realize that the 3" Mercury and Gemini patches, are, at best, 'souvenir' patches. True enough, but in case you want to keep them anyway, this is a good solution. I created identification cards for each patch using a heavy, high quality inkjet matte paper, my word processor (I use MS Word) and an inkjet printer. For the three inch patches you can create up to three ID cards per page, and two per page for the larger sleeves. (Experiment a little first with placing your text and/or graphics on the page before you use up your expensive heavy bright white printer paper). You then cut the ID cards for the 3" smaller bags at 5.125" x 3.75 ", and for the larger cards cut them at 5.75" x 4.5 ". These will fit perfectly inside the crystal clear sleeves. The flap is easily folded over and sealed using the adhesive strip built into the bag. If need be these can be opened and resealed several times. Now you can store these slim little packets in a box if you want, but you can remove them, handle them as much as you want without risking finger grime or spills, or adding wear to the embroidery, and you can perfectly view both sides, with the patch showing on one side, and your ID card on the other side. The sleeves really are crystal clear and it is almost like they are out in the open. 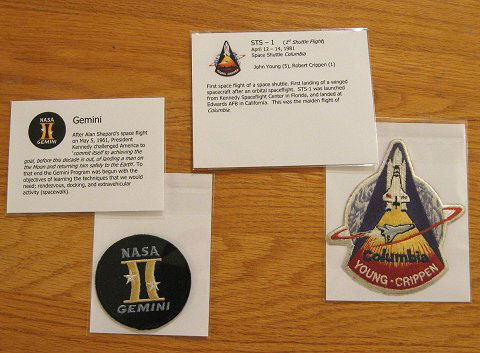 |
ddrwilli
Member Posts: 66
From: Pataskala, Ohio
Registered: Nov 2005
|
posted 01-14-2010 05:15 PM
I have been collecting patches since the late 1960's. At first, I displayed my patches pinned to corkboard mounted on the wall. Then I started putting the patches into archival photo pages in a three-ring binder, both for storage and display. But, after a number of years storing my patches that way, I decided that I needed to do something different.About 6 years ago, my wife and I put together a scrapbook of our son's Boy Scout Eagle Project. Afterward, I decided to use the skills and techniques I learned from the scrapbook for my patch collection: I use 8.5 x 11" acid-free black cardstock and mount the patches with double-sided fabric tape, like Bill Hunt described earlier in this thread. Then I add appropriate photographs and information that I find on the web (I use MS Word to format the text for printing). When each page is complete, I'll slip it into a document protector sleeve for a 3-ring binder. So far, I have had a lot of fun with my scrapbook method and I wind up learning a lot about each mission. Also, I find that I, and my space-enthusiast friends, go back and look at my collection time and time again. After all, what's the point of having a collection if you can't show it off? However, there is a drawback with the scrapbook method... I've more than tripled the amount of space that I need to store my patches! |
hoorenz
Member Posts: 1034
From: The Netherlands
Registered: Jan 2003
|
posted 01-15-2010 04:28 AM
I wish I had time to make something like this. |
Philip
Member Posts: 6040
From: Brussels, Belgium
Registered: Jan 2001
|
posted 01-15-2010 05:19 AM
Even "Samsonite" makes cases to hold over 500 CD/DVD and these are great to store patches! |
benguttery
Member Posts: 547
From: Fort Worth, TX, USA
Registered: Feb 2005
|
posted 01-15-2010 09:39 AM
Although I am on the lame end of the spectrum when it comes to storing patches, it does the job: double sided tape on heavy card or cover stock paper put in recycled black binders. Some in plastic page protectors. All archival stuff. Cheap. The really good patches (Gemini, SMEAT, etc) get a whole page to themselves perhaps with some explanation of what they are. I want to embark on an effort to get some better explanation put with some patches like the shuttle experiment or payload patches. My goal with those is to have the mission patch and its variants together with the respective payload that mission carried. Amen to the call for an updated space patch book! Wasn't Bisney working on one? Thanks for the discussion. |
Henk Stroo
Member Posts: 66
From: Amsterdam, Netherlands
Registered: Feb 2000
|
posted 01-15-2010 10:13 AM
I started my spaceflight collection 1n February 1958 and I also have most space patches. I use my space patches also for exhibitions that's why all my patches are behind glass of 20x25 inch, together with information and photos of the flight or crew. |
BMckay
Member Posts: 3310
From: MA, USA
Registered: Sep 2002
|
posted 02-16-2010 08:57 PM
I am looking for ideas on how to frame 8x10 photos with patches. If you can show me what you did on this site or via email that would be great.Editor's note: Threads merged |
MARKW
New Member Posts:
From:
Registered:
|
posted 02-17-2010 06:32 PM
I use double stick carpet tape on the back of the patches. I put the patches on non acid cardboard stock paper. I slide them into 8-1/2x 11 clear plastic toploaders that are also non degrading quality. I then put the pages in a 3 ring binder. Any photo
supply company on the web should have the clear toploaders and the non acid paper. |
Tykeanaut
Member Posts: 2216
From: Worcestershire, England, UK.
Registered: Apr 2008
|
posted 11-29-2010 11:53 AM
I display some of my mission patches in frames. Just wondered how many others did or do you keep them in a folder, etc.?Editor's note: Threads merged. |
GACspaceguy
Member Posts: 2542
From: Guyton, GA
Registered: Jan 2006
|
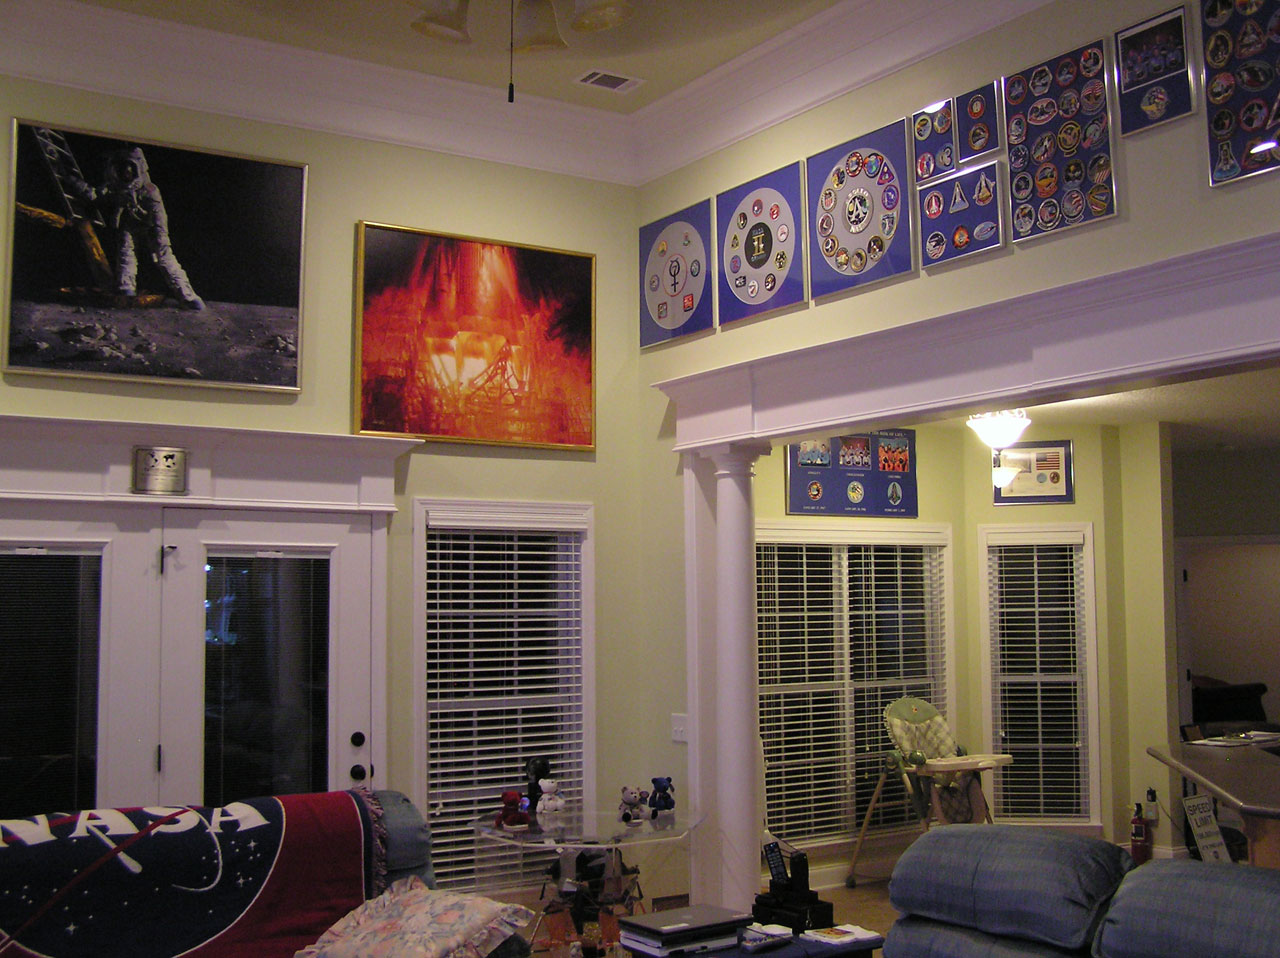
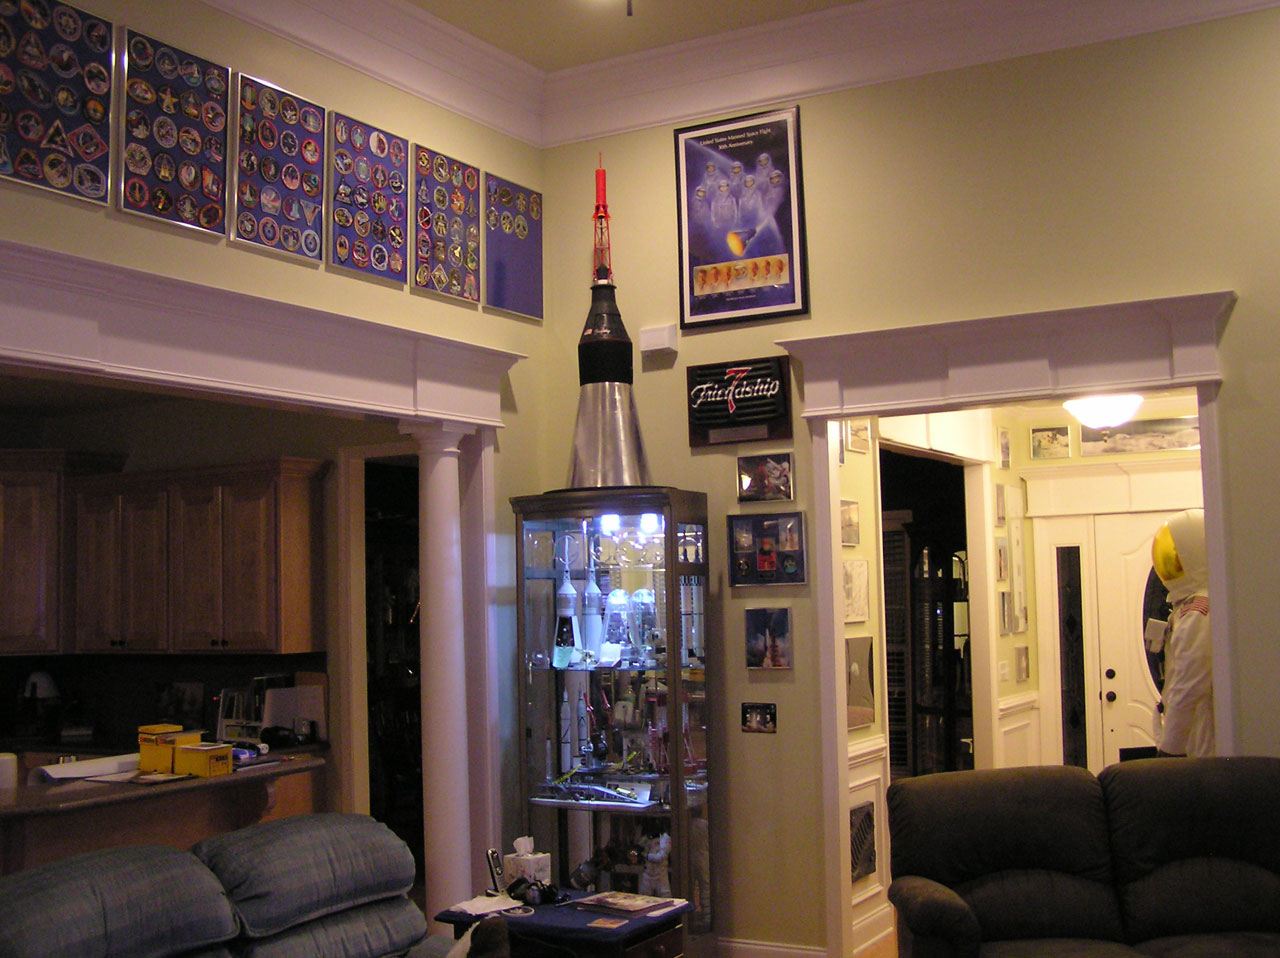
posted 11-29-2010 12:48 PM
I decided to go both ways with my display of patches. I keep my official AB emblem patches in a CD binder and then I display my "other" patches (some AB some not) in frames on the wall. The "glass" for the frames is actually UV Acrylic plexiglass (blocks out 98% of UV rays). See the photos below (click to enlarge).  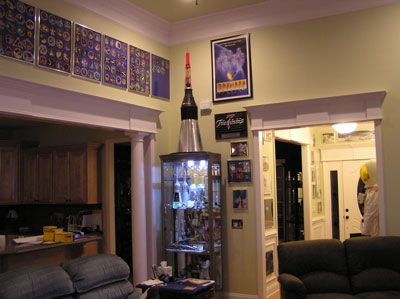
|
Tykeanaut
Member Posts: 2216
From: Worcestershire, England, UK.
Registered: Apr 2008
|
posted 11-30-2010 02:47 AM
Cool! |
dogcrew5369
Member Posts: 750
From: Statesville, NC
Registered: Mar 2009
|
posted 11-30-2010 06:26 PM
Nice. I'm restricted to my small man room. Wish my wife was a space fan too. Way to go with your displays. Envious. By the way, did you make the frames for your patches and where did you pick up the UV proof plexiglass? |
Greggy_D
Member Posts: 978
From: Michigan
Registered: Jul 2006
|
posted 12-03-2010 07:34 PM
quote:
Originally posted by GACspaceguy:
I display my "other" patches (some AB some not) in frames on the wall.
Your 51-I patch should have its stripes horizontal, as this was the intended orientation. The funny thing is... NASA itself got it wrong and oriented the insignia with the names "centered" and stripes at an angle on the flown Crew Activity Plan (above Ox van Hoften). |
GACspaceguy
Member Posts: 2542
From: Guyton, GA
Registered: Jan 2006
|
posted 03-06-2011 07:49 AM
Thanks for the info, I will correct it the next time I have the ladder out. |
Spaceguy5
Member Posts: 427
From: Pampa, TX, US
Registered: May 2011
|
posted 09-02-2012 09:16 AM
I just finished hanging my collection of Space Shuttle patches. This display is just going to be up for a few months and it won't be seeing any sunlight, so I didn't bother with framing them. To affix them to the wall, I attached a long strip of masking tape to the backing (it doesn't leave any residue as long as it doesn't get too hot, and it's very easy to remove. It may be too weak to stick to some backing materials so you might want to use something stronger if some fall off). I then attached masking tape to the wall with foam mounting tape. Mounting tape is very strong, so on most patches it only took a very small piece. However you don't want to attach the foam tape directly to the patch. On some of the waxy-feeling backings, it can be removed easily but on most, it's moderately hard (especially the plastic iron-on kind) and may even tear the backing material. If a patch wasn't staying down flat, I used one to three rolled pieces of masking tape to hold them in place. As others have mentioned, I've also found double-sided fabric tape to work very, very well as a temporary adhesive. It could make a more effective replacement for masking tape in the method I described above. However if it gets too hot, it can leave minor residue on patch backings. Later I plan to hang up my Gemini reproductions. I don't yet have a complete set of Apollo nor ISS patches so I won't be displaying those. I don't think I would even have anywhere to put them. |
Apollo 8
Member Posts: 176
From: Vienna, Austria
Registered: Oct 2010
|
posted 09-02-2012 11:57 AM
To get no sunlight on the patches is good, but be careful with the dust too.At the moment I am working on displaying my Lion Brothers Apollo Patches together with the Grumman LM Patches. I am going to frame them all with my Apollo astronauts´ autographs... |
Gonzo
Member Posts: 596
From: Lansing, MI, USA
Registered: Mar 2012
|
posted 09-05-2012 06:05 AM
When I started collecting many years ago, I would put my patches in ziplock bags and then staple the corners to pages in a notebook. Needless to say, I quickly realized this wasn't a good solution!I then "moved" them all to new bags, ones with out holes in them, and put them in boxes. I've used this system ever since. As I've also assigned a serial number to each patch using a numbering scheme that aids in identification, I also put the serial number in a spreadsheet with tabs/worksheets for each major project or area (Gemini, Mercury, Apollo, STS, locations, DOD, Company patches, non-official patches, coins/medallions, other items, etc.) I keep the latest copy of the spreadsheet in email/Google Docs so I can access it anywhere/anytime. This method then allows me when visiting a space center to quickly "see" what I have so as to avoid duplicates. Through the years of collecting and with my current collection size, I recently expanded my collection of storage boxes. I use those plastic storage boxes that are a little bigger than a shoe box. Six inch ziplock bags fit in them very nicely standing on edge. I then have cardboard dividers between each project or area (there's a divider between Gemini and Mercury for example). Each box will comfortably fit about 100 patches this way. (I also keep a "placeholder" in the front of each box so that when I remove a patch to look at it, I put the "placeholder" where the patch goes so I can easily put the patch back in its spot.) With the serial number on a sticker in the top corner of the bag (inside the bag so it can't be separated from the patch), all the serial numbers are then displayed in a row along the corners of the bags allowing me to find a patch very quickly. I currently have six of these boxes and I need to add another or two as a couple of them are getting full. While this method may not be perfect, it has served me well through the years and with each series/area labeled on the end of the box, I can quickly find any patch I'm looking for, with or without the serial number from the spreadsheet. As the serial numbers are related to the mission, I usually will know the serial number without the spreadsheet (Gemini 5 would be G-5 for example, Apollo 11, A-11 - although there's several of these!) The OP asked about insuring your patches. I recently spoke to my insurance agent due to the size of my collection and he told me that my home-owners insurance will cover up to $3,000 for a collection IF they know what's in the collection. I told him about my spreadsheet and now update a copy of it with him every couple of months. If the value of my collection were to exceed $3,000, I'd need a separate rider to put on my policy for a minimal cost. Note however that this is what MY insurance will do. Yours may be different. I'm just trying to answer the question and maybe help someone who may need it. |
JBoe
Member Posts: 983
From: Edgewater, MD
Registered: Oct 2012
|
posted 07-22-2013 04:35 PM
Is there an economical way of storing patches? What is the best way to keep them all together and free from discoloring? Thanks!Editor's note: Threads merged. |
Gonzo
Member Posts: 596
From: Lansing, MI, USA
Registered: Mar 2012
|
posted 07-22-2013 06:05 PM
Economy is a relative thing. The method I described above is pretty inexpensive. Plus, with the boxes on a closet shelf, they are free of the UV that will discolor them. (Being inside ziplock bags and then stacked together also helps here.) So they are virtually 100% UV free this way.The only "big" expense I had was the last time I ran out of bags of the size I used (5" x 5" for most patches) I had to order 1,000 online. And even then it wasn't too bad. If I recall correctly, it was like $35US for the case. The boxes are can be found at department stores (Target, WalMart, etc.) and will only be about $4-5 each. So yes, it's a pretty simple and cheap solution that also gives them great protection. The only downside is that to look at them, you have to get them out. But if you're interested in the patches, that's not a big deal. And I have got to add, the link to clearbags.com above is a perfect solution. You can get virtually any size you want and you are not forced to buy a case of 1,000. I only wish I had found this site earlier. I need some larger bags for some recent patches so I'll be ordering soon. Thanks for the link! |
johntosullivan
Member Posts: 162
From: Cork, Cork, Ireland
Registered: Oct 2005
|
posted 07-23-2013 06:33 AM
Here's some of my collection framed and hung in my office. This includes the full shuttle collection. |
robtheblue
Member Posts: 71
From: Market Harborough, Leicestershire, UK
Registered: Jun 2018
|
posted 09-01-2018 06:51 AM
I'm quite new to the forum but I've started to collect patches, predominantly from the Mercury, Gemini and Apollo programs. I want to make a presentation binder to store them in which is also nice to show off. I'm thinking of using acid free clear pages with the patches attached to either card or felt. Is felt safe for this? Has anyone else done this and got any pictures for me to get some inspiration and ideas? Thanks guys. Editor's note: Threads merged. |
waa49
Member Posts: 103
From: Neu-Isenburg, Germany, Hessen
Registered: Sep 2015
|
posted 09-01-2018 07:35 AM
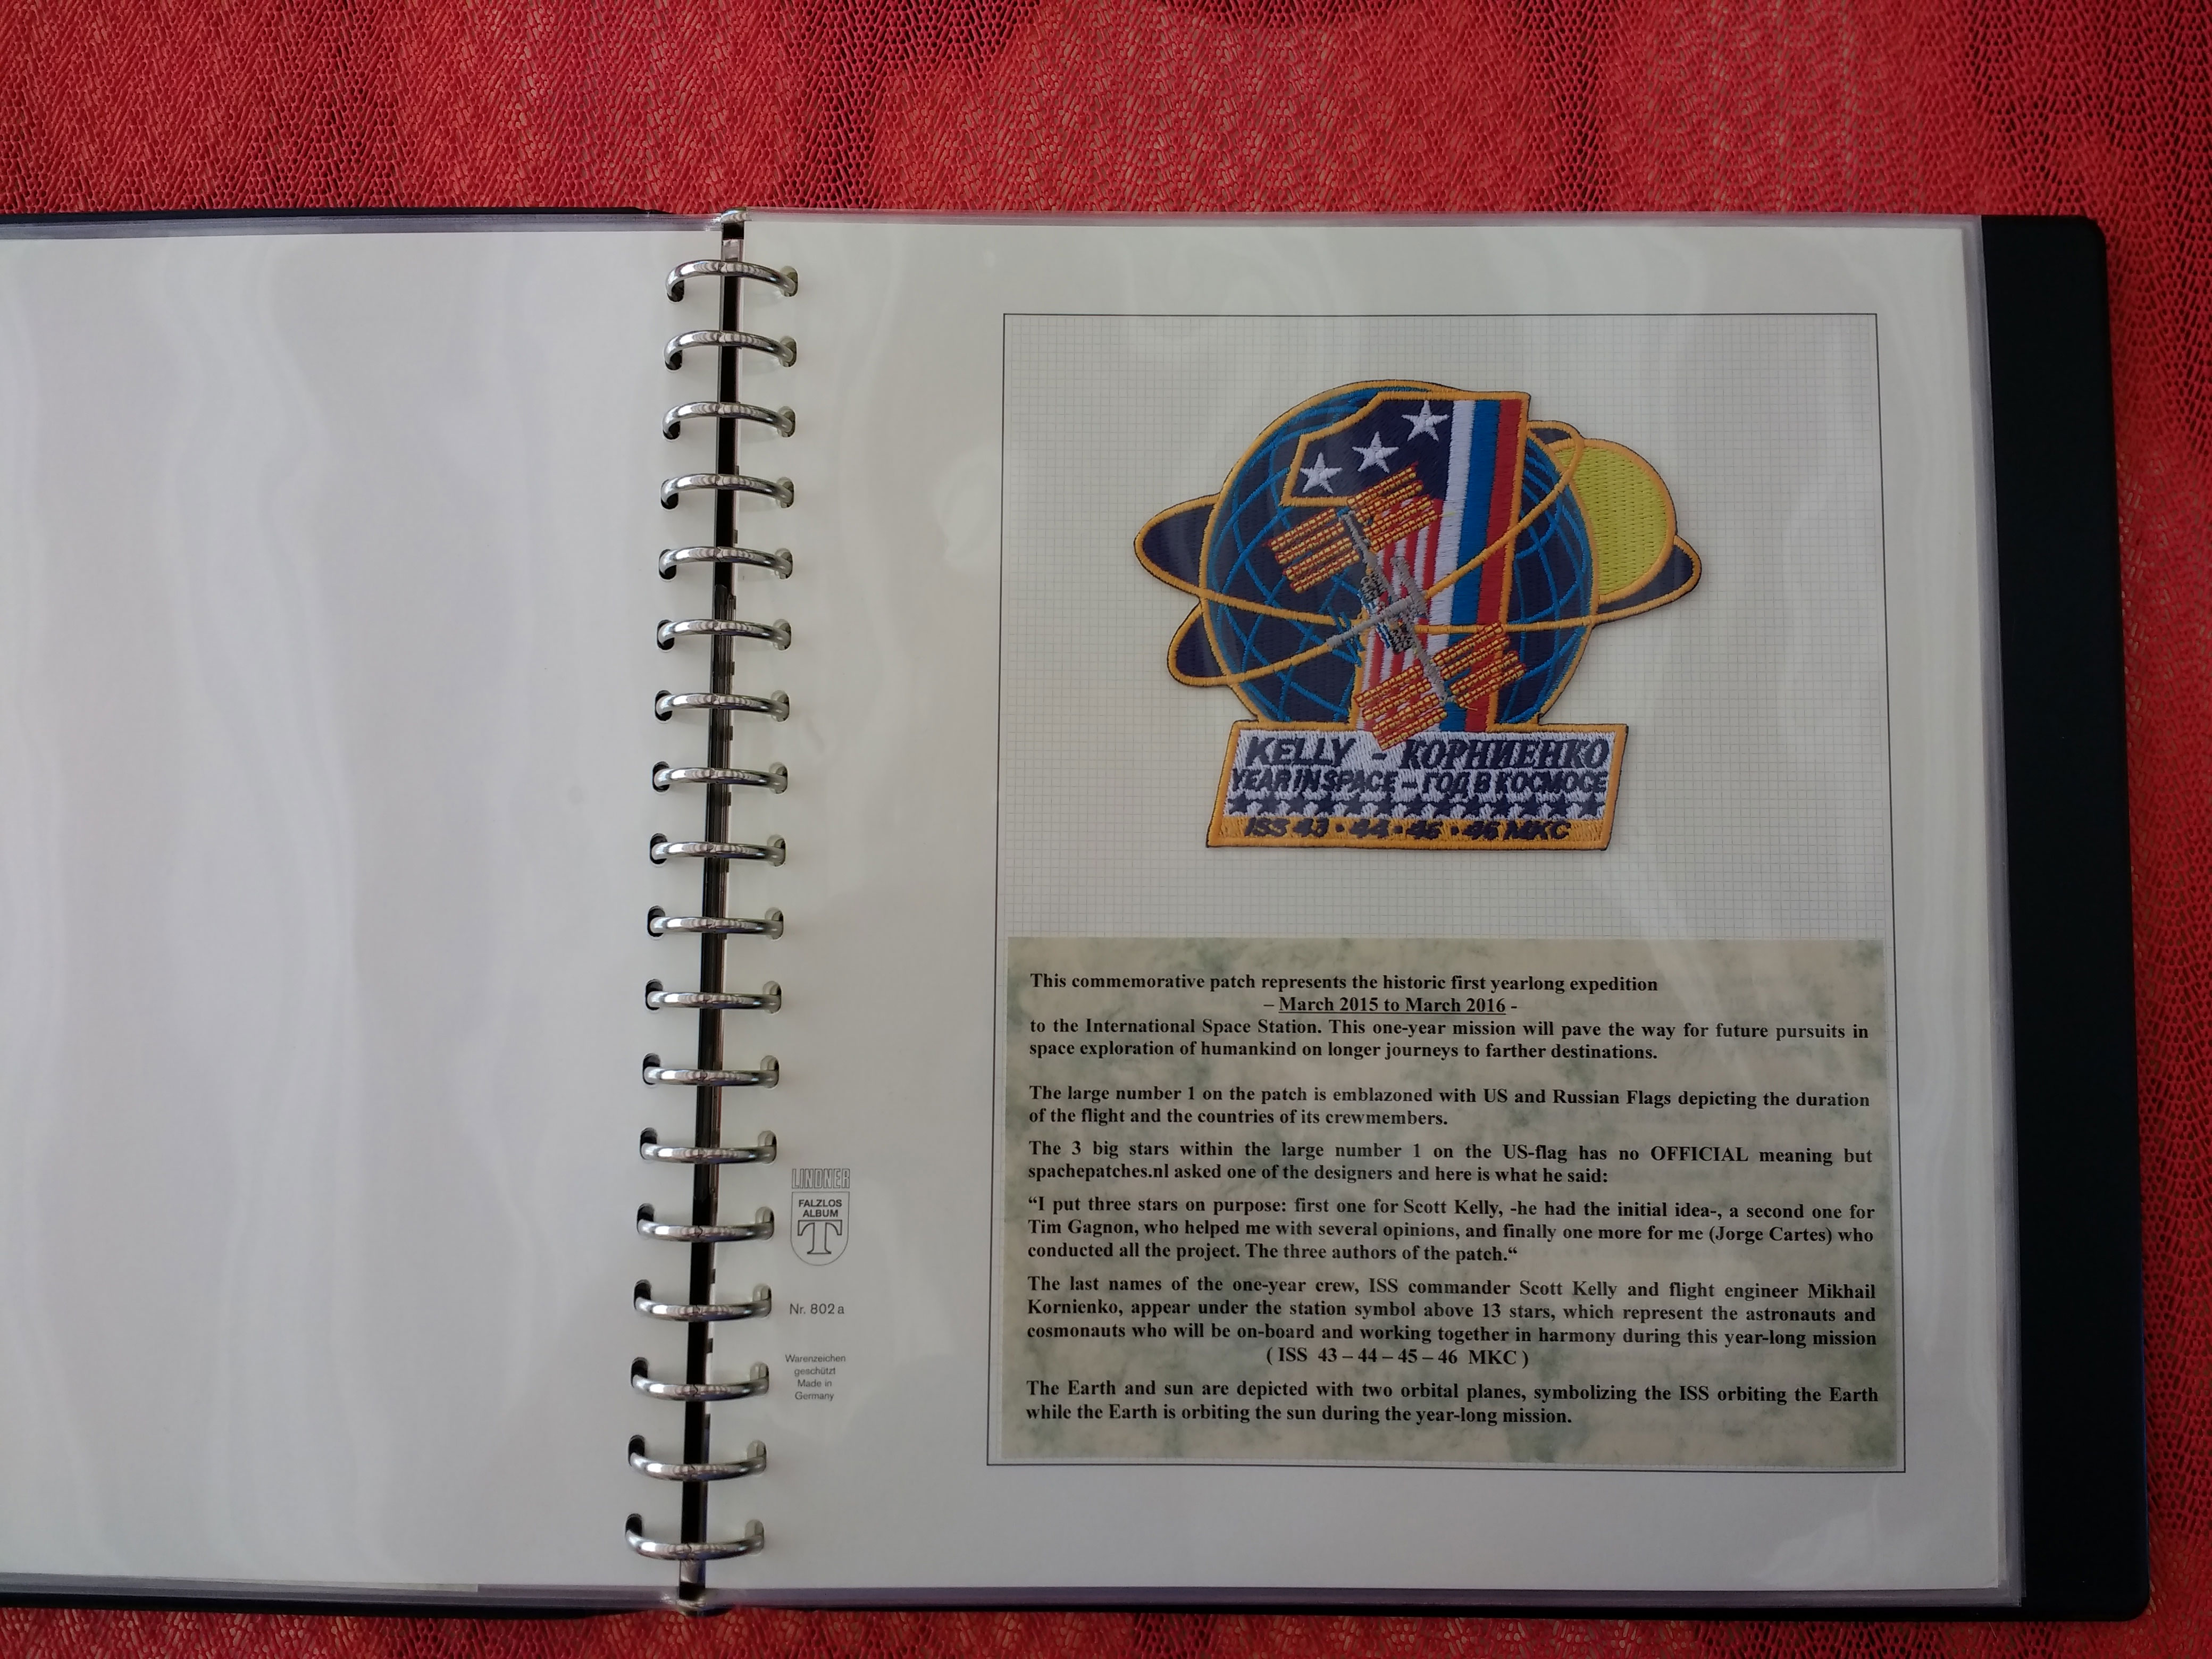
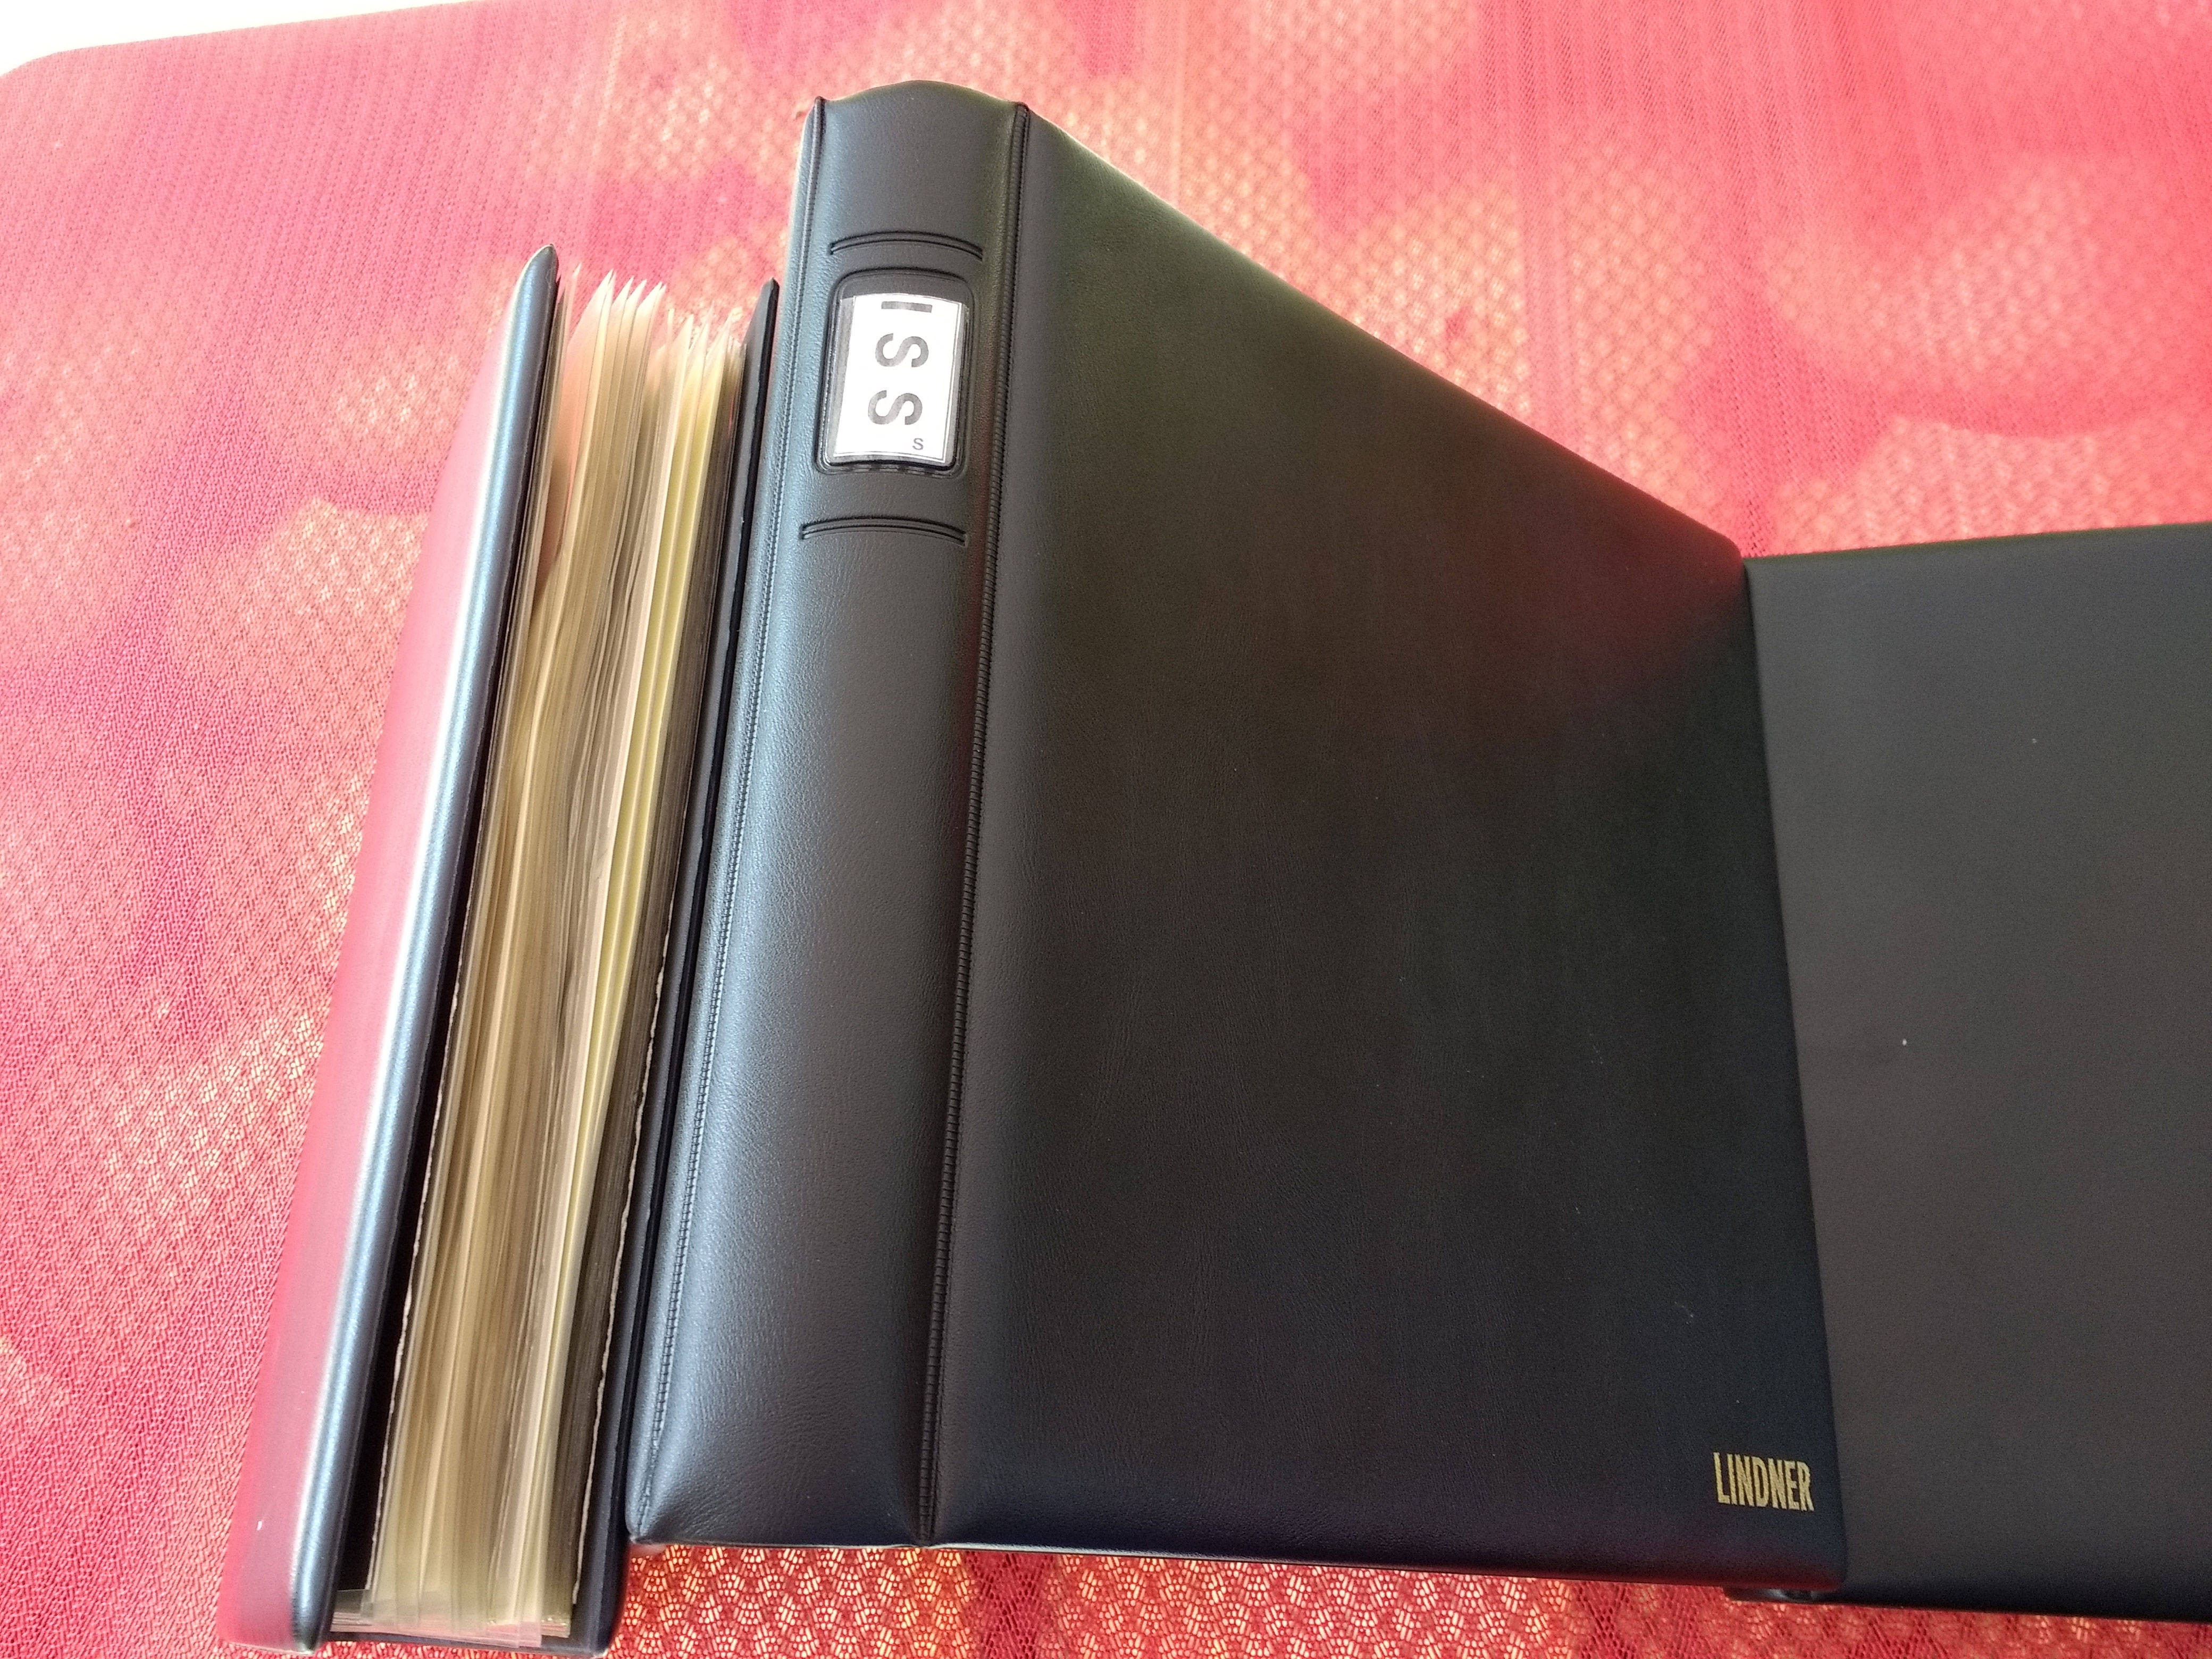
All my emblems — from Mercury to ISS — I have filed in folders of Fa. Lindner (Germany): Item No. 1102Y: Folder; 880 - transparent cover; 802a - collection sheets.I attached the patches with double sided tape. 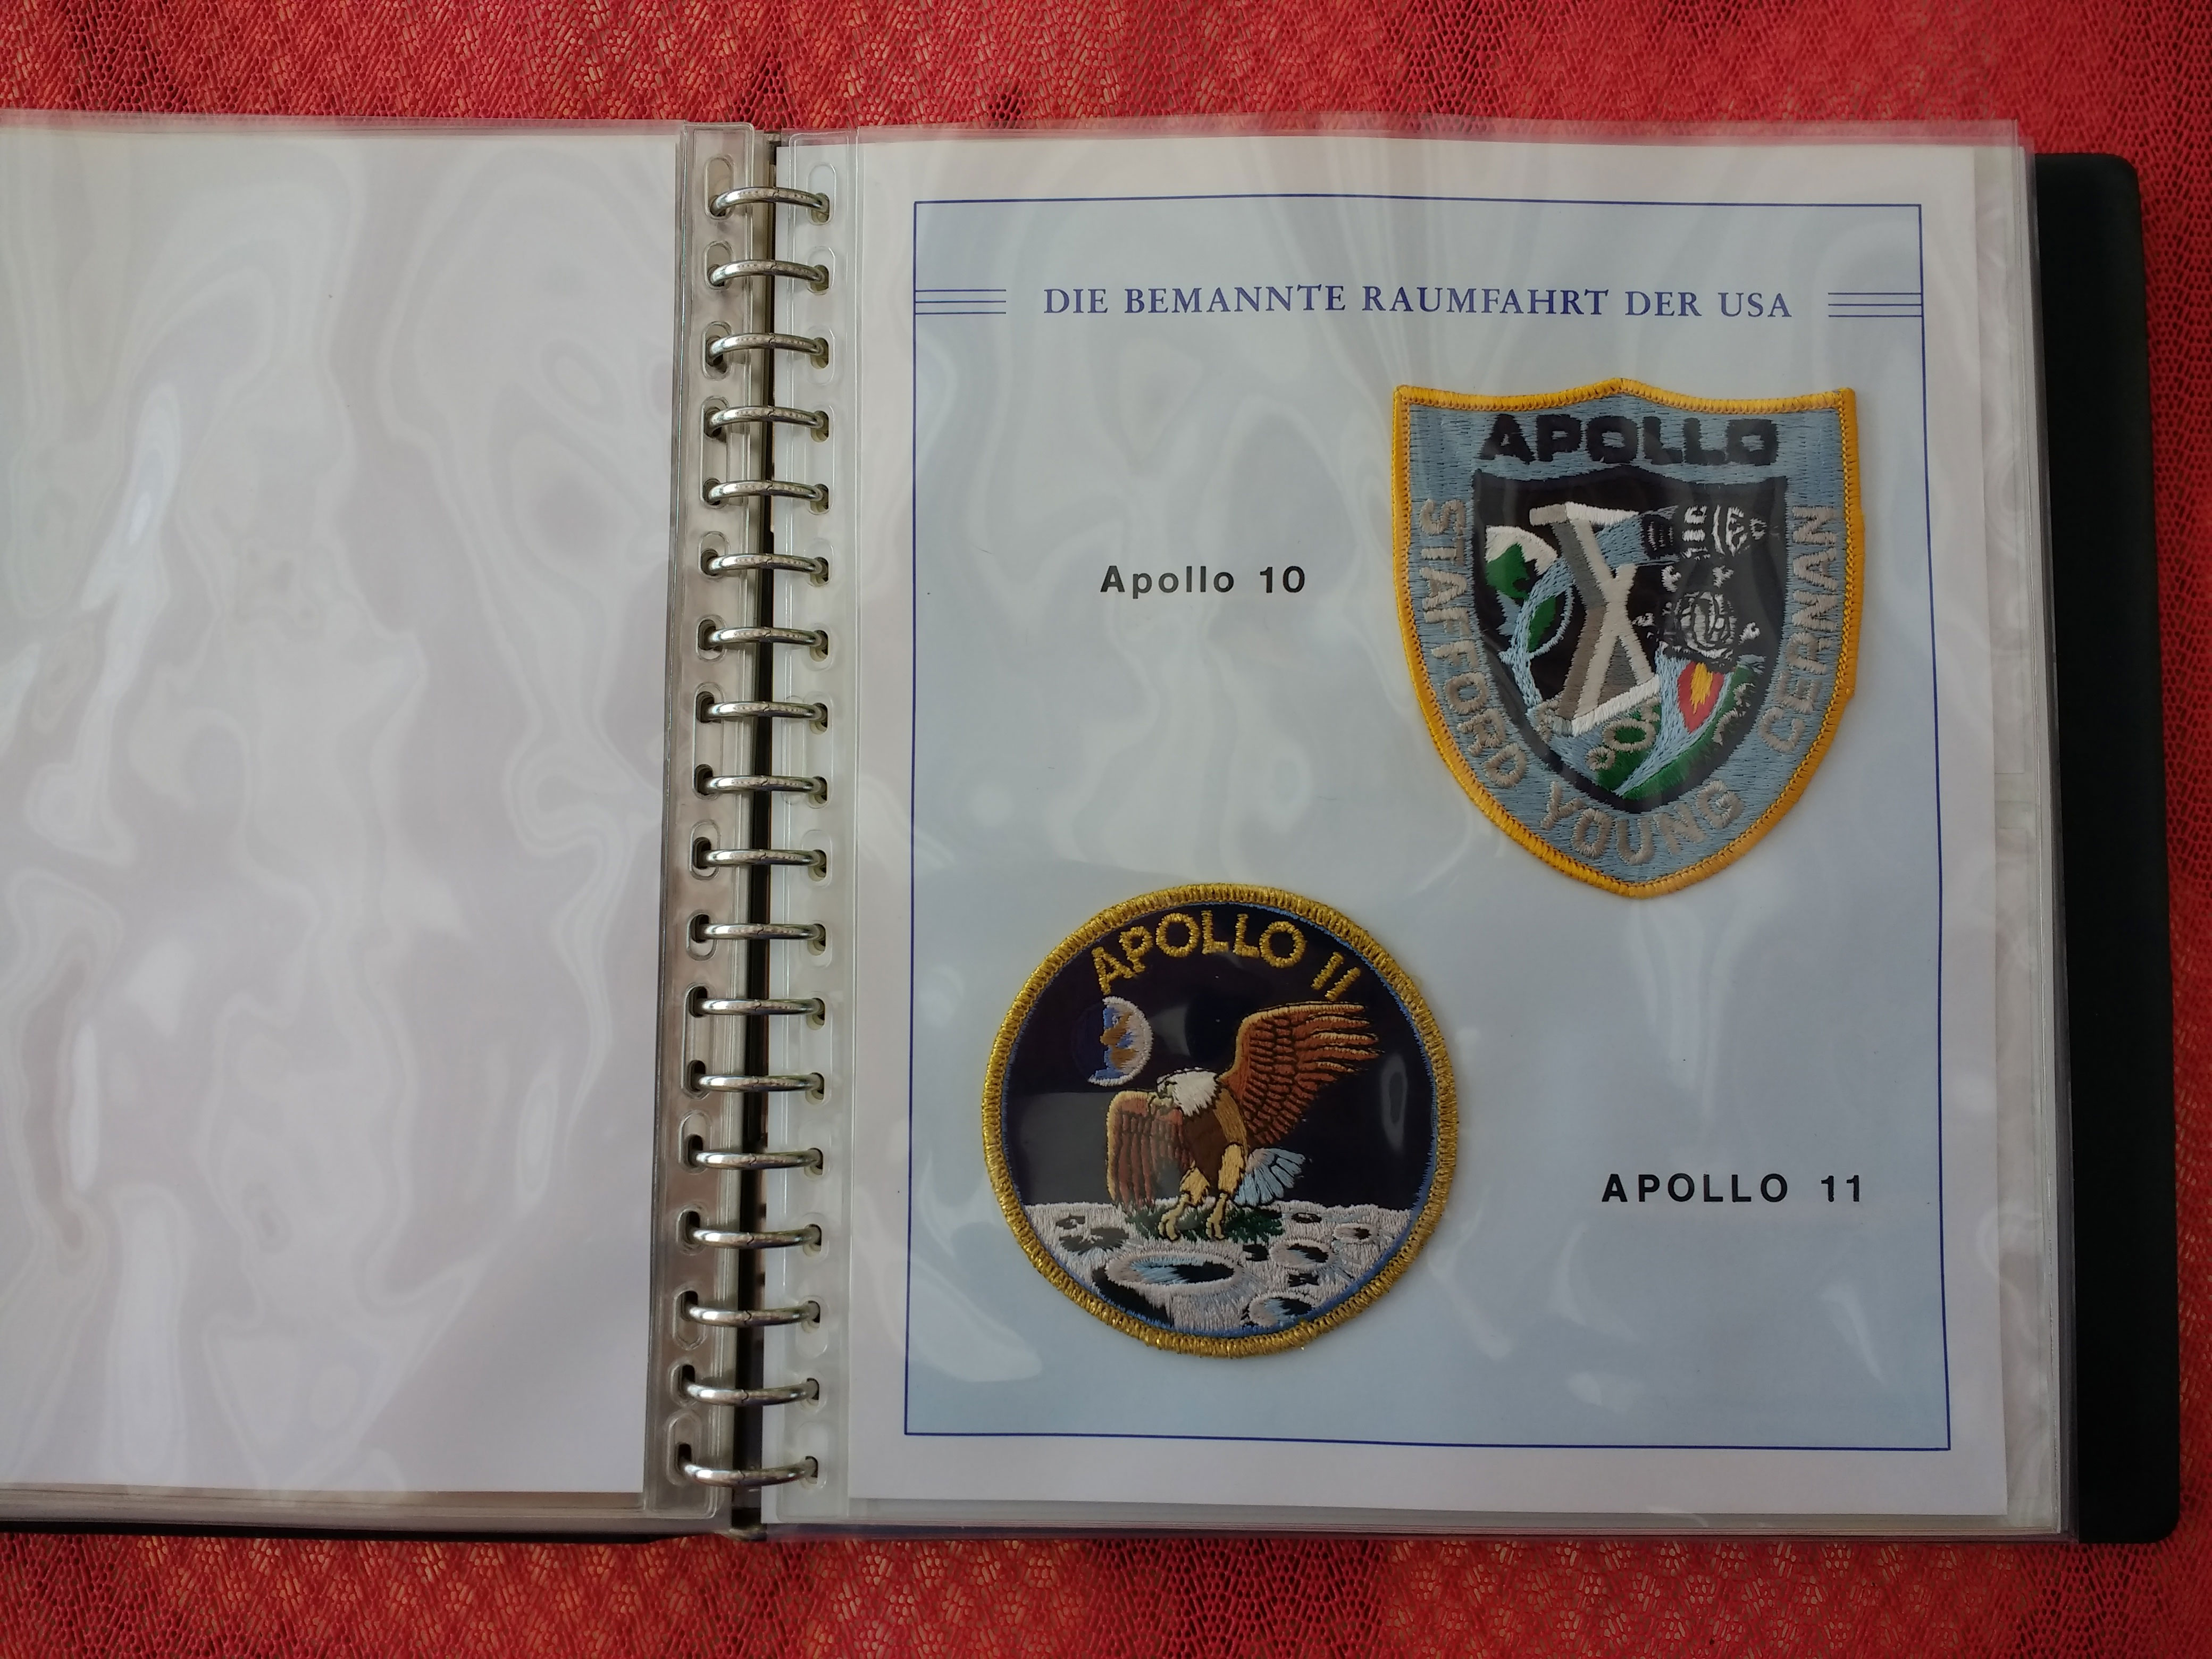 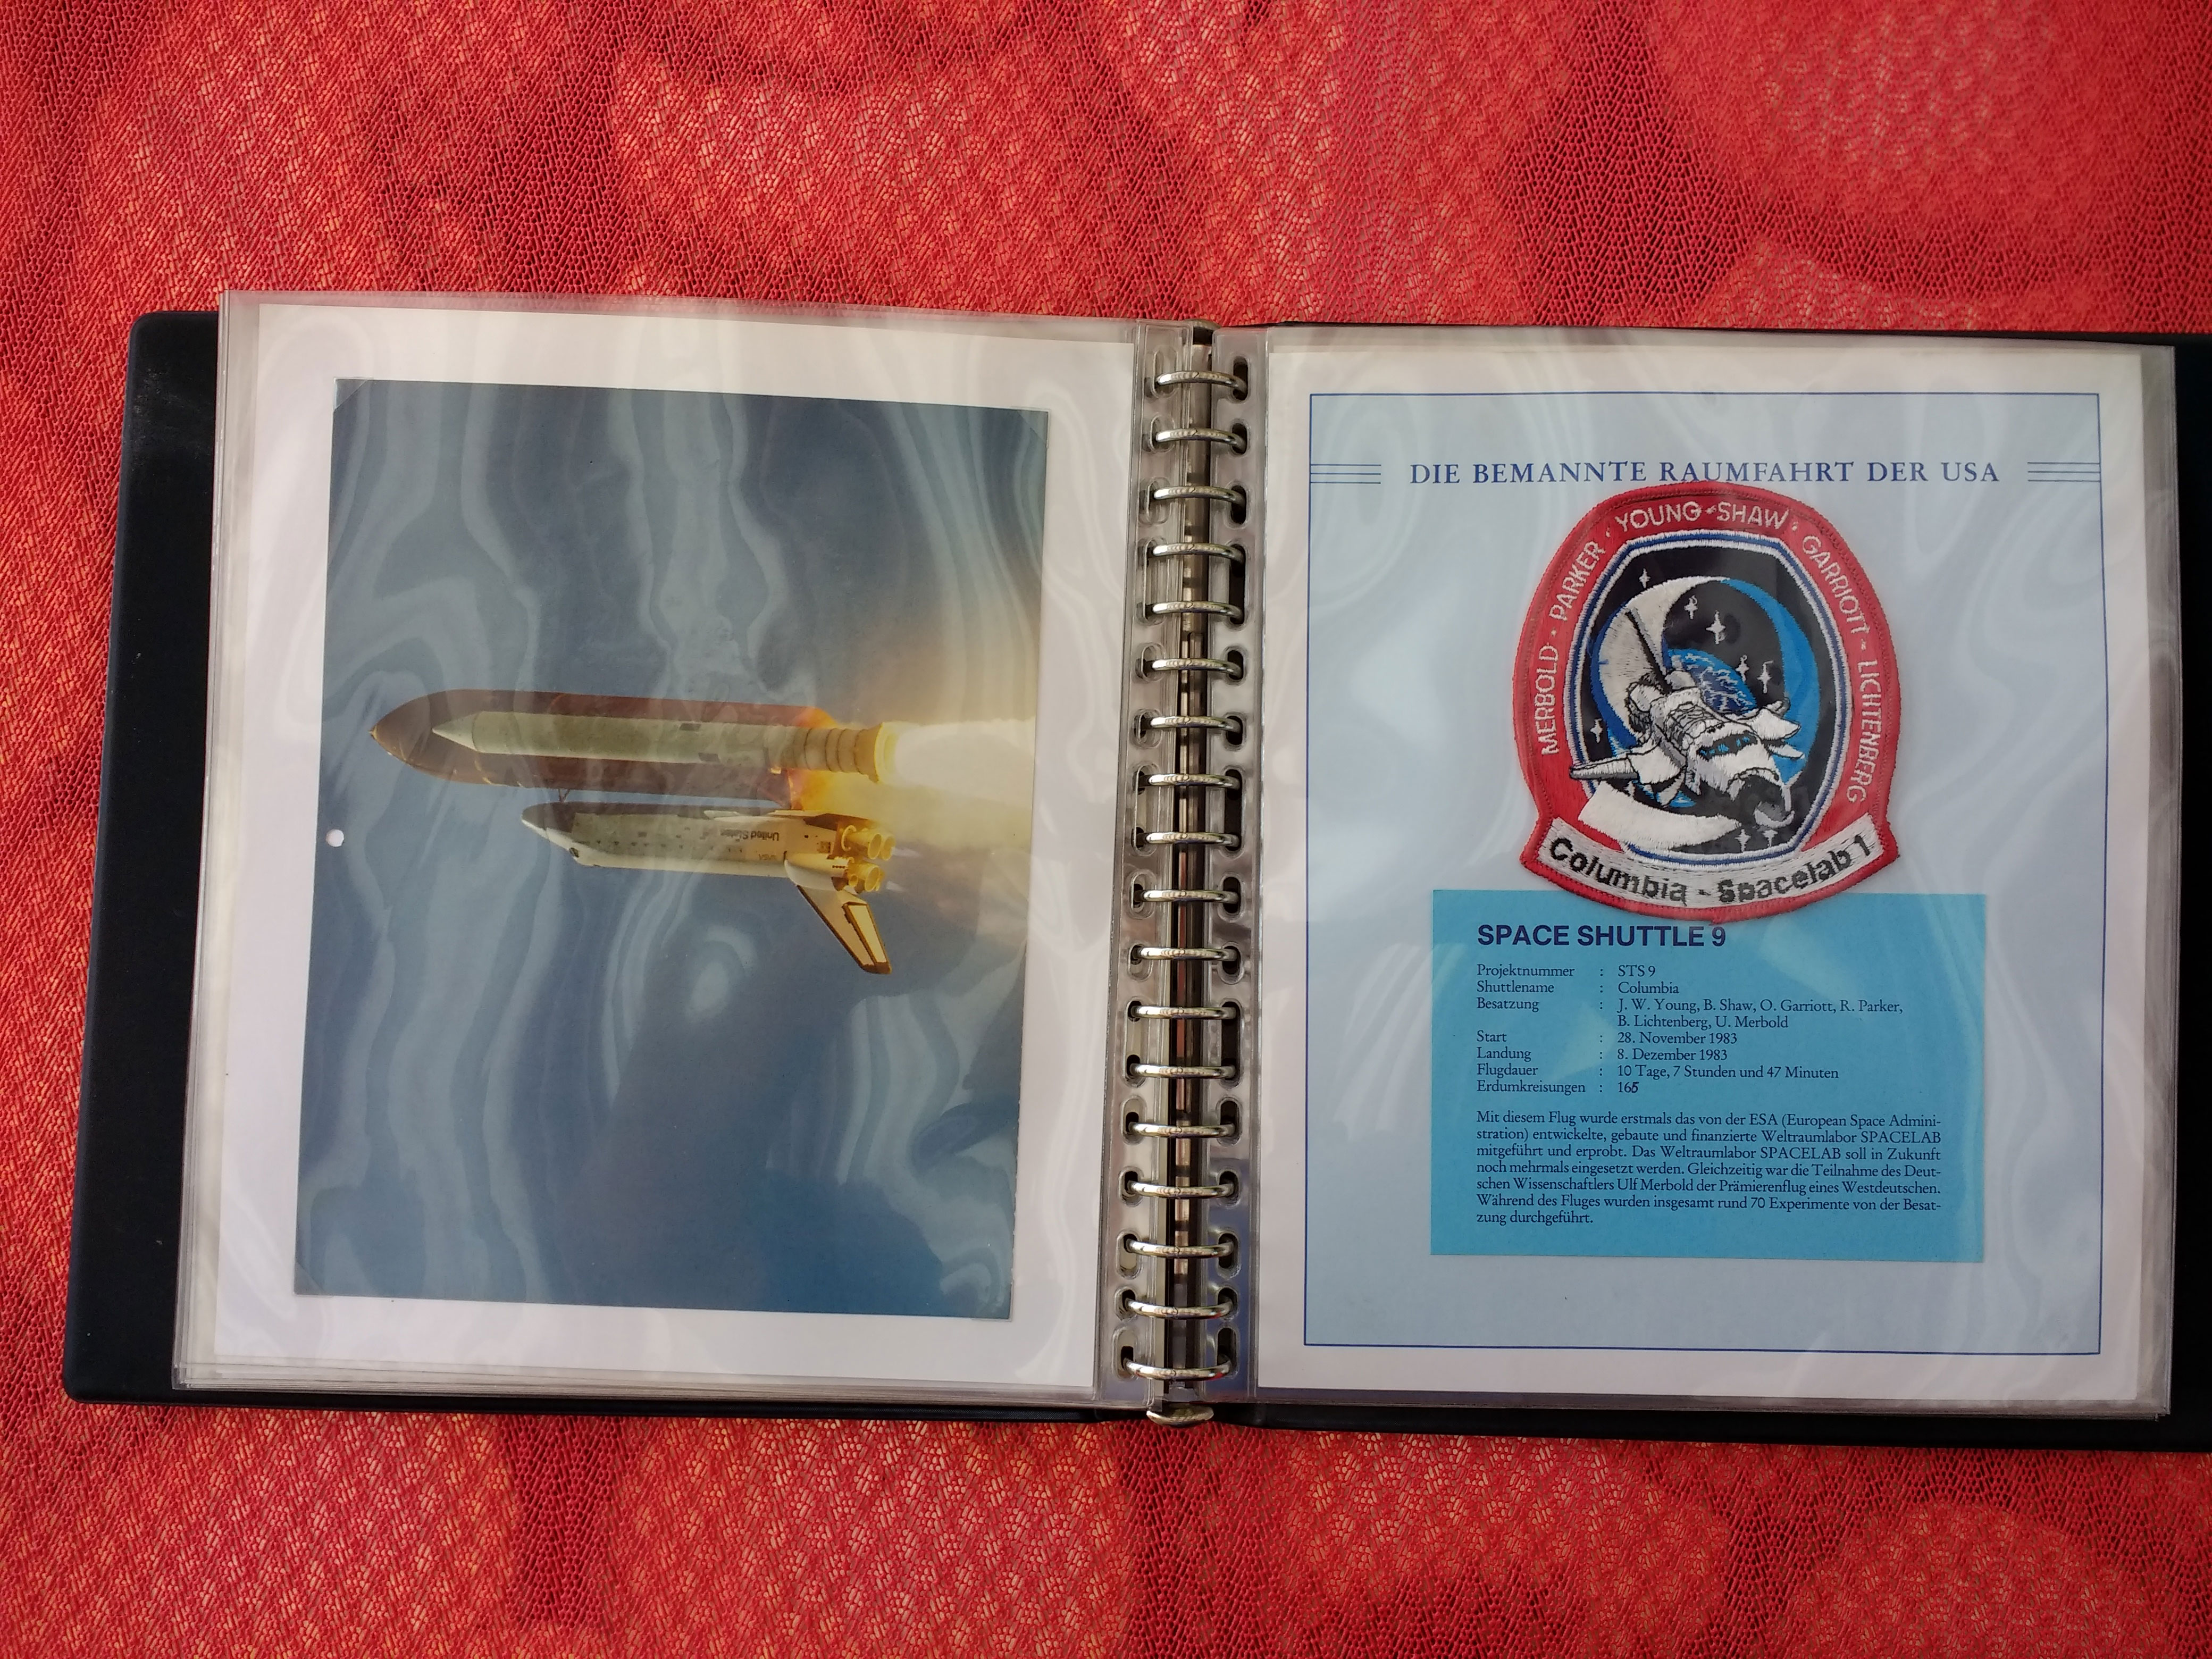
|
Liembo
Member Posts: 644
From: Bothell, WA
Registered: Jan 2013
|
posted 09-01-2018 02:16 PM
I use 4x6 album sheets from small photo binders and gladware containers. This is the most space efficient method I have found. Albums get pretty bulky, pretty fast, and can get problematic to flip pages through (the clamps always seem to get loose or offset). I can leaf through these pretty quickly and most 4" patches fit. I can fit approximately 100 patches per container. They slide into a cupboard or shelf nicely next to each other. Not quite as attractive as an album but they are very practical. 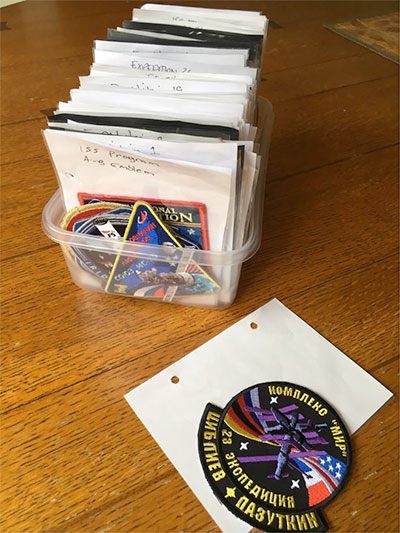 |
ddrwilli
Member Posts: 66
From: Pataskala, Ohio
Registered: Nov 2005
|
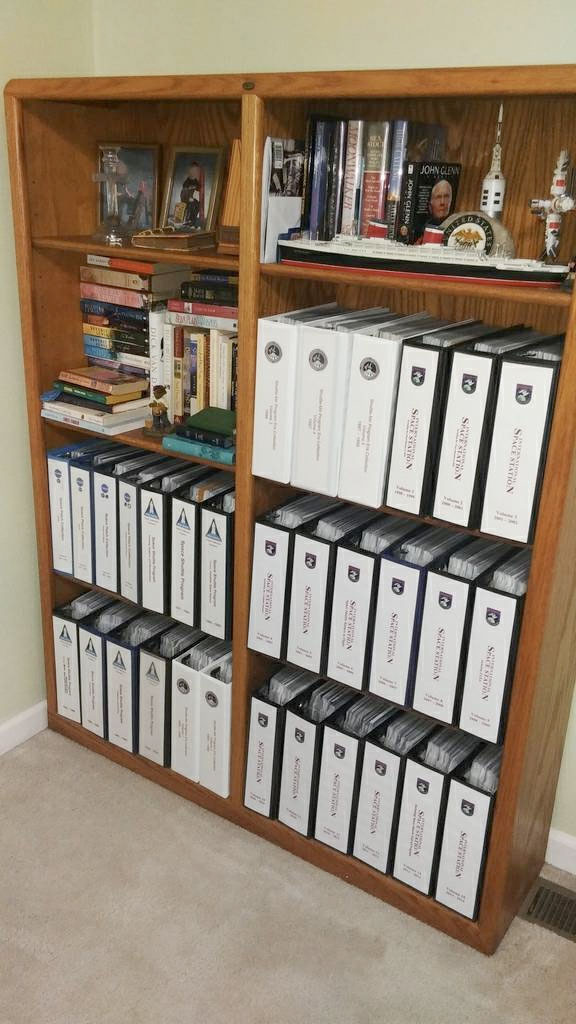
posted 09-06-2018 07:48 PM
I use document protecters and 3-ring binders for my collection - lately I've been using 3" heavy duty binders that have rings with locating pin style closures. I find that the locating pin style rings are not likely to misalign. The binders have clear plastic covers that allow me to slip in decorative - more or less - labels.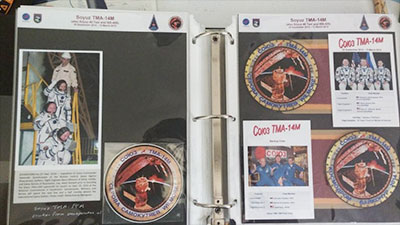 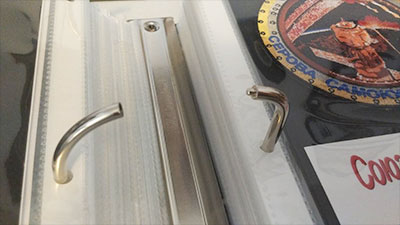
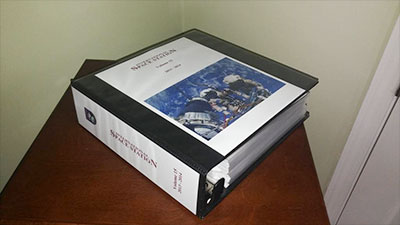
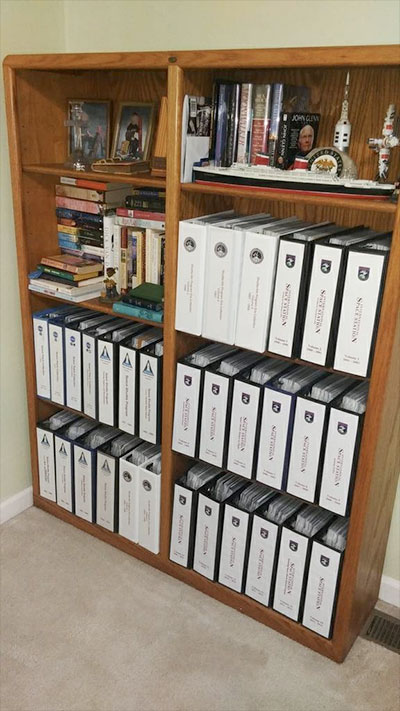
|
SparkR_13
Member Posts: 103
From: Martinsburg, WV 25401, USA
Registered: Dec 2010
|
posted 09-13-2018 02:00 PM
Another storage way is to use the clear CD vinyl holders, such as the Memorex makes. An off brand can be found on Amazon or eBay and you get 500 for about $30. These will hold the 4" very easily and will accommodate some odd shape, etc, putting them on angle. My collection is close over 3000 patches and decals and almost all are in these. I then use some thicker vinyl tag holders for the large rectangles and have only a few in larger round patches in baggies. All of these are stored in plastic bins/totes. Takes up a lot of space really, but for now they are protected. My collection is formatted for the most part by STS mission, with the mission patch and associated payload/experiment patches and decals in the same fashion. Bottom line... those CD holders are very nice as they keep shape and the entire patch/decal is within. |
James913
Member Posts: 293
From: Houston, TX
Registered: Oct 2004
|
posted 09-16-2018 01:31 AM
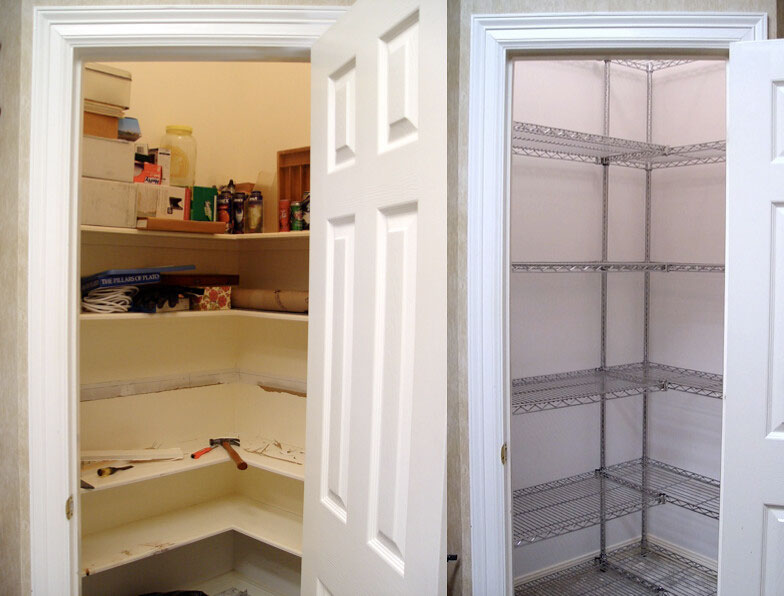
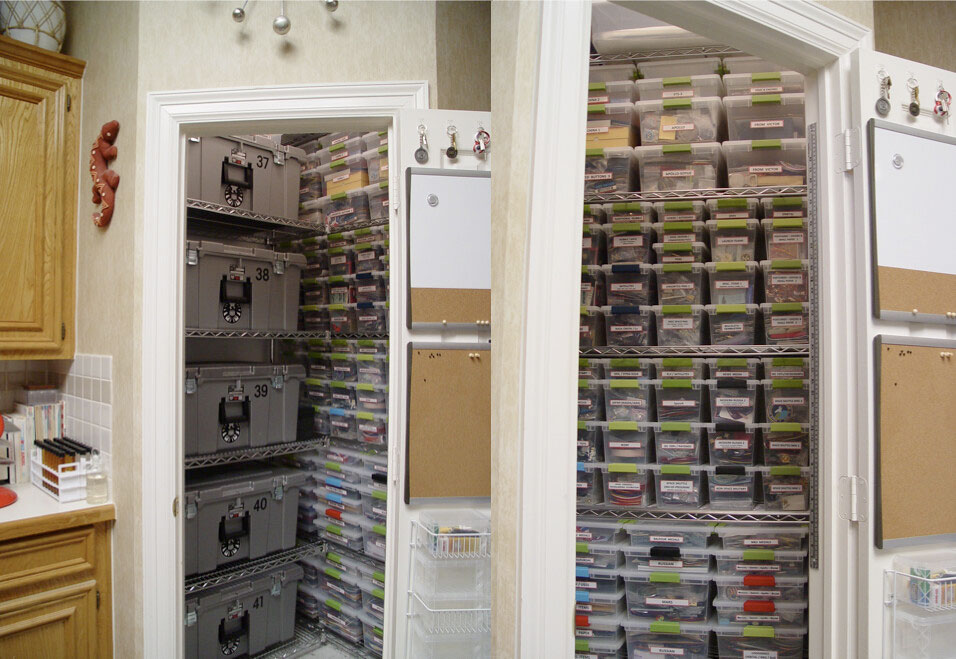
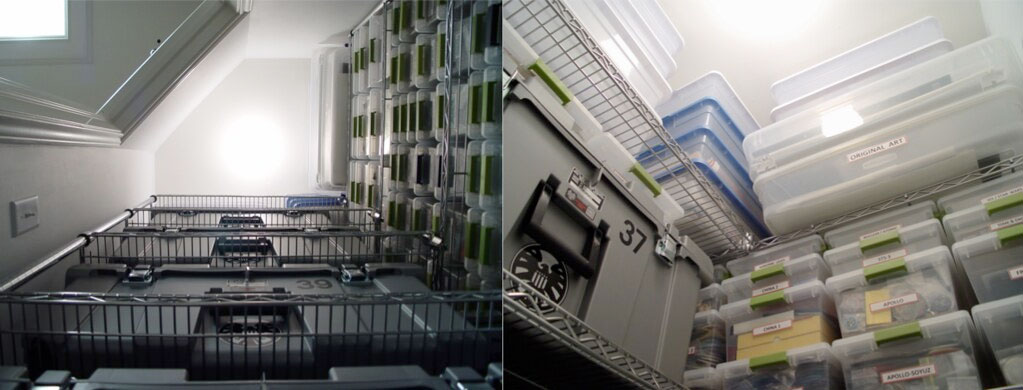
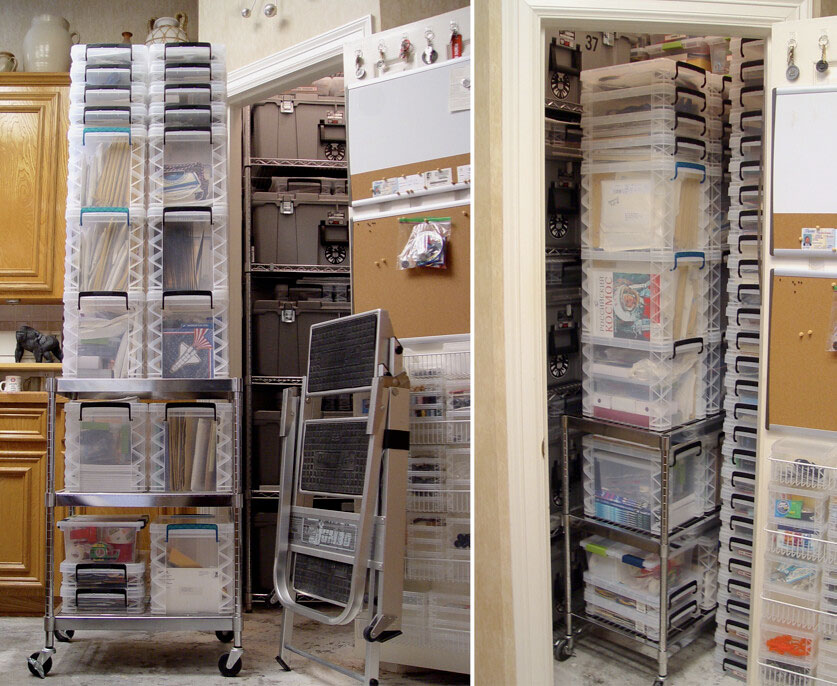
Here’s an idea that’s more storage than display oriented. Like a lot of us, I have a pile of patches and pins and other smallish space memorabilia (medals, coins, badges, postcards, covers, caps, photos, pieces of flown hardware, etc.) that I need to protect and keep track of until I can get them framed or otherwise properly displayed. What I really wanted was a central location where I could store everything and find specific items (with the help of a FilemakerPro database). I decided to repurpose one of my closets and optimize it for small item storage (something that most closets are not really designed for). Fortunately, I had a corner kitchen closet that had pretty poor space utilization to begin with. As you can see in the photos below, I ripped out the built-in shelves, refinished the interior and installed some heavy-duty commercial wire shelving. My closet footprint was just over 4x4 feet (reduced significantly by the corner with the door being sliced off on a diagonal), but it was 10 feet tall, with a lot of wasted space at the top with the original shelves. Here’s the transformation of that closet… 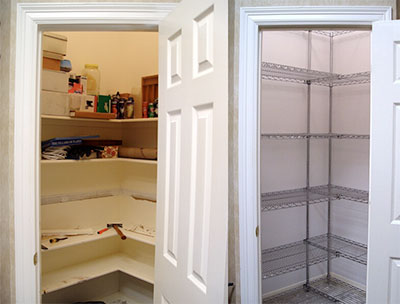 With the shelving in place, I needed some plastic storage boxes that fit the shelf dimensions well and were good sizes for patches, pins, documents, etc. I found five basic types at Target that were sturdy and stackable. For larger items (shirts, caps, flight suits, model kits, etc.), I found some inexpensive heavy duty PVC foot lockers at Walmart. Medium size prints and posters are stored flat in some larger containers on the top shelf. Here are photos of everything in place with some preliminary labels.  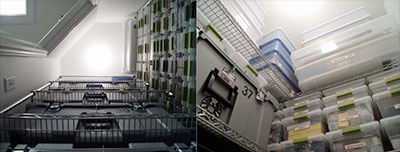
I outfitted the closet door interior with small shelves and bulletin boards and had enough space left in the middle of the closet to accommodate a rolling cart with more boxes, another stack of boxes on the floor and a set of folding steps (my mobile access platform) for reaching the upper shelves. In its final form, I now have 220 boxes of various sizes in there (over 150 cubic feet of useable storage), all labeled and readily accessible.  If you want to see some more detailed photos and other diagrams from the project, there’s a PDF file (108MB) available here. |
MrDaniel
New Member Posts: 5
From: Los Angeles, Ca, USA
Registered: Dec 2011
|
posted 06-16-2020 02:12 PM
Anyone have any ideas on how to organize and store mission patches? My preference is to have them stored in those plastic divider pages in a binder, like four to a page maybe. I found some dividers for Boy Scout patches however they're either too big or too small. My patches also have plastic backs, not velcro so I can't put them in a velcro book. Editor's note: Threads merged. |
kosmo
Member Posts: 417
From:
Registered: Sep 2001
|
posted 06-18-2020 10:26 AM
I use Riker mounts as a inexpensive way to store and display patches and other items. I put the patches in archival Mylar bags before putting them in the Riker mounts. | |
Contact Us | The Source for Space History & Artifacts
Copyright 2020 collectSPACE.com All rights reserved.

Ultimate Bulletin Board 5.47a
|
|
|
 advertisement advertisement
|