|
Author
|
Topic: Richard Lobinske's space models, dioramas
|
rlobinske
Member Posts: 167
From: Crawfordville, FL
Registered: Oct 2014
|
 posted 11-28-2018 10:26 AM
  

|
postmanpat
Member Posts: 22
From: Melbourne, Australia
Registered: Nov 2018
|
posted 11-29-2018 05:23 AM

Richard, these are incredible kits!!!! Fantastic job on all of them. |
rlobinske
Member Posts: 167
From: Crawfordville, FL
Registered: Oct 2014
|
posted 02-24-2019 10:05 AM
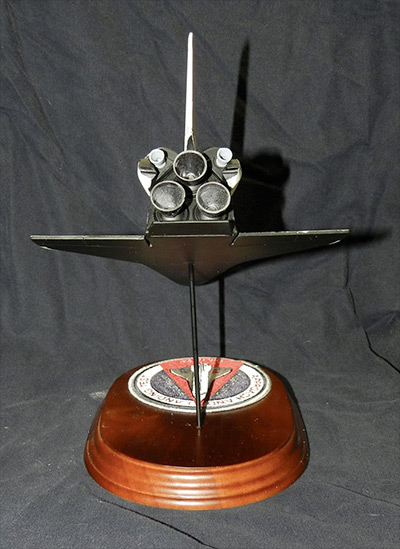
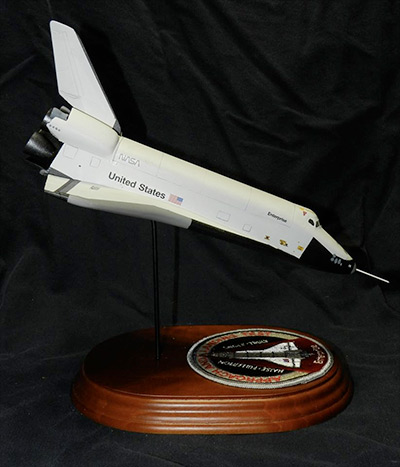
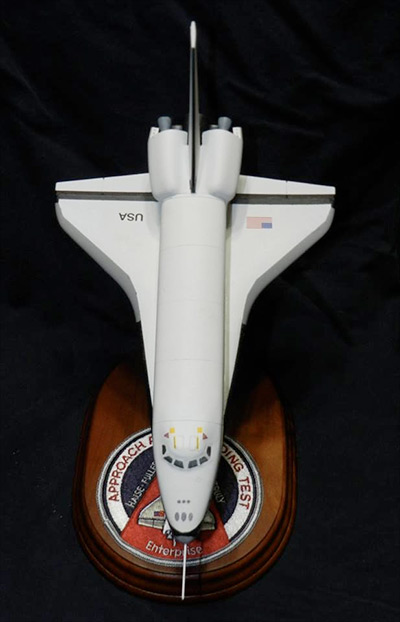
1/144 Shuttle Enterprise in Approach and Landing Test configuration. Classic Revell shuttle kit. Tried using pencil for the panel lines on this one. Mostly kit decals with a few custom cut from color decal film. The dummy SSME bells were filed and sanded smooth to match original. Window masks were made using the AXM Paper Models as a template that was white glued in place. Pitot tube made from 0.040 plastic rod. 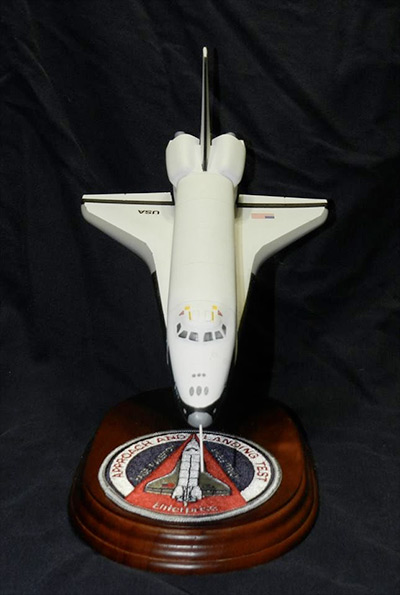 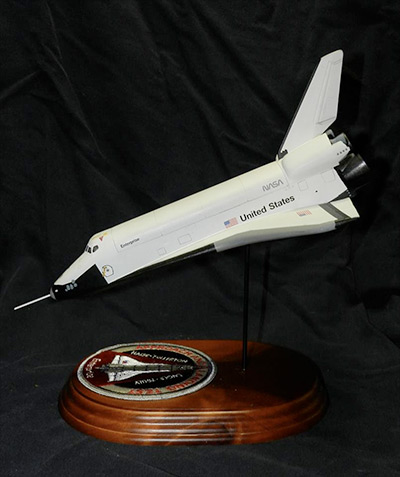
|
rlobinske
Member Posts: 167
From: Crawfordville, FL
Registered: Oct 2014
|
posted 05-16-2019 09:38 AM
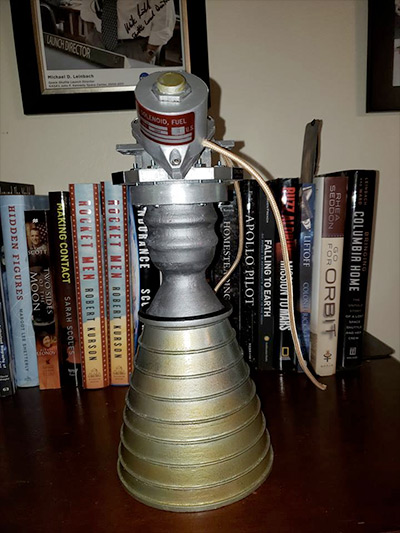
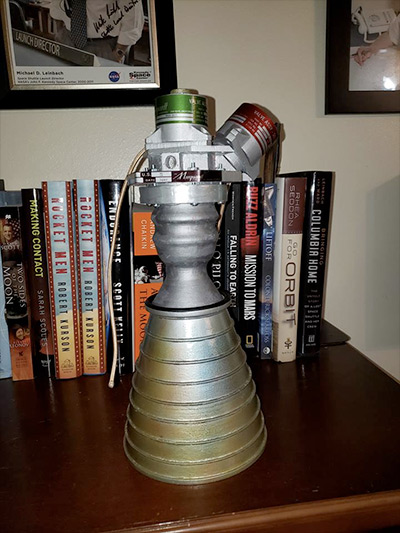
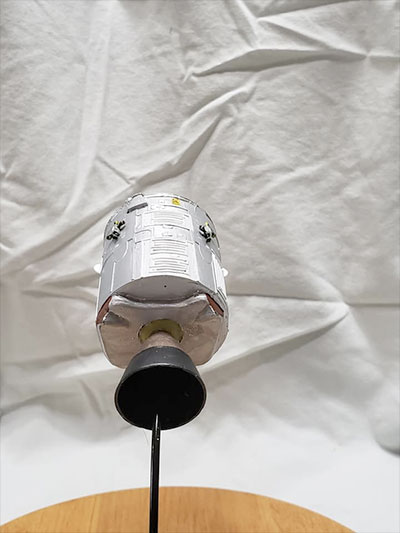
These 100 lb thrust rockets were used for the RCS quads on the Apollo LM and SM. I picked up this 3D print from eBay at a good price, knowing that it was coarse print that needed cleanup. Overall fit was good and the cleanup went smoothly with no surprises. Overall paint was Tamiya bare metal from a rattle can. The combustion chamber is Tamiya metallic gray. The expansion bell collar was painted Modelmaster enamel chrome silver. The bell heat stains were simulated with airbrushed Tamiya clear yellow, clear blue, clear red and smoke. The data plates are decals printed by Michael Key applied to 0.005 sheet styrene painted with plastickote rattle can chrome.  
|
rlobinske
Member Posts: 167
From: Crawfordville, FL
Registered: Oct 2014
|
posted 06-06-2019 05:43 AM
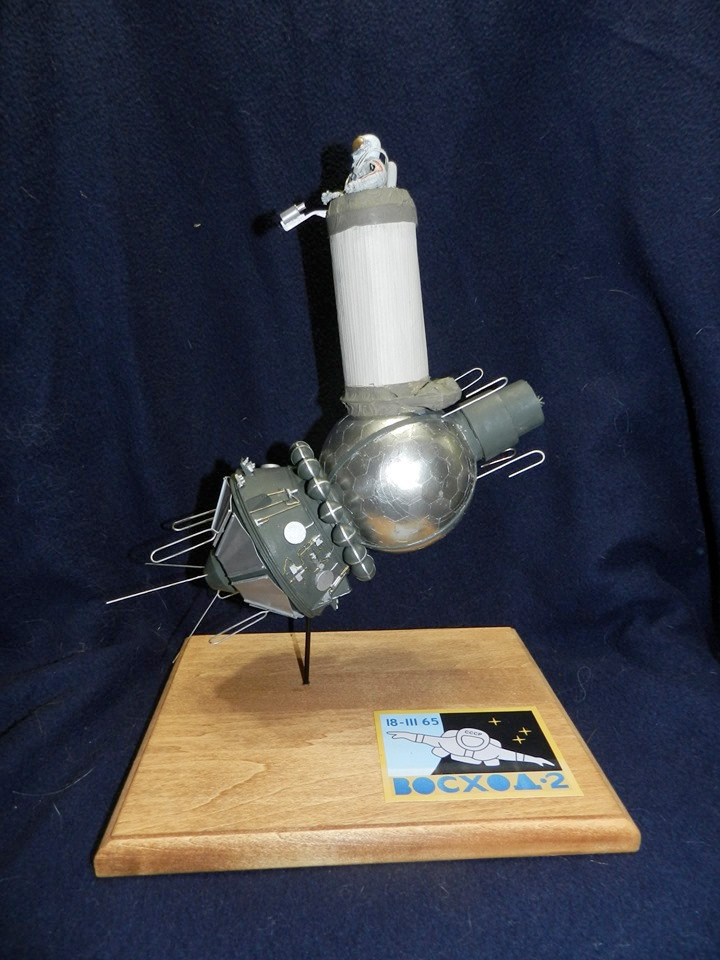
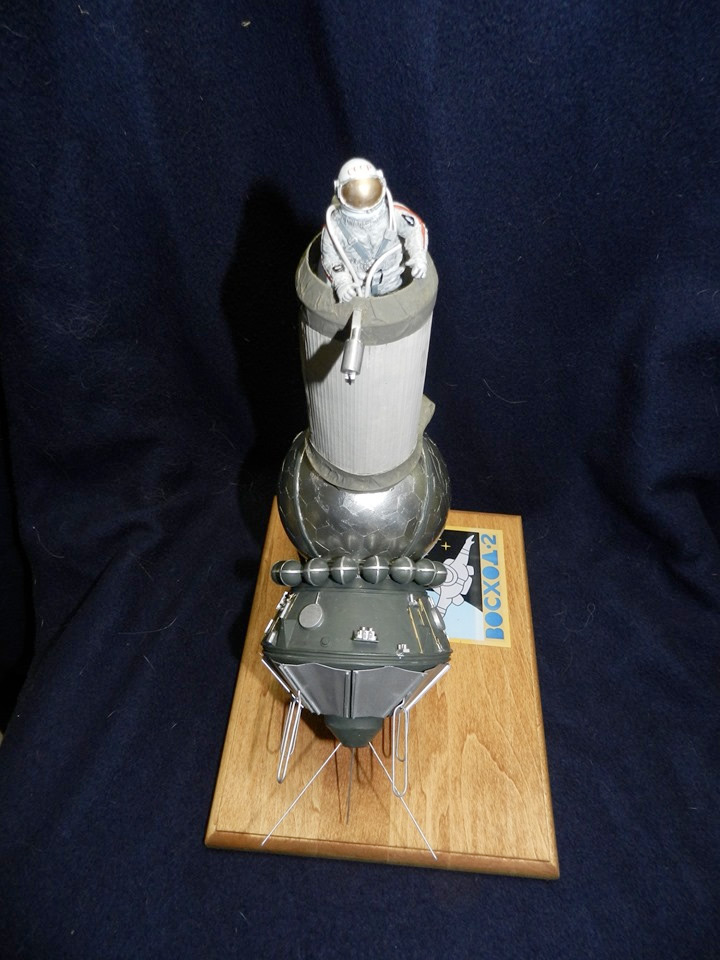
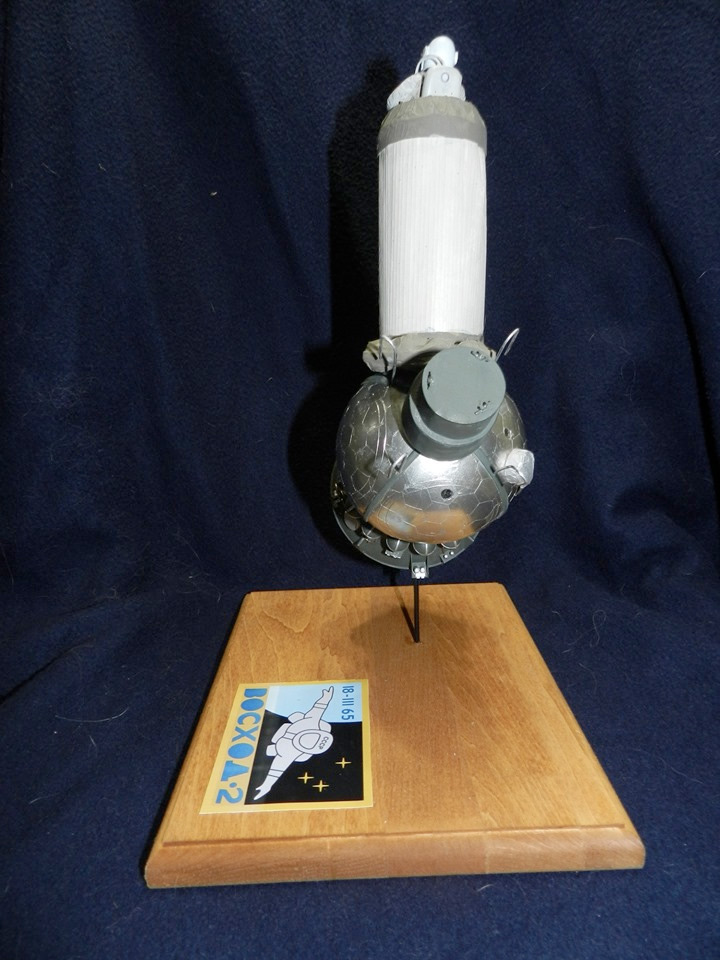
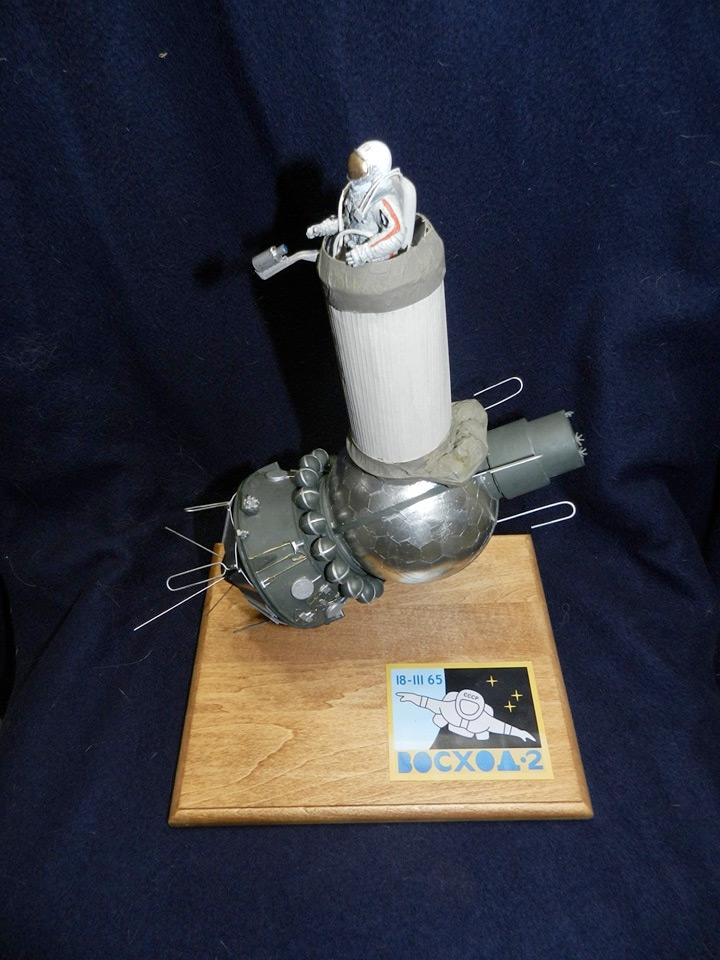
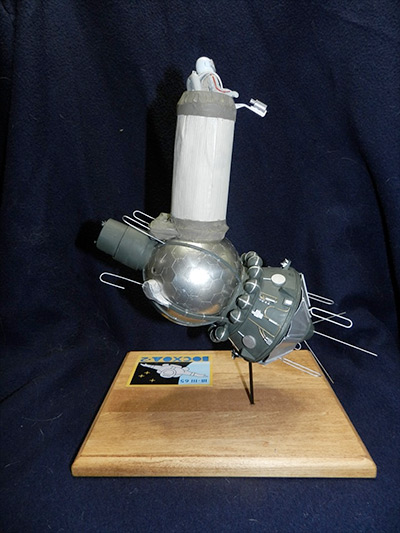
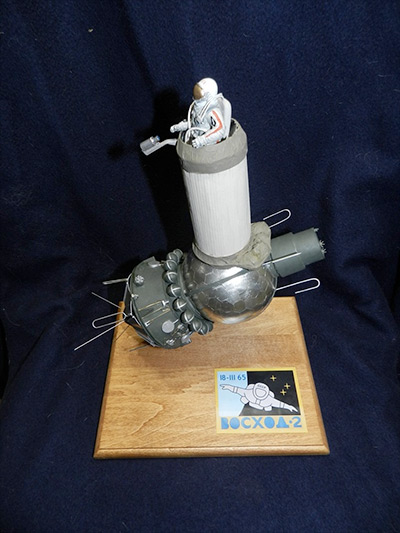
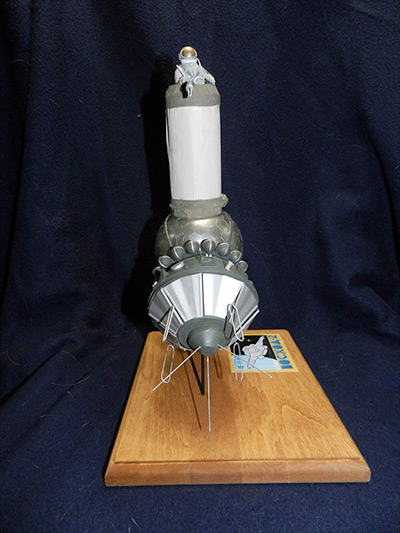
Converted from the classic Revell Vostok kit. Removed the molded details on the equipment module and built up new details with plastic stock and wire. Reconfigured the aft section of the equipment module with sheet styrene and added the forward equipment module built up from sheet styrene. The extendable airlock is styrene and paper. The tanks at the base of the airlock are Gemini leftovers covered with tissue. The crew sphere had new portholes made and covered with hexagons of Bare Metal Foil. Antennas are from brass wire and paper clips. The figure is the New Ware Leonov spacewalker.  

|
rlobinske
Member Posts: 167
From: Crawfordville, FL
Registered: Oct 2014
|
posted 07-30-2019 07:51 AM
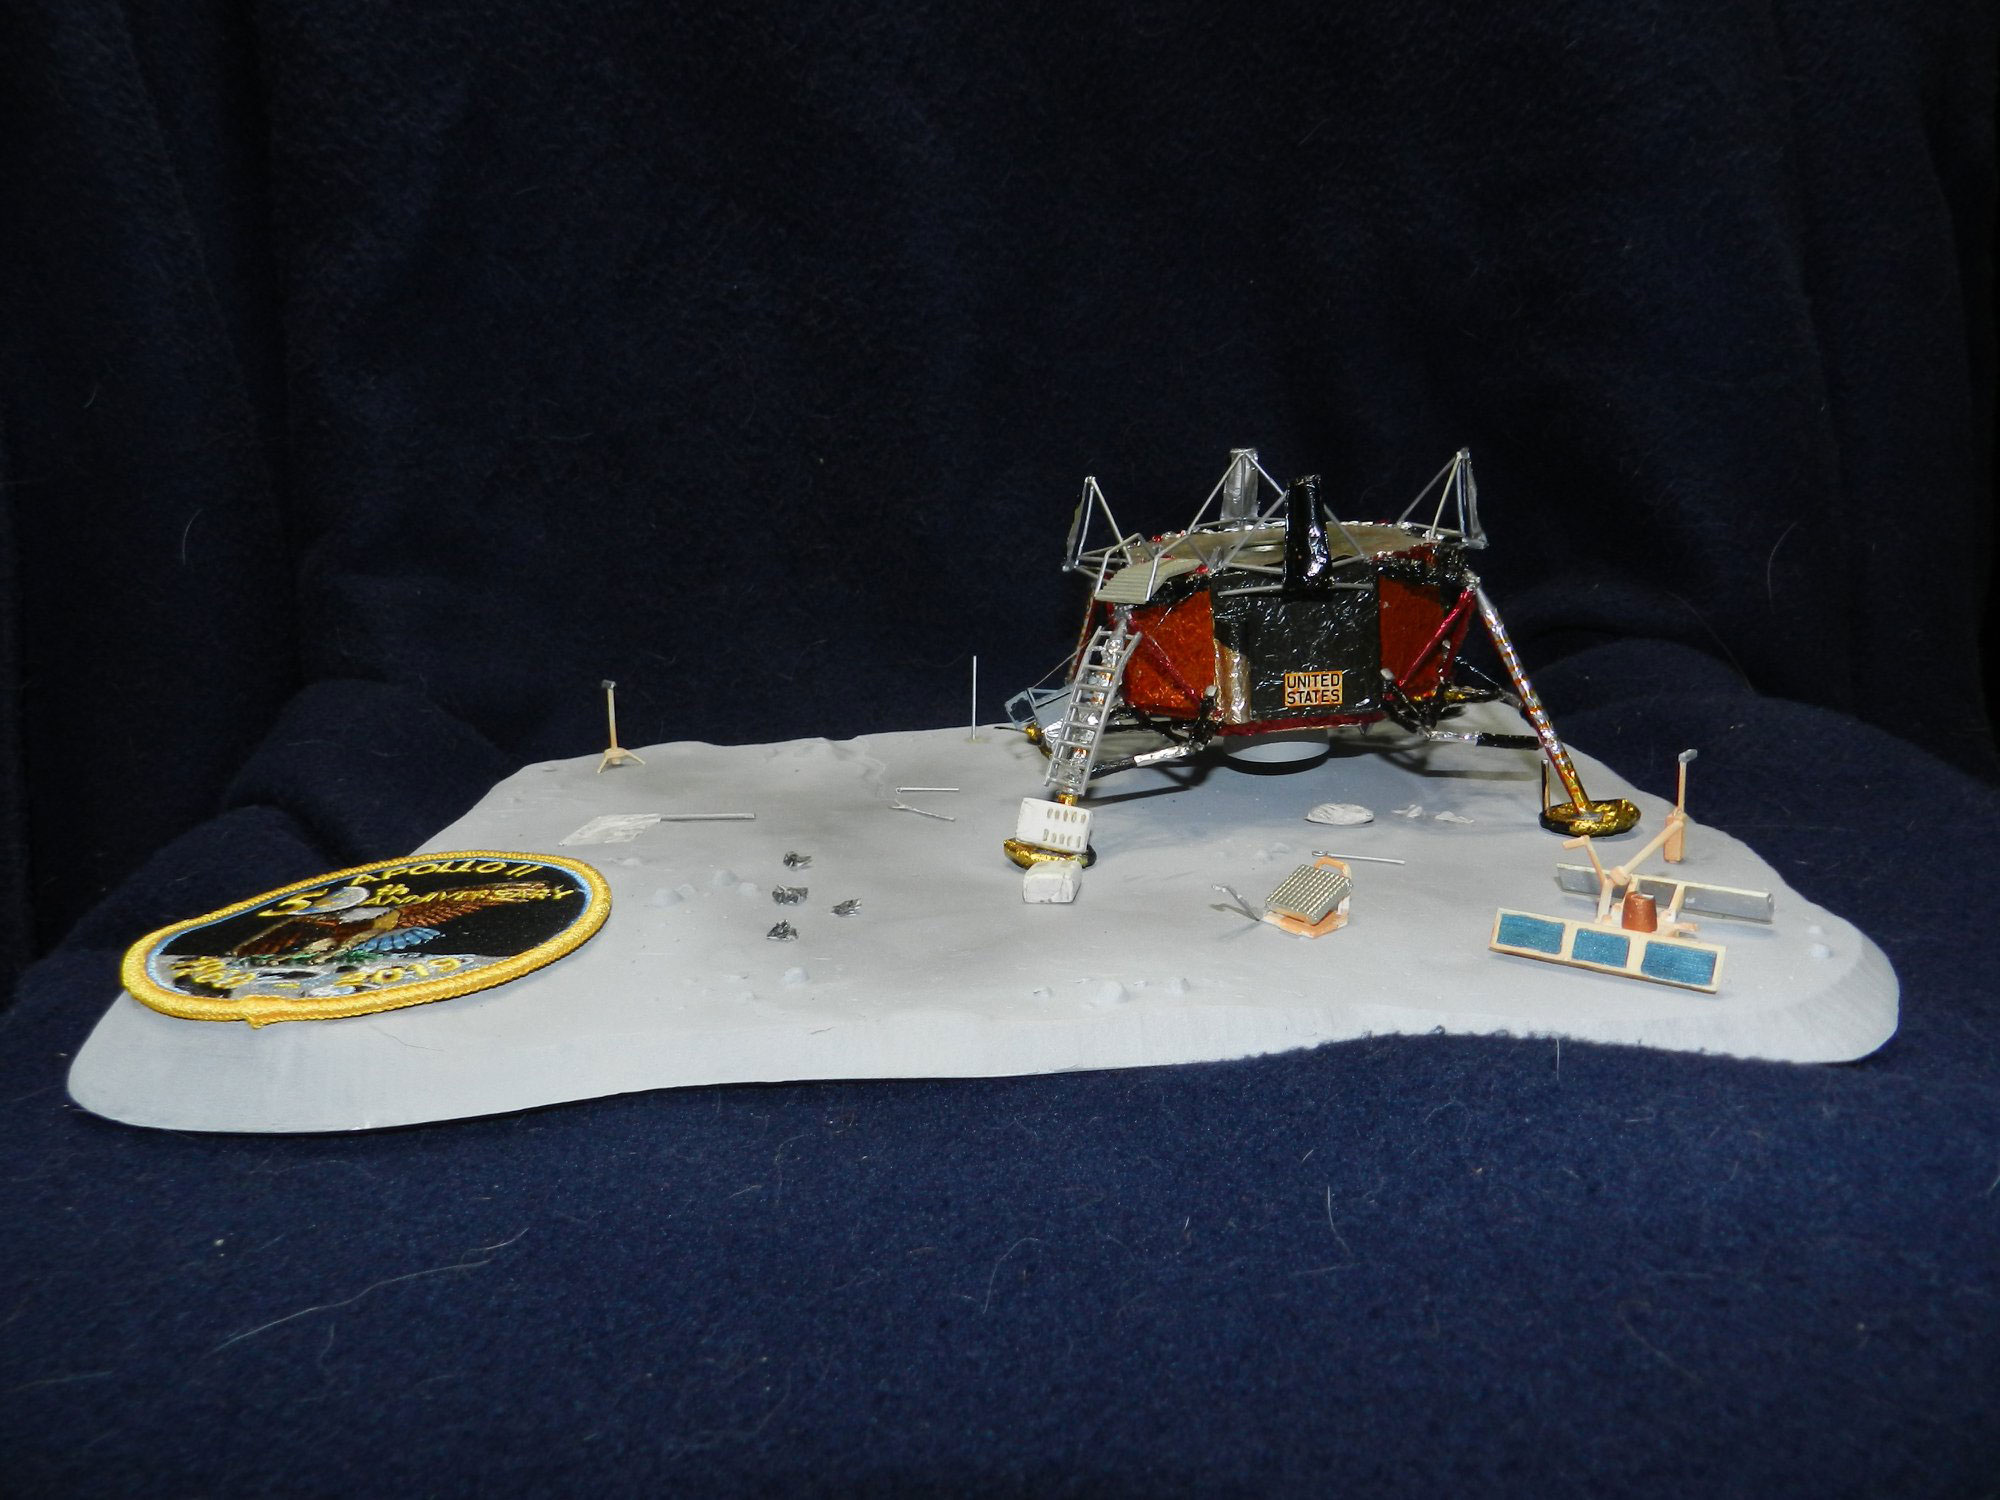
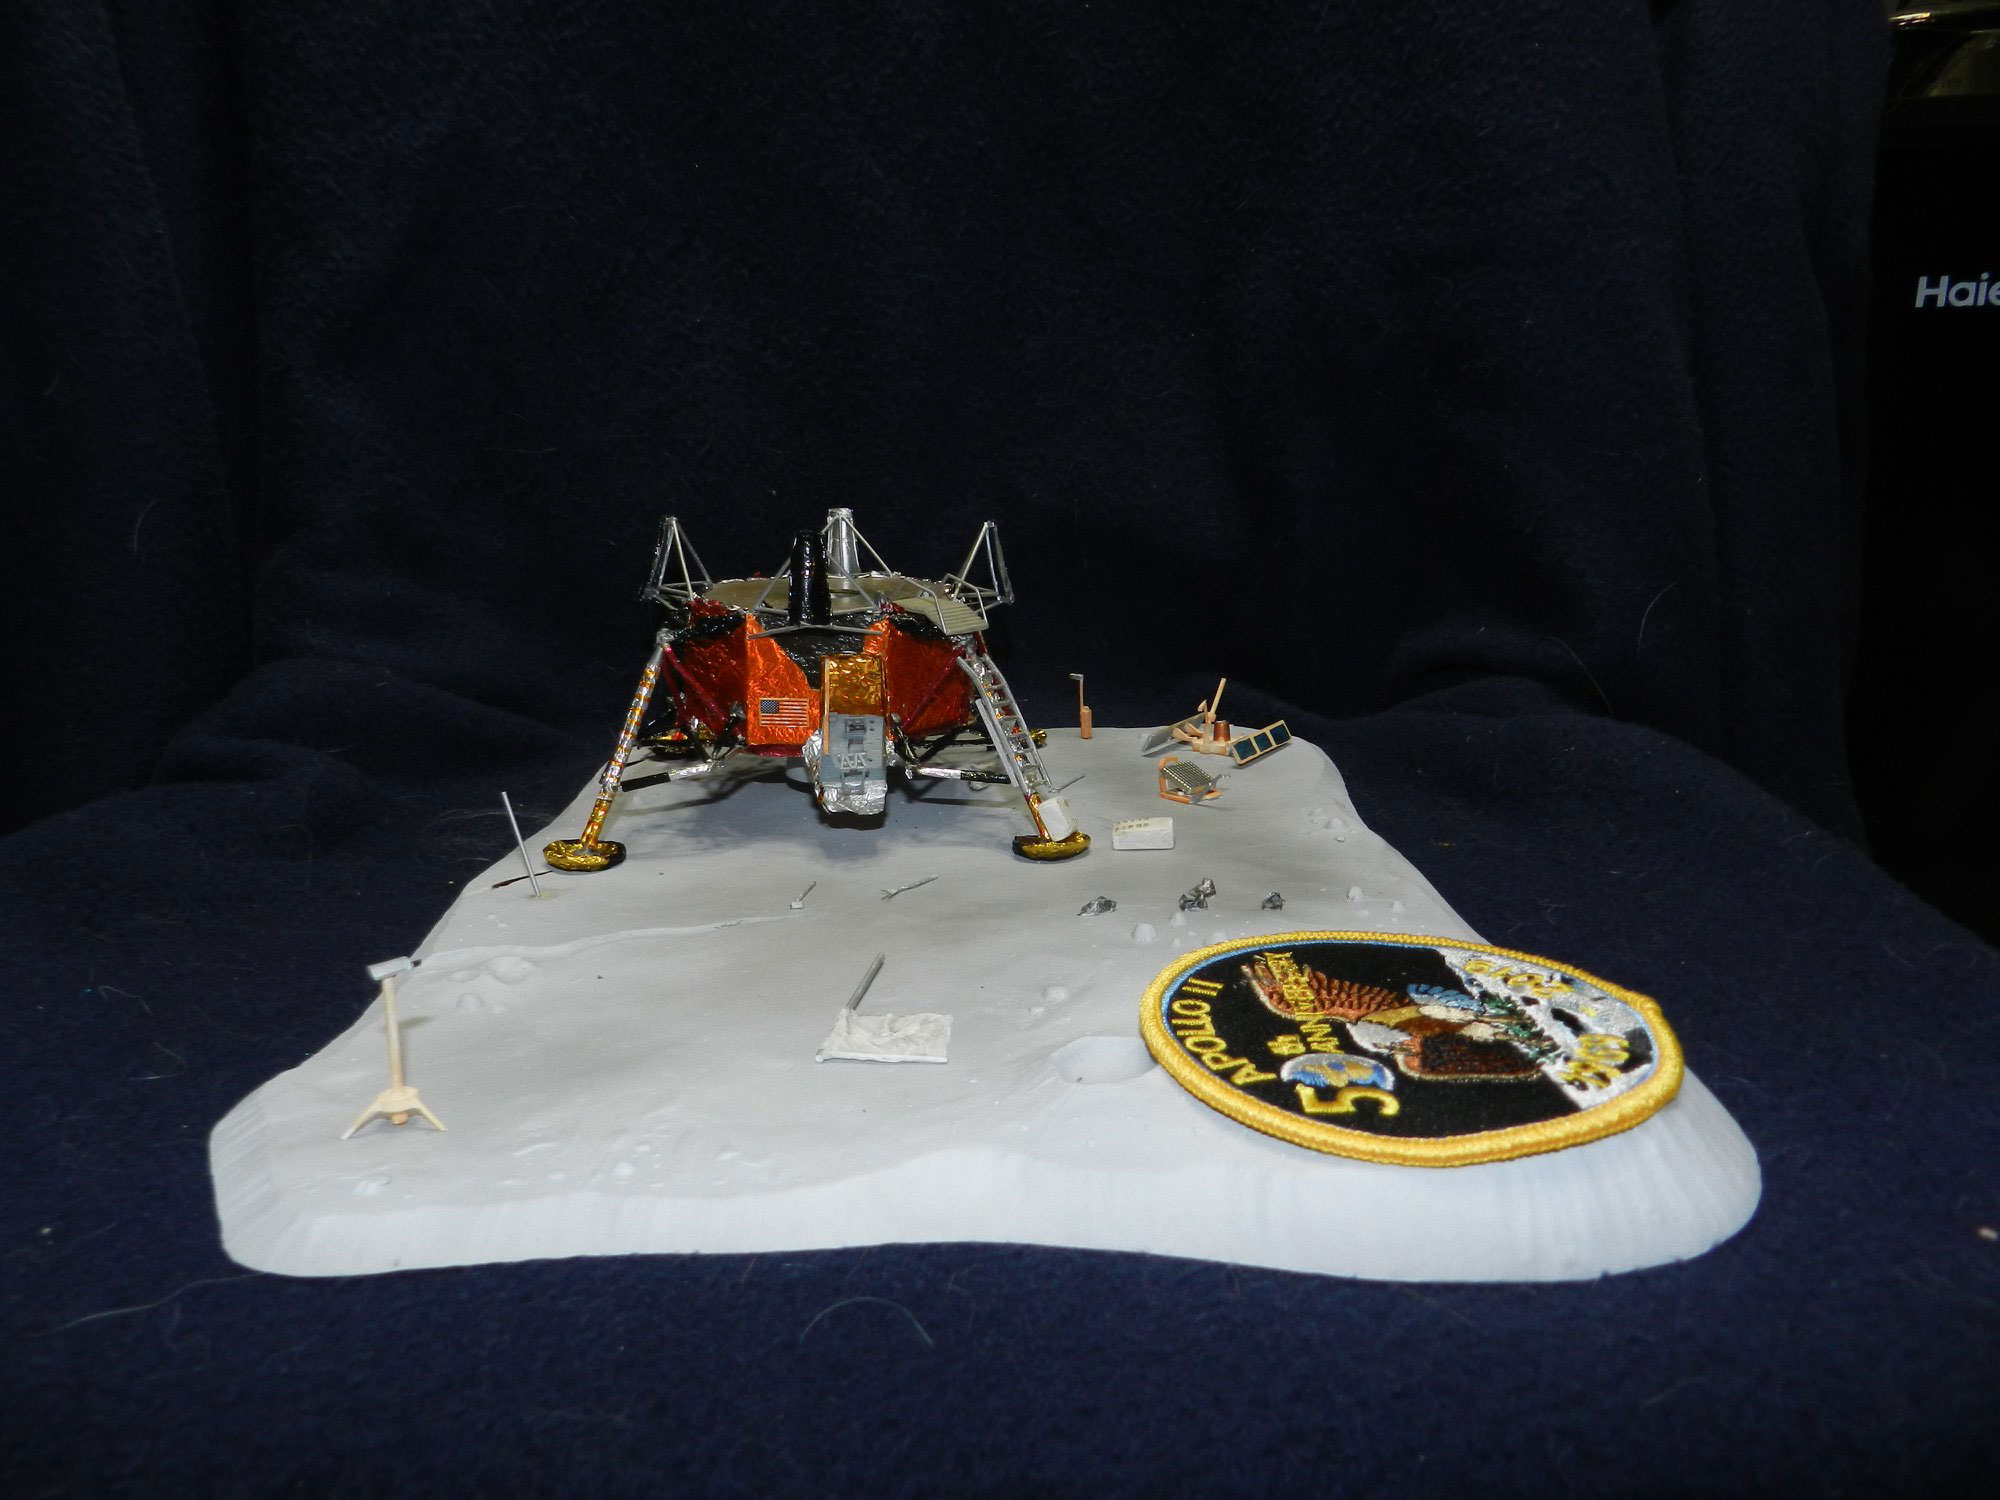
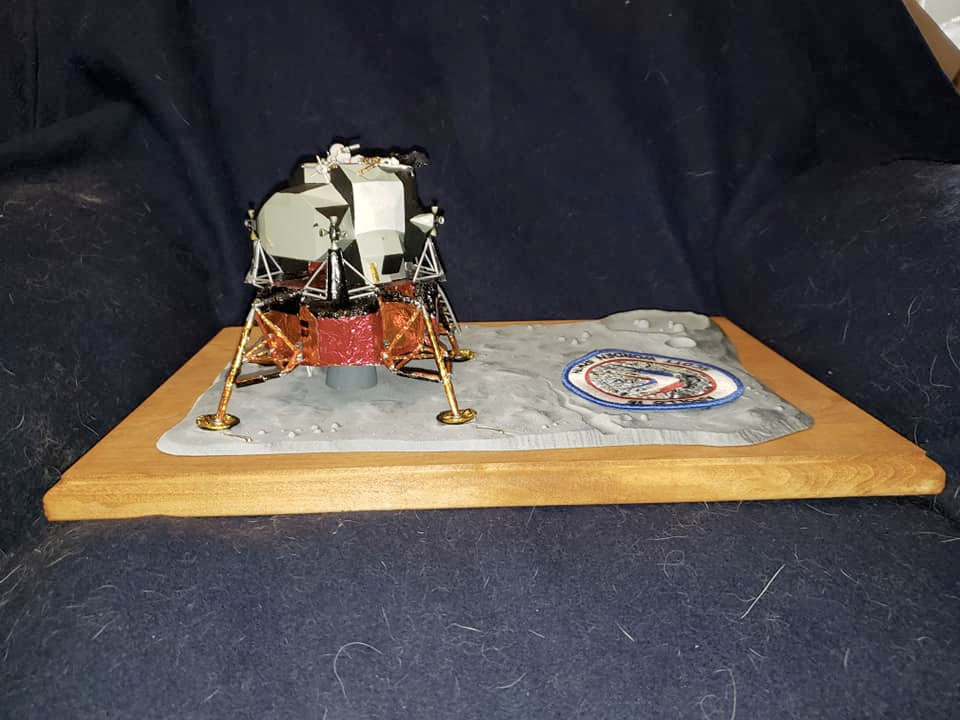
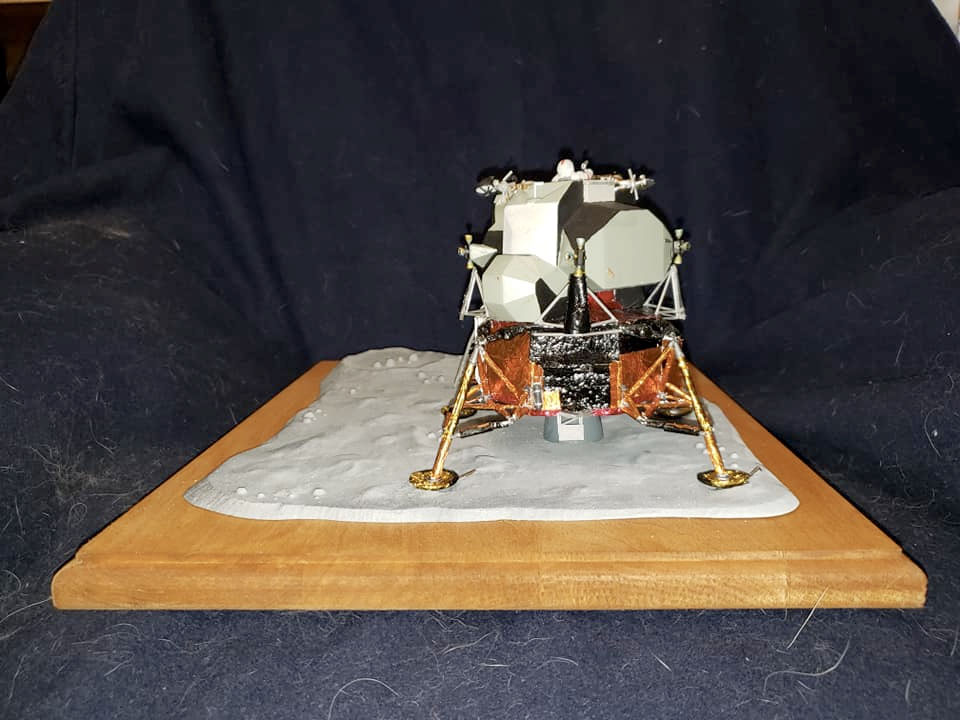
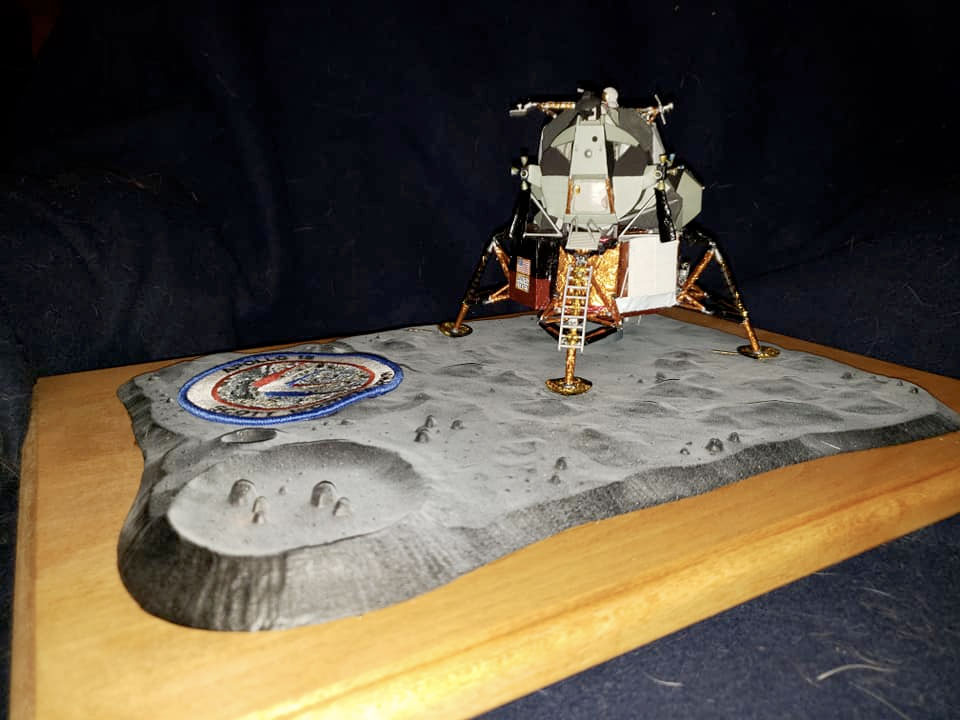
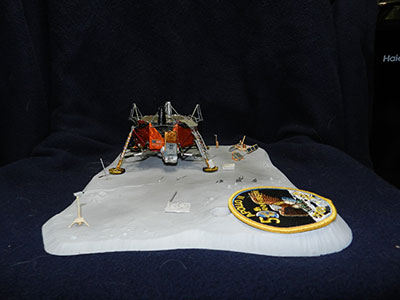
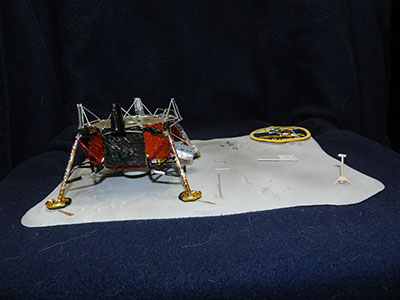
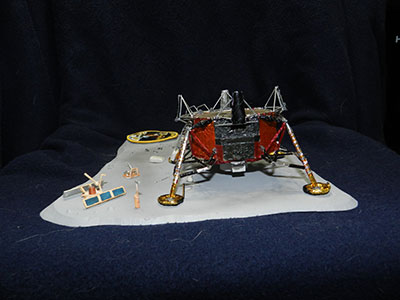
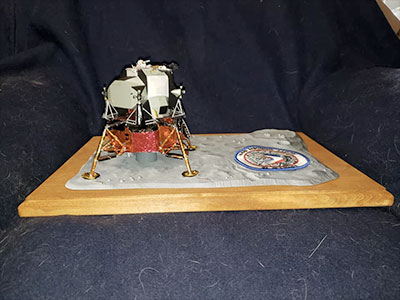
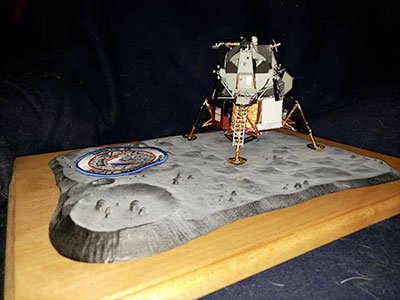
Tranquility Plus 50 completed. Modified a 25-year old 1/48 Monogram First Lunar Landing kit to represent what Tranquility Base may look like on the 50th anniversary. I used salt chipping over clear overcoats to simulate the take off damage to the upper deck and simulated the pealed away thermal blankets. Added missing details like the fuel tank bump, landing radar, corrected the EASEP housing, added the MESA and replaced the plume deflectors with foil. Corrected the egress platform and ladder, added the flag holder. On the base, corrected the TV camera, fashioned a new flag to represent it being knocked down by the Ascent Stage takeoff and bleaching of the fabric. I also added sample tools, jet bag, sample bags and discarded overboots. The kit PLSSs were modified and placed at the ladder base. I filled in the engraved shadows and used simple shading on the base. The white painted equipment was aged with Garagekit Colors transparent chestnut, which was also used to age the flag and United Dates decals on quads I and IV. The patch I picked up at the KSCVC gift shop. 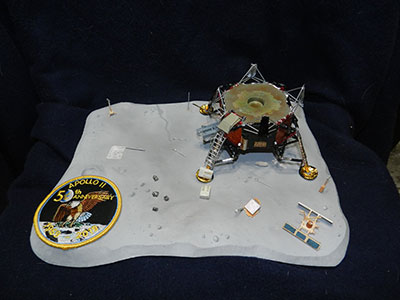 
|
rlobinske
Member Posts: 167
From: Crawfordville, FL
Registered: Oct 2014
|
posted 08-02-2019 10:30 AM
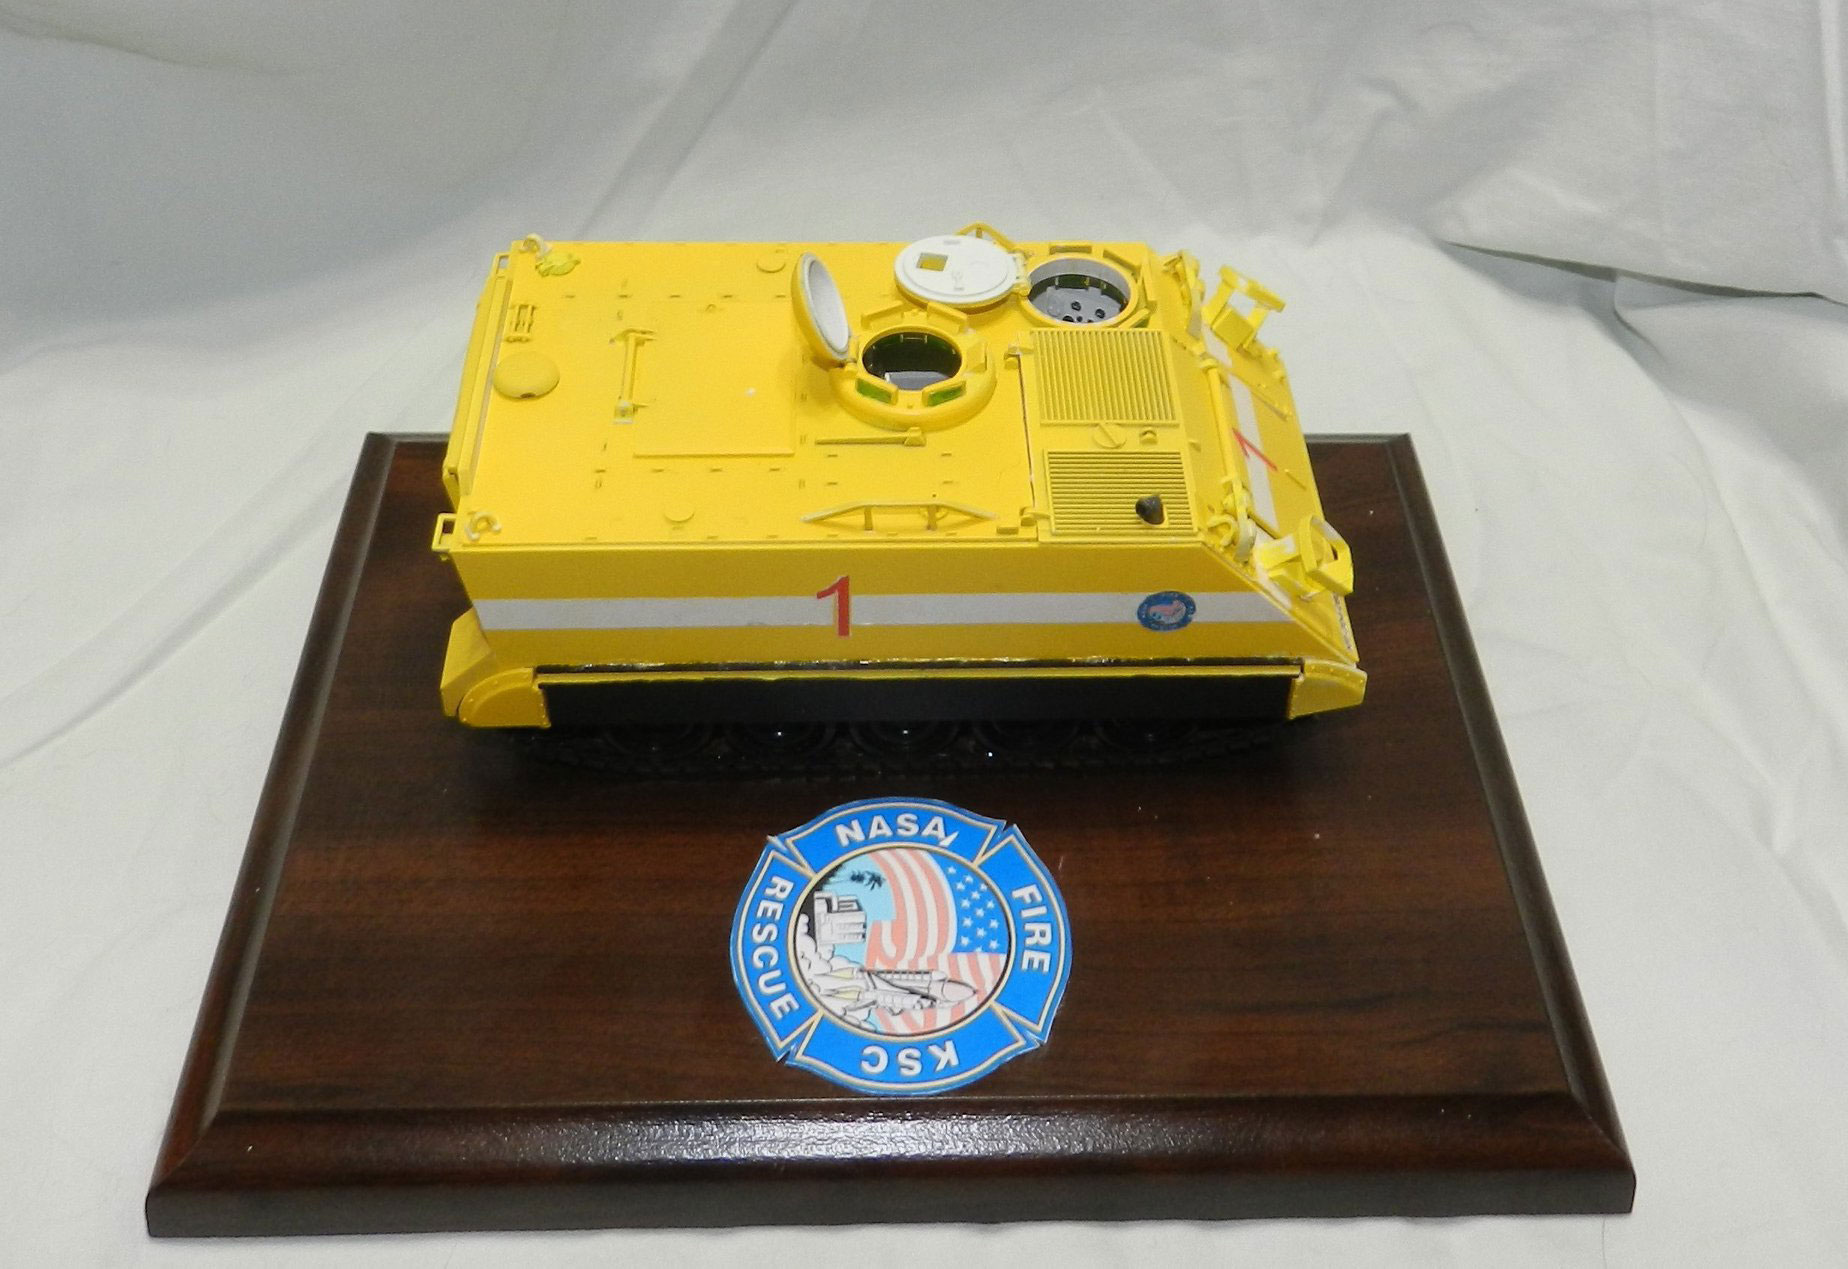
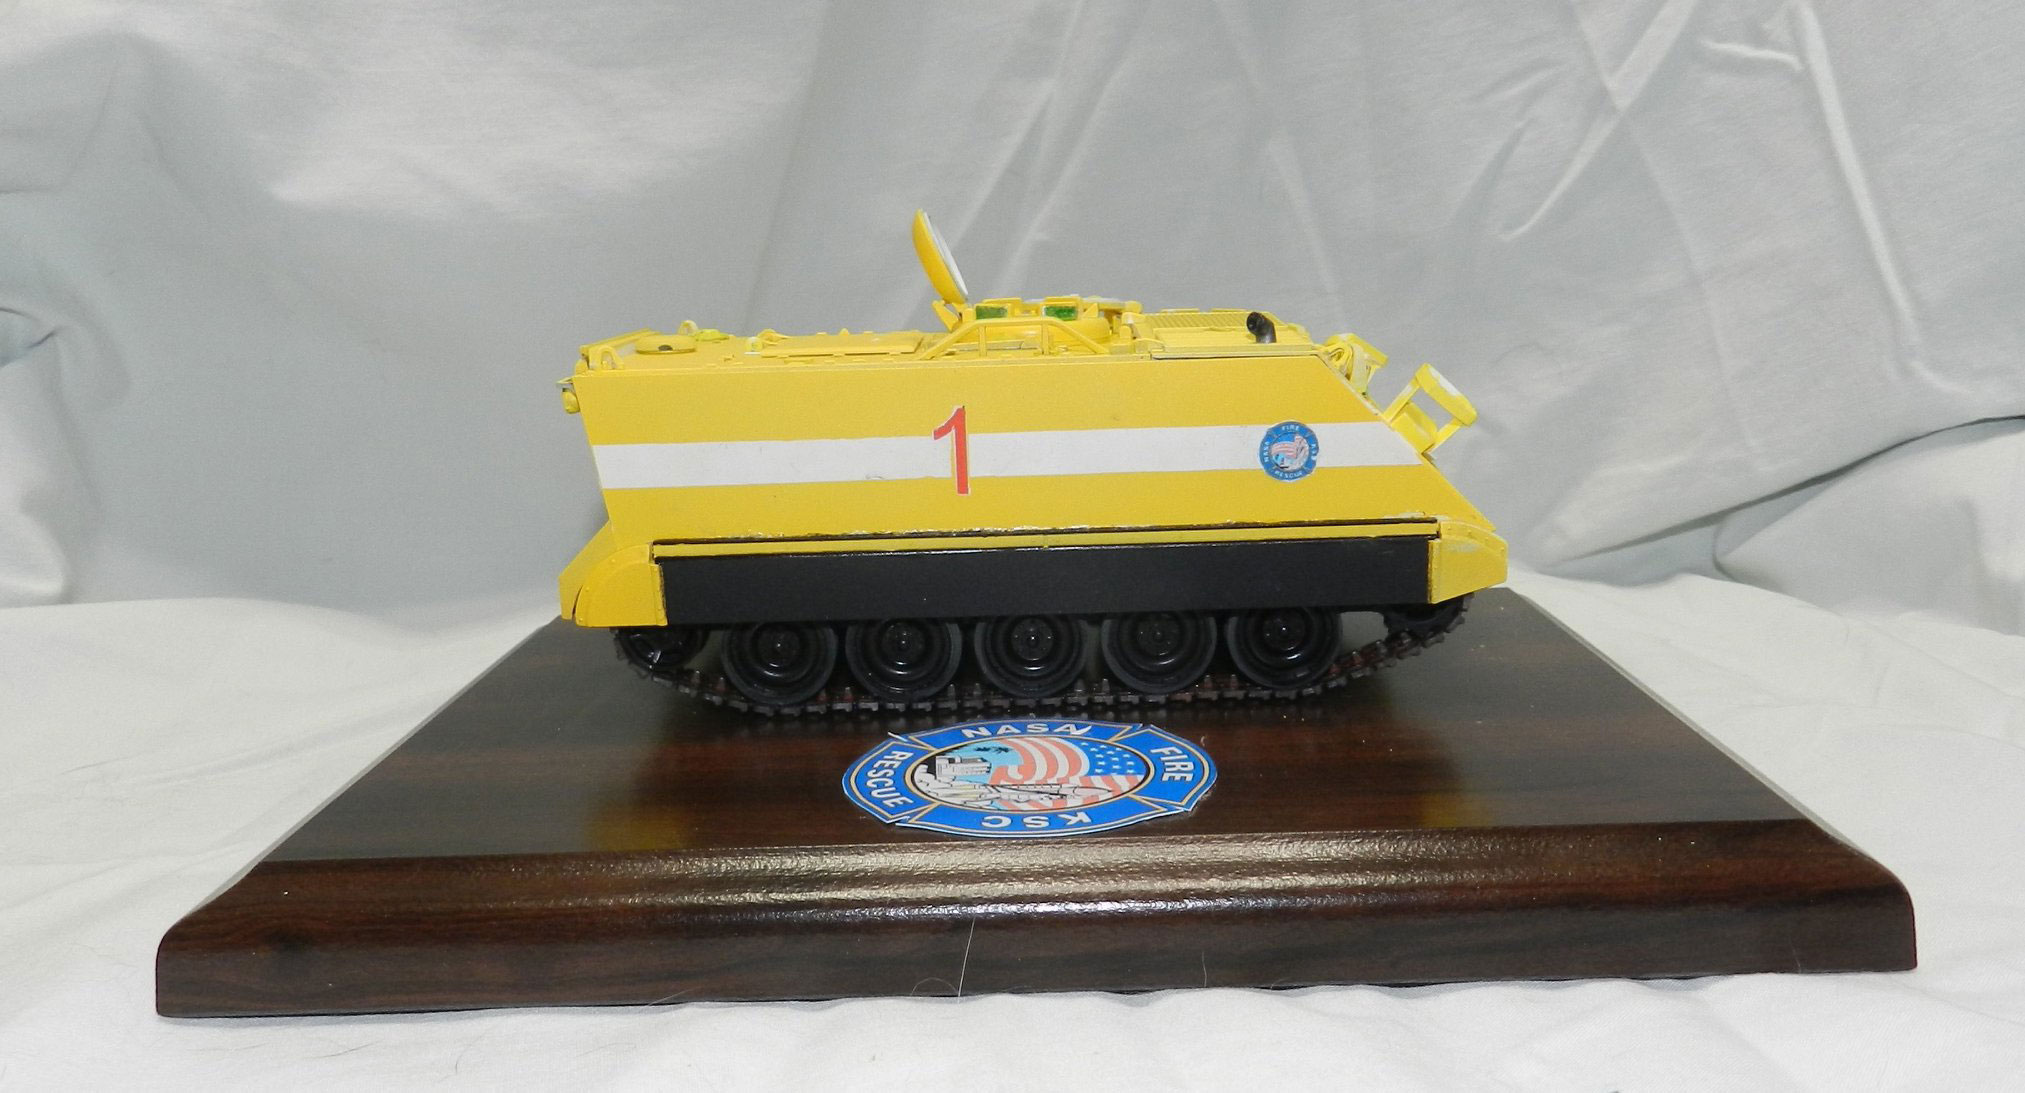
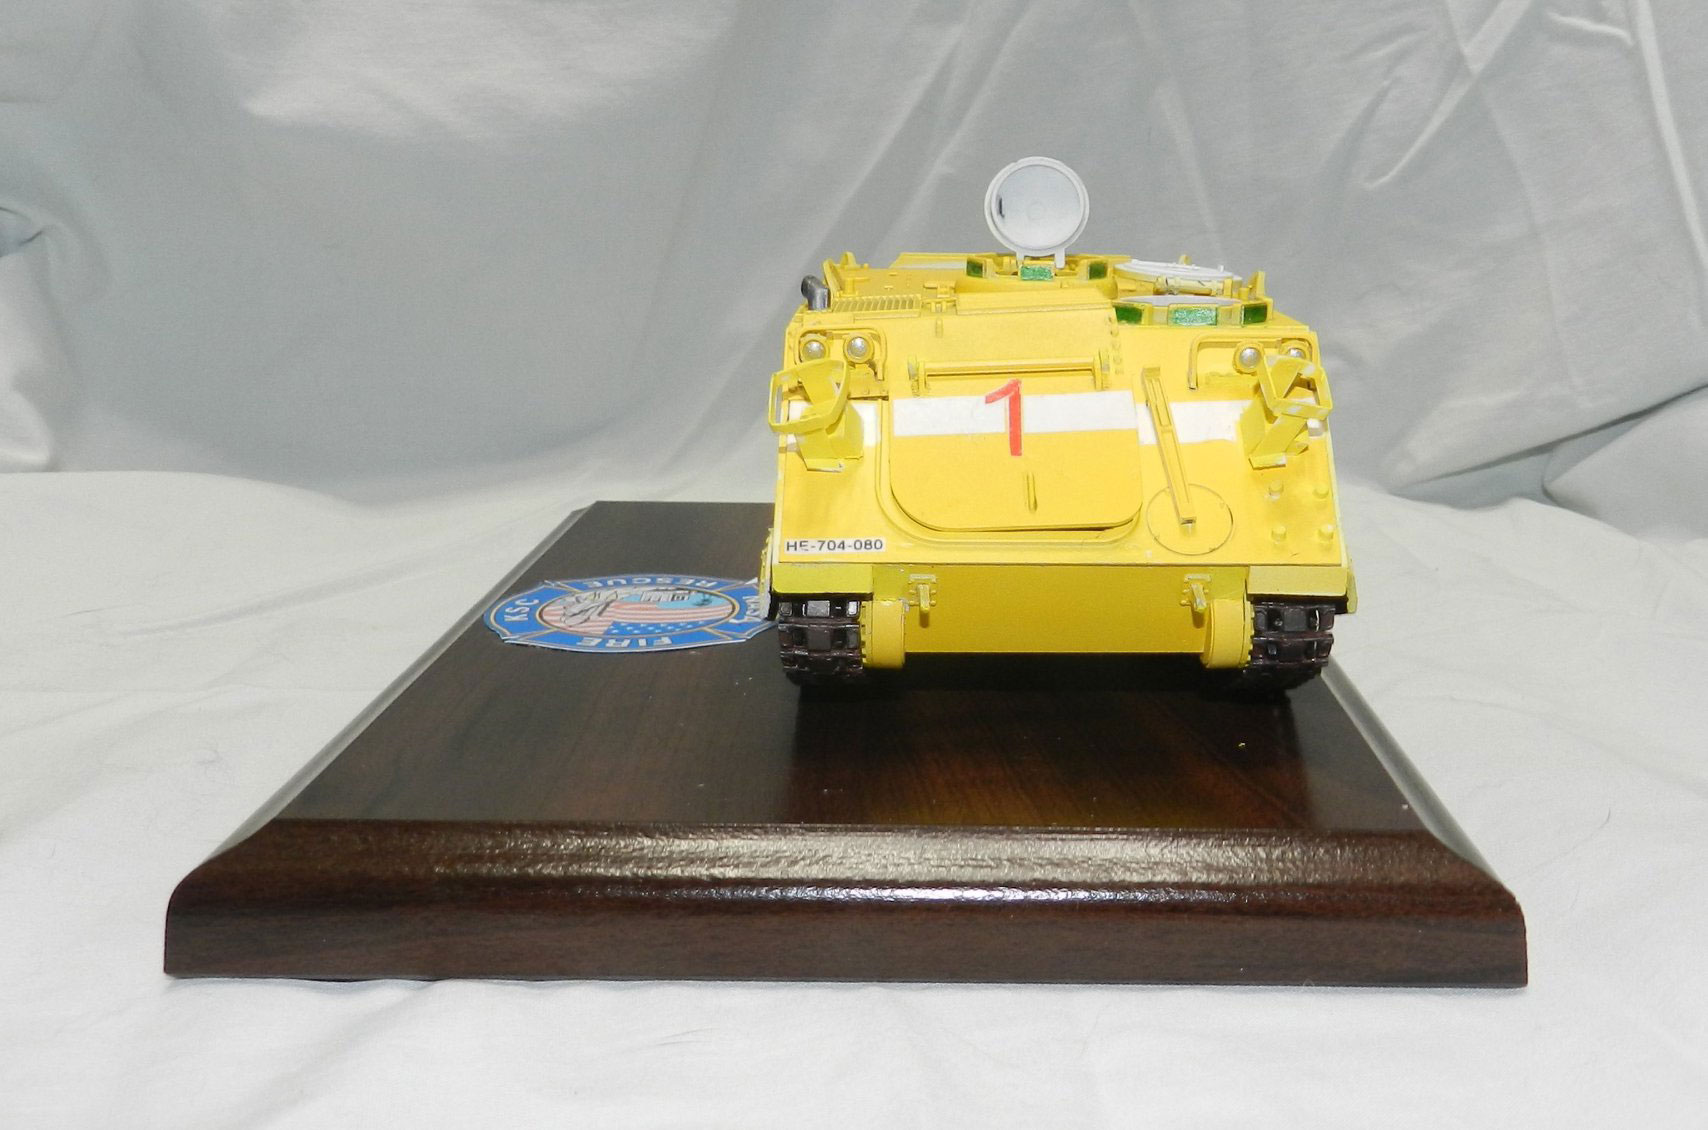
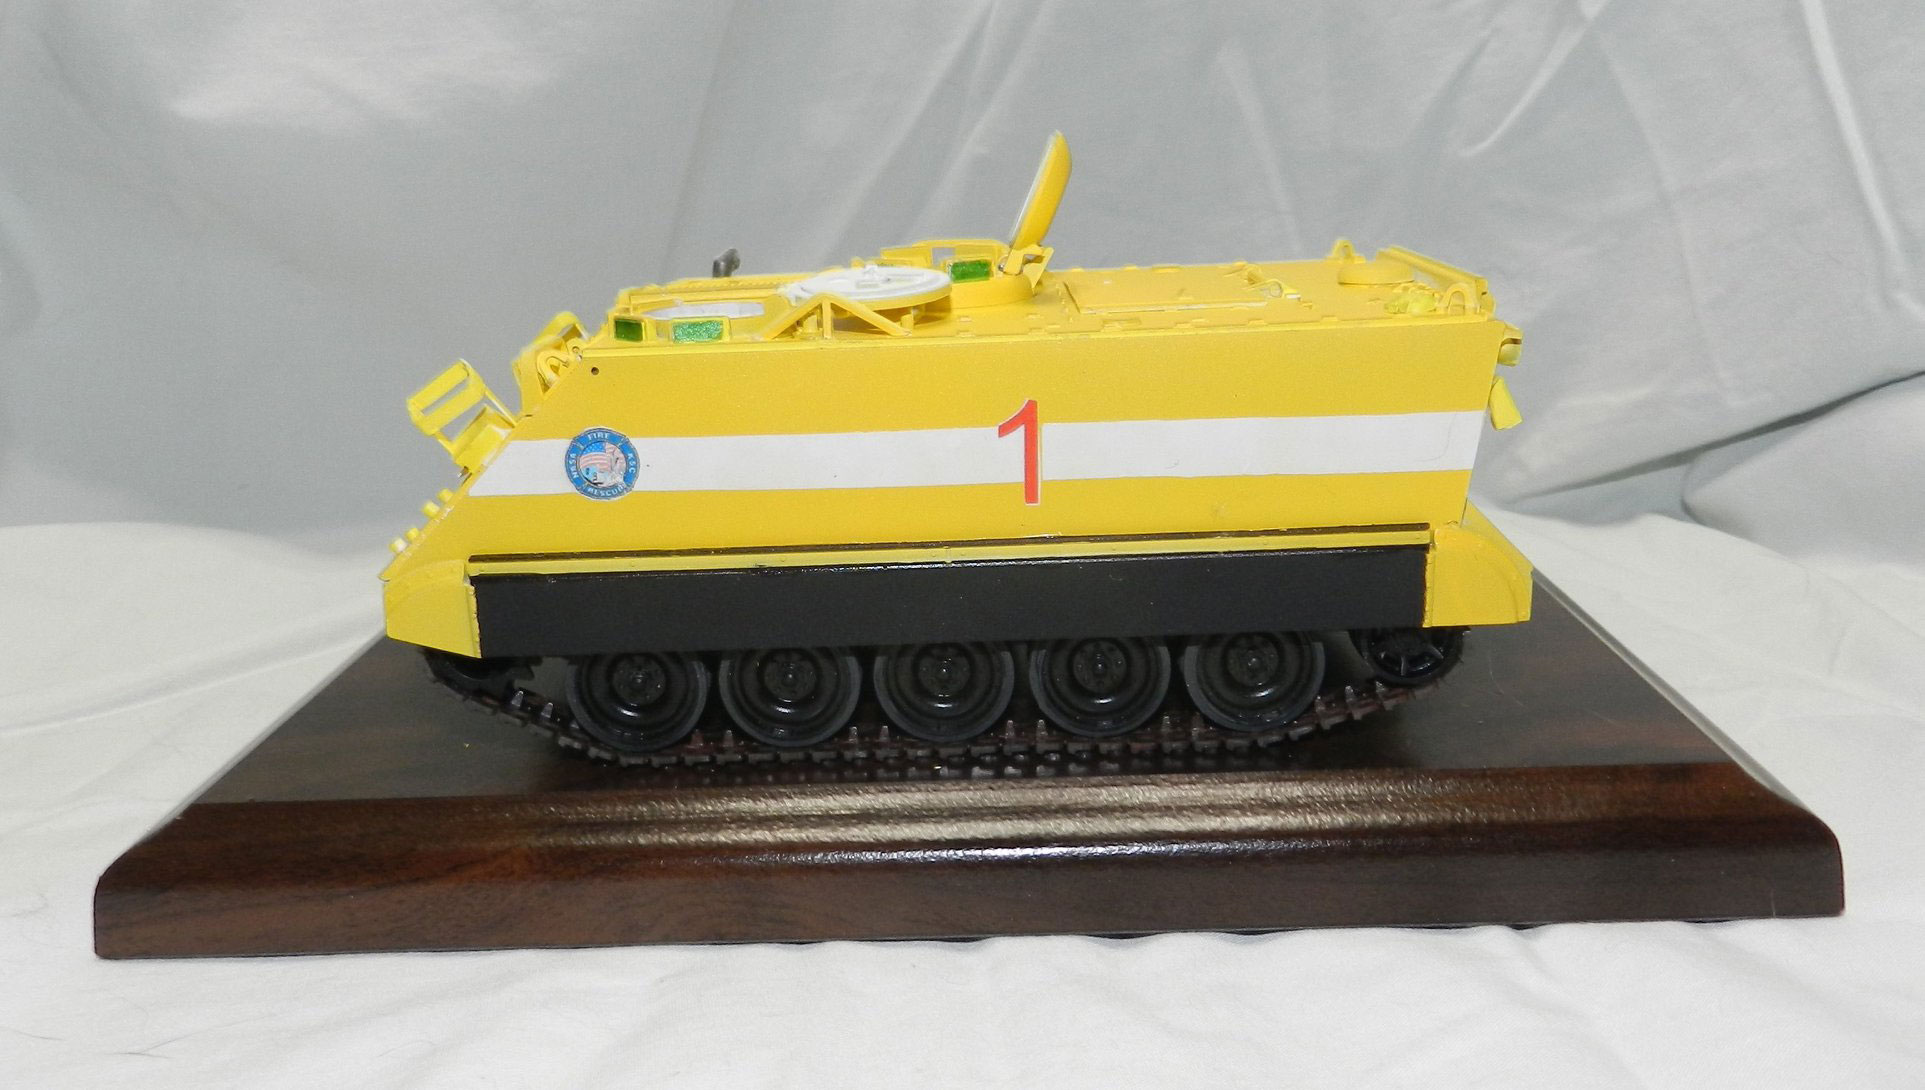
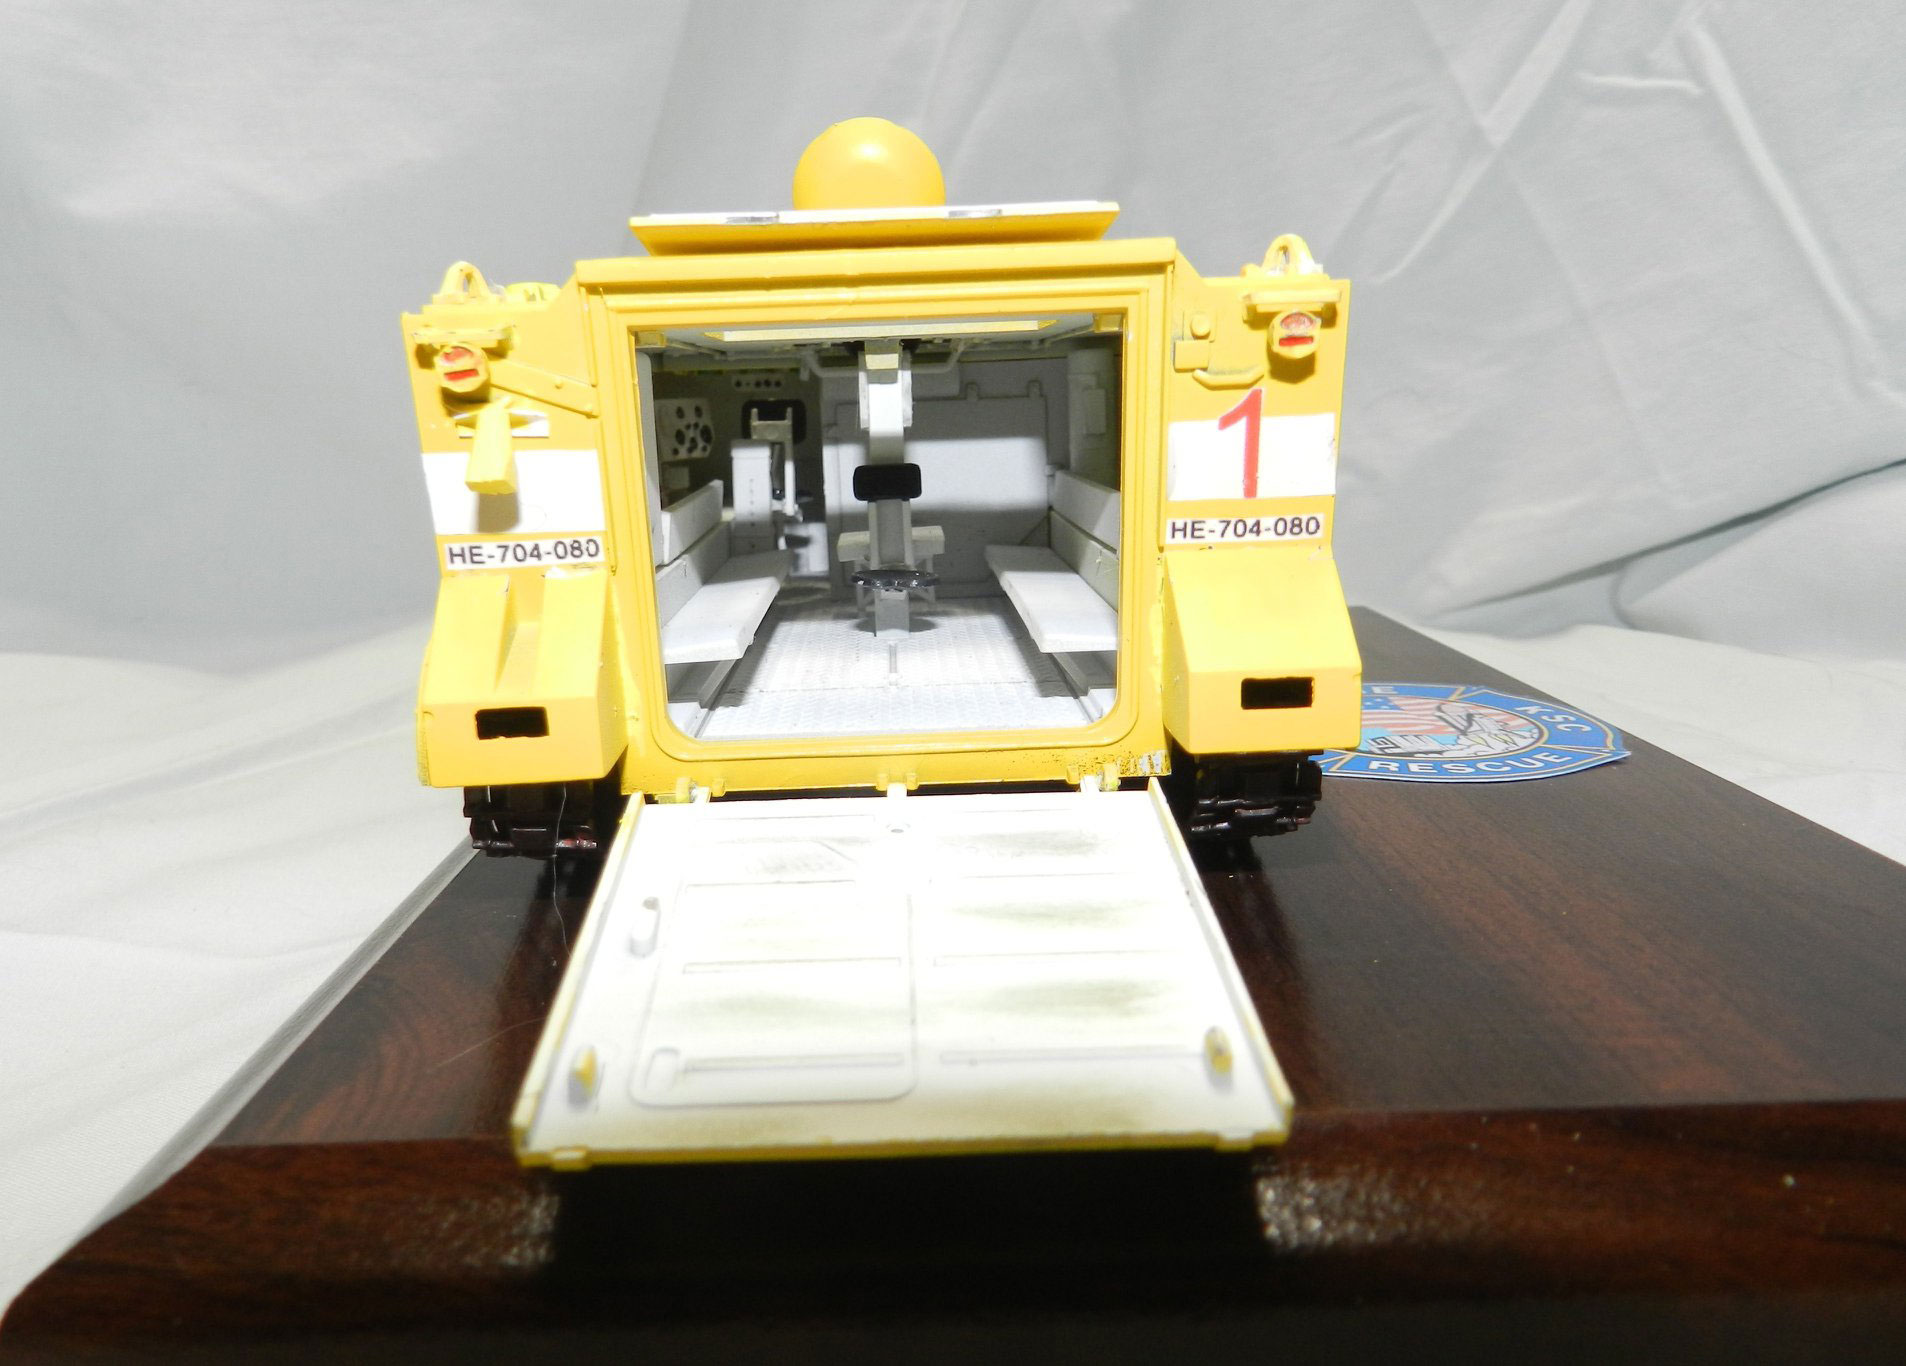
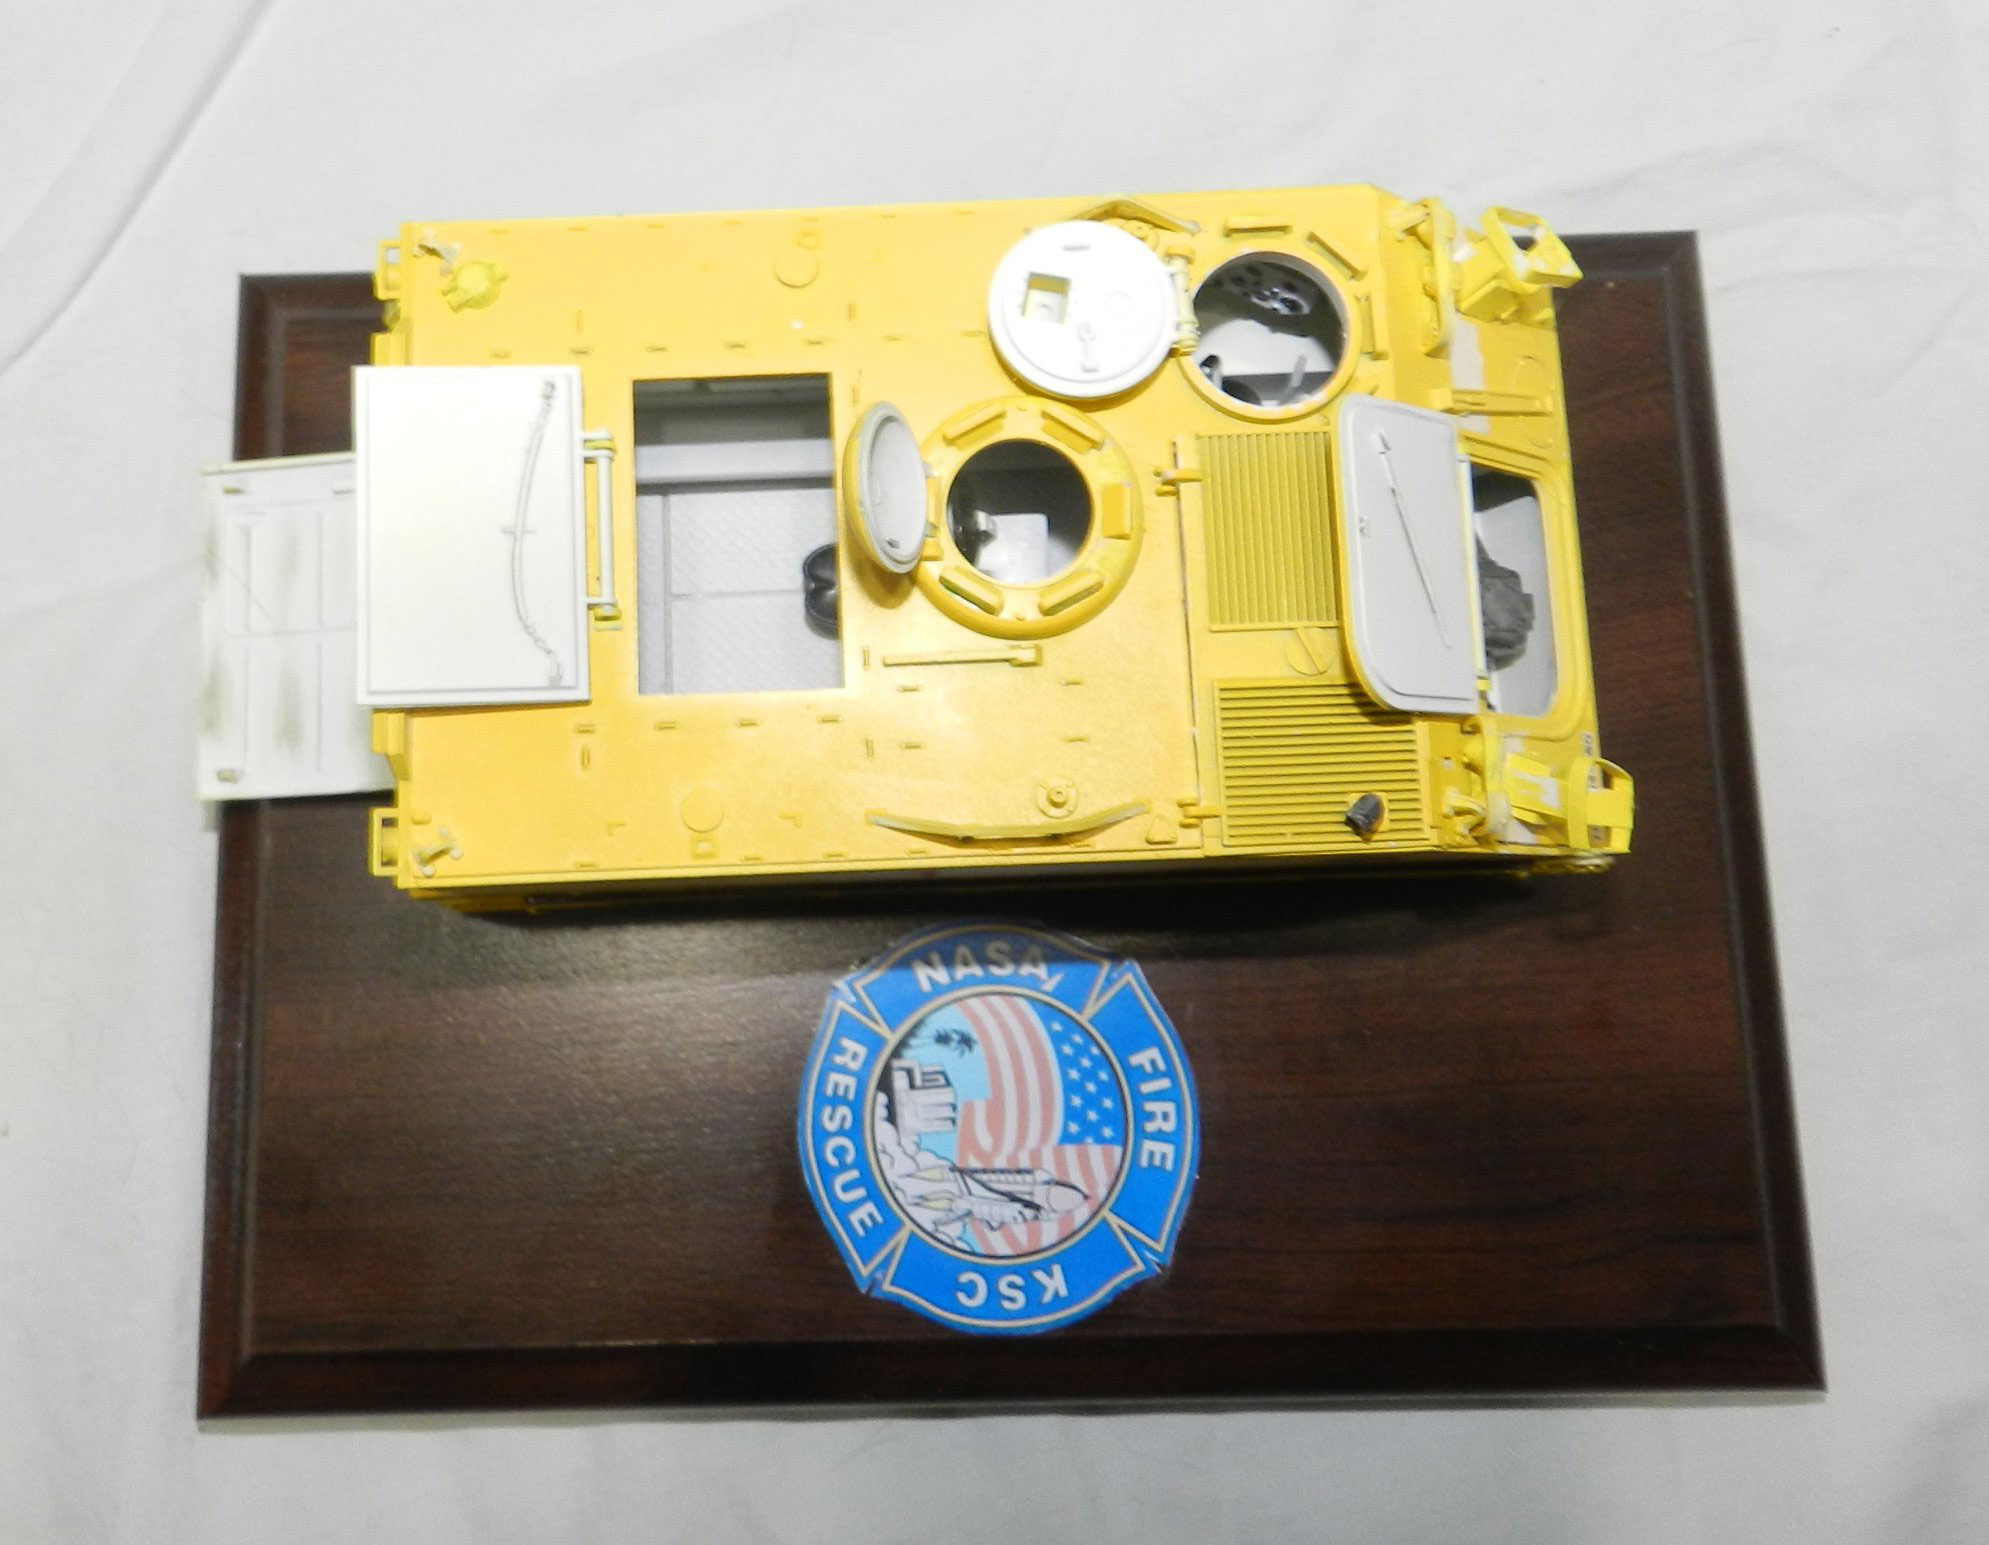
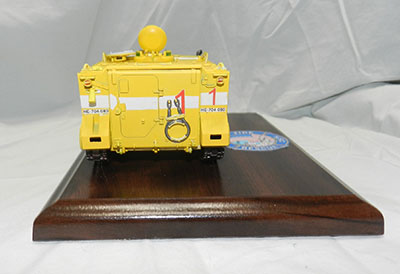
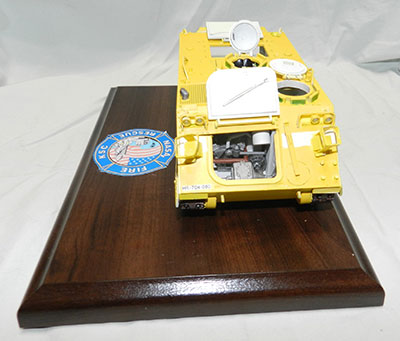
Modified Tamiya 1/35 M113 APC to look like the shuttle era fire rescue M113s used for fire crews and crew escape, based on photos of #1 on display at KSC. Mostly out of box, omitting the weapons. Modified the headlights to match, added the speaker on the back and those odd boxes to the front glacis. Tamiya rattle can yellow over light grey primer with white decal film for the stripe. Other decals printed on white film using a laser printer. The badge is from a closeup photo on #1 cleaned up and trimmed.  


|
rlobinske
Member Posts: 167
From: Crawfordville, FL
Registered: Oct 2014
|
posted 10-20-2019 09:24 AM
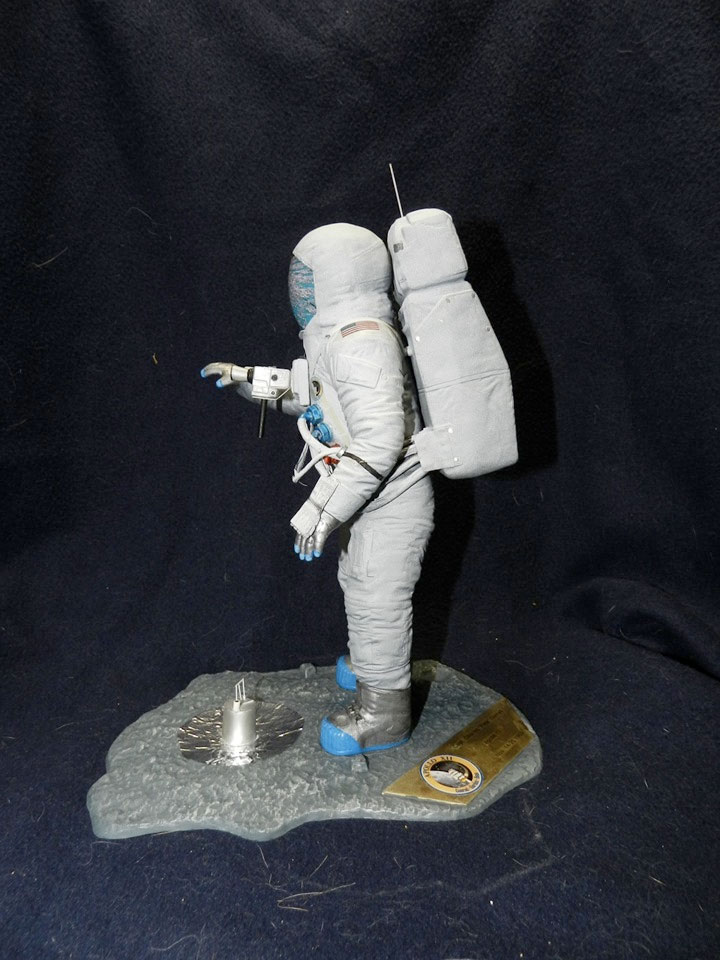
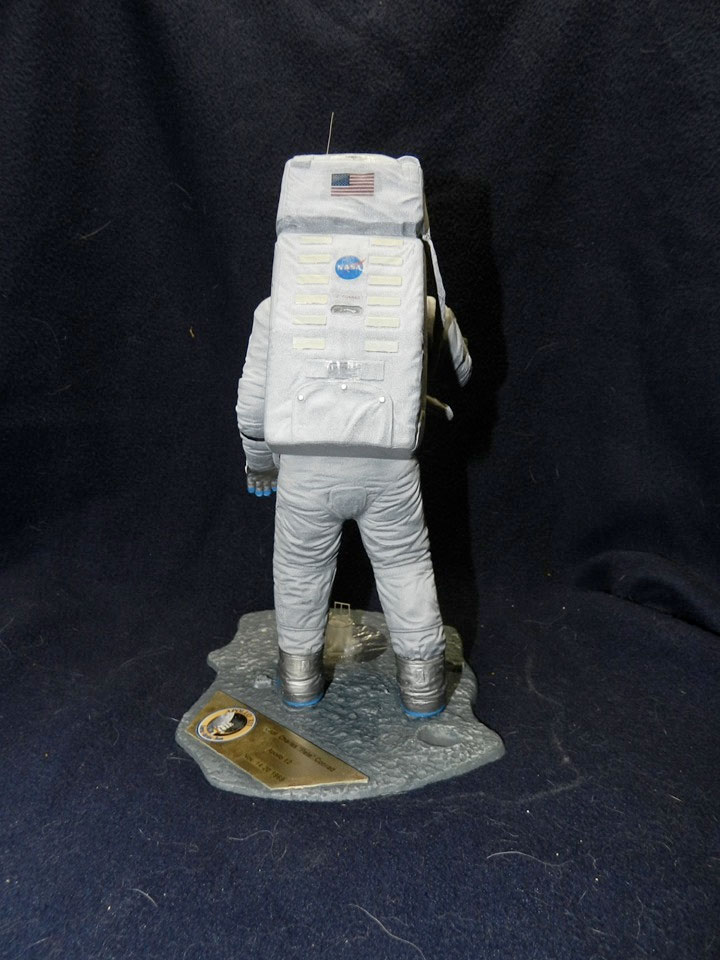
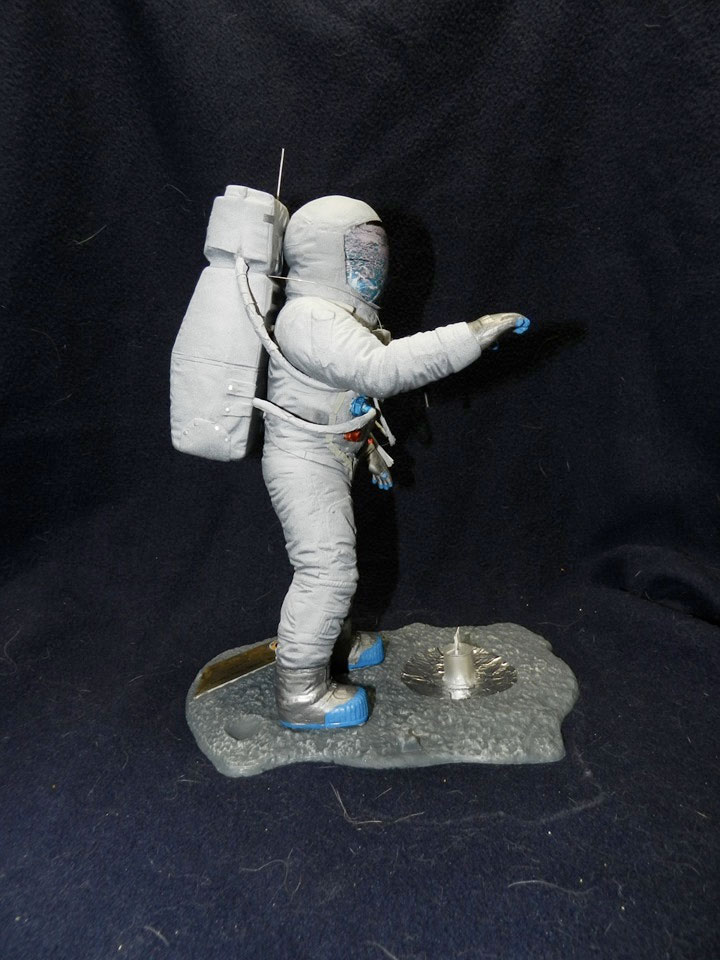
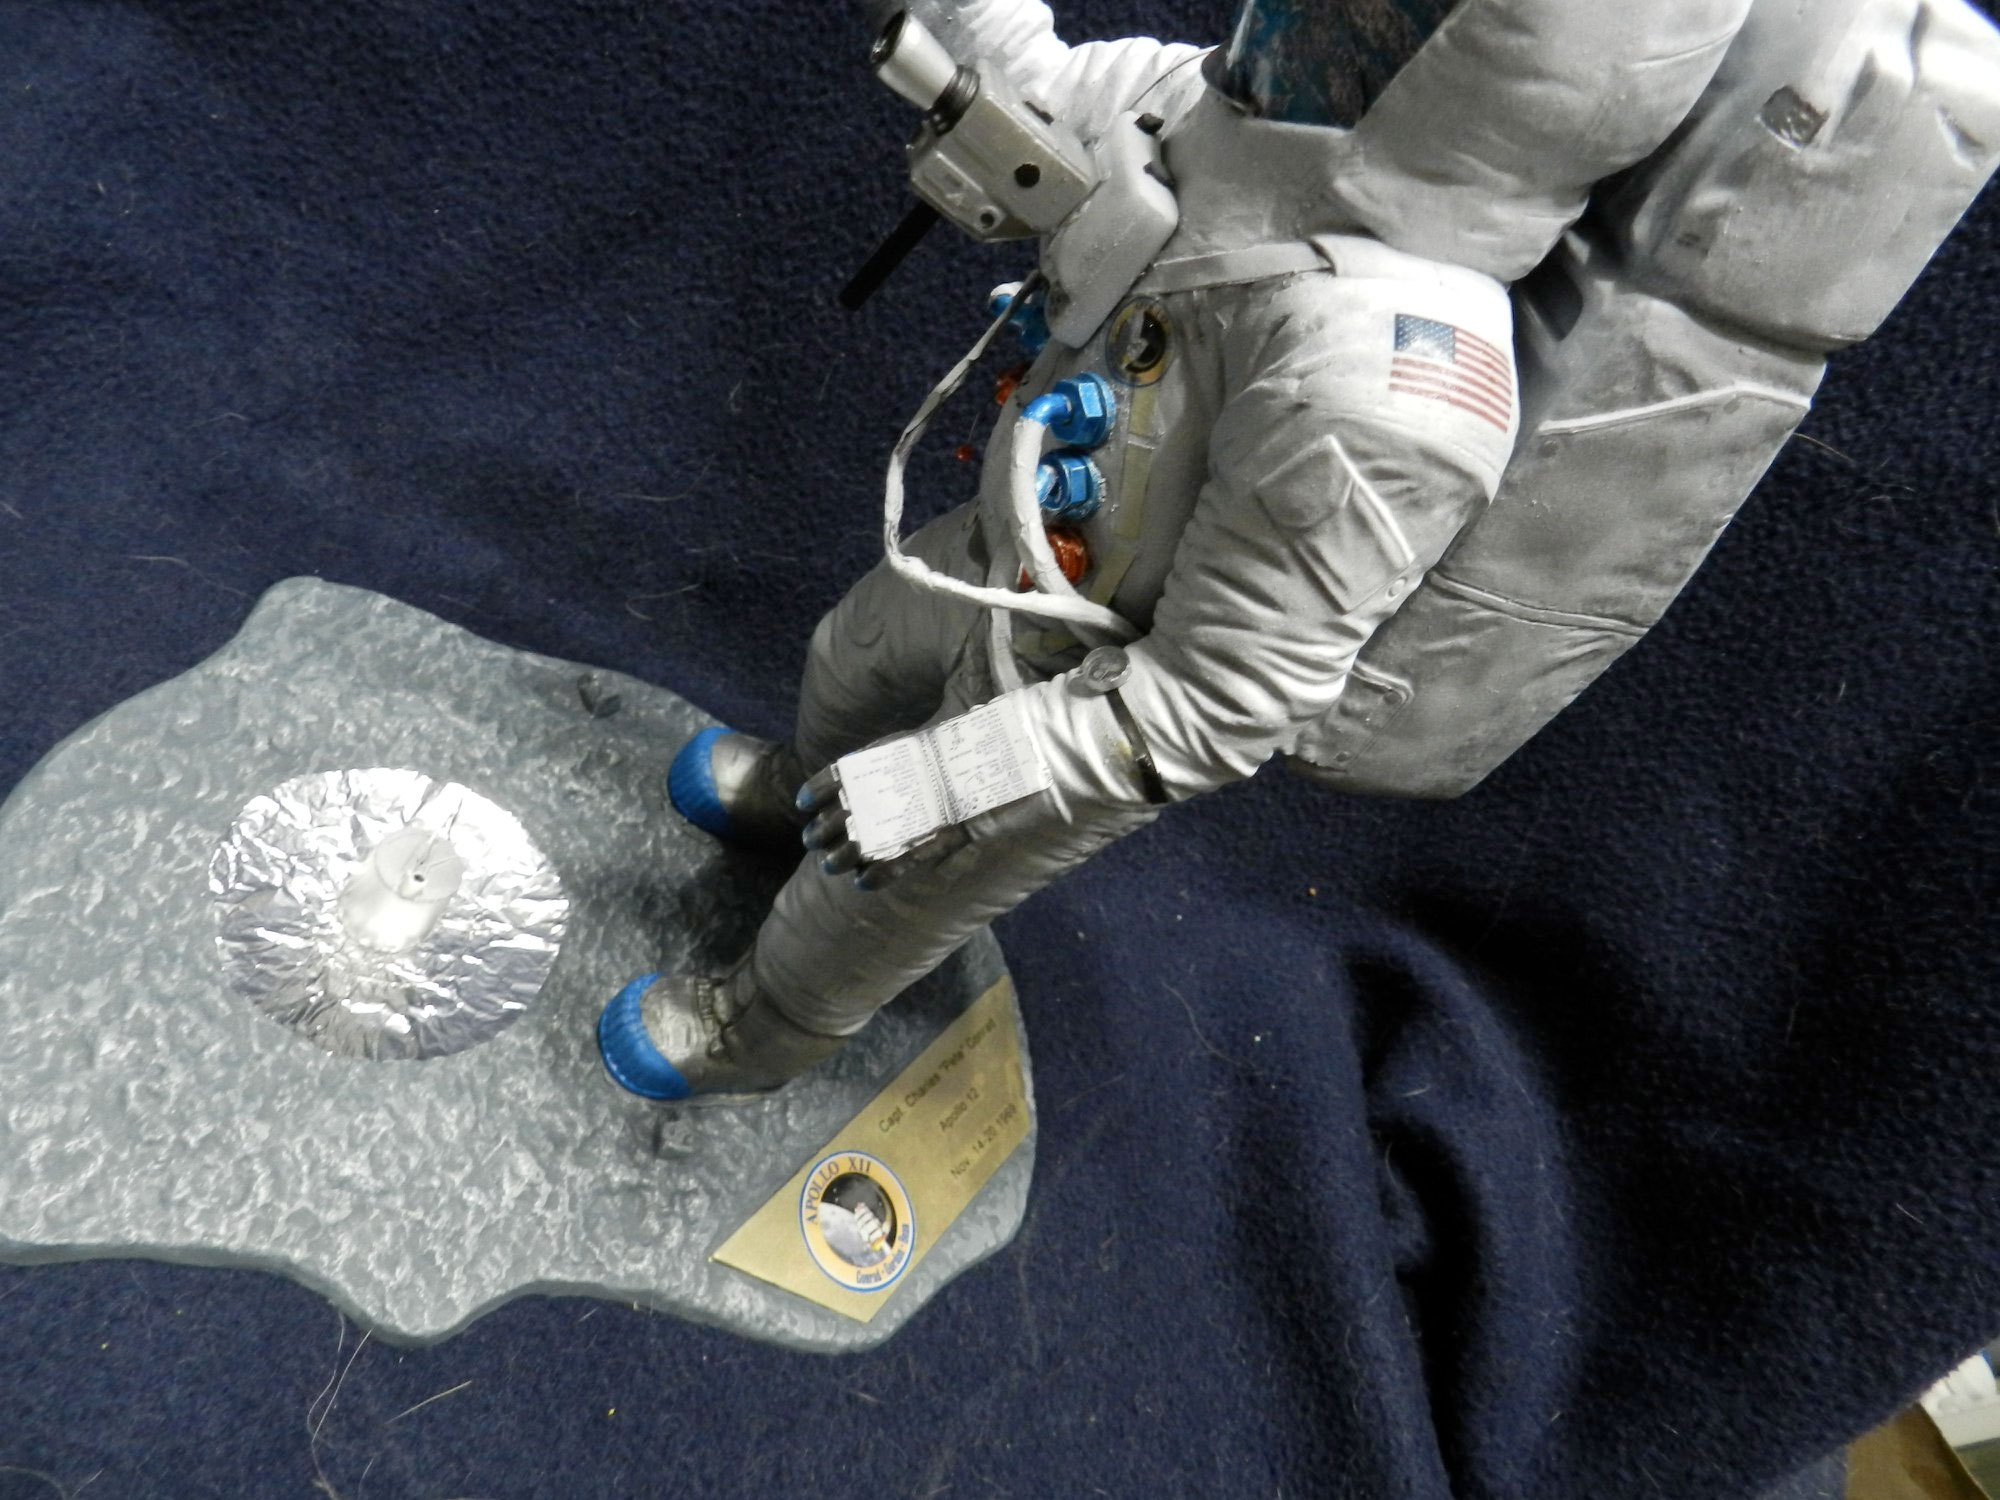
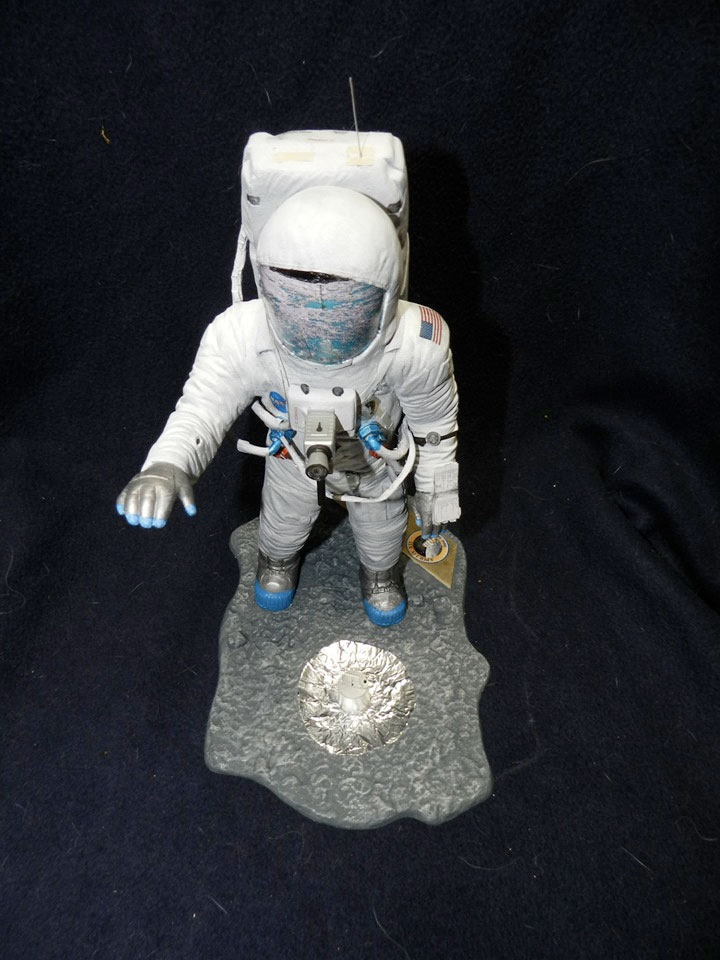
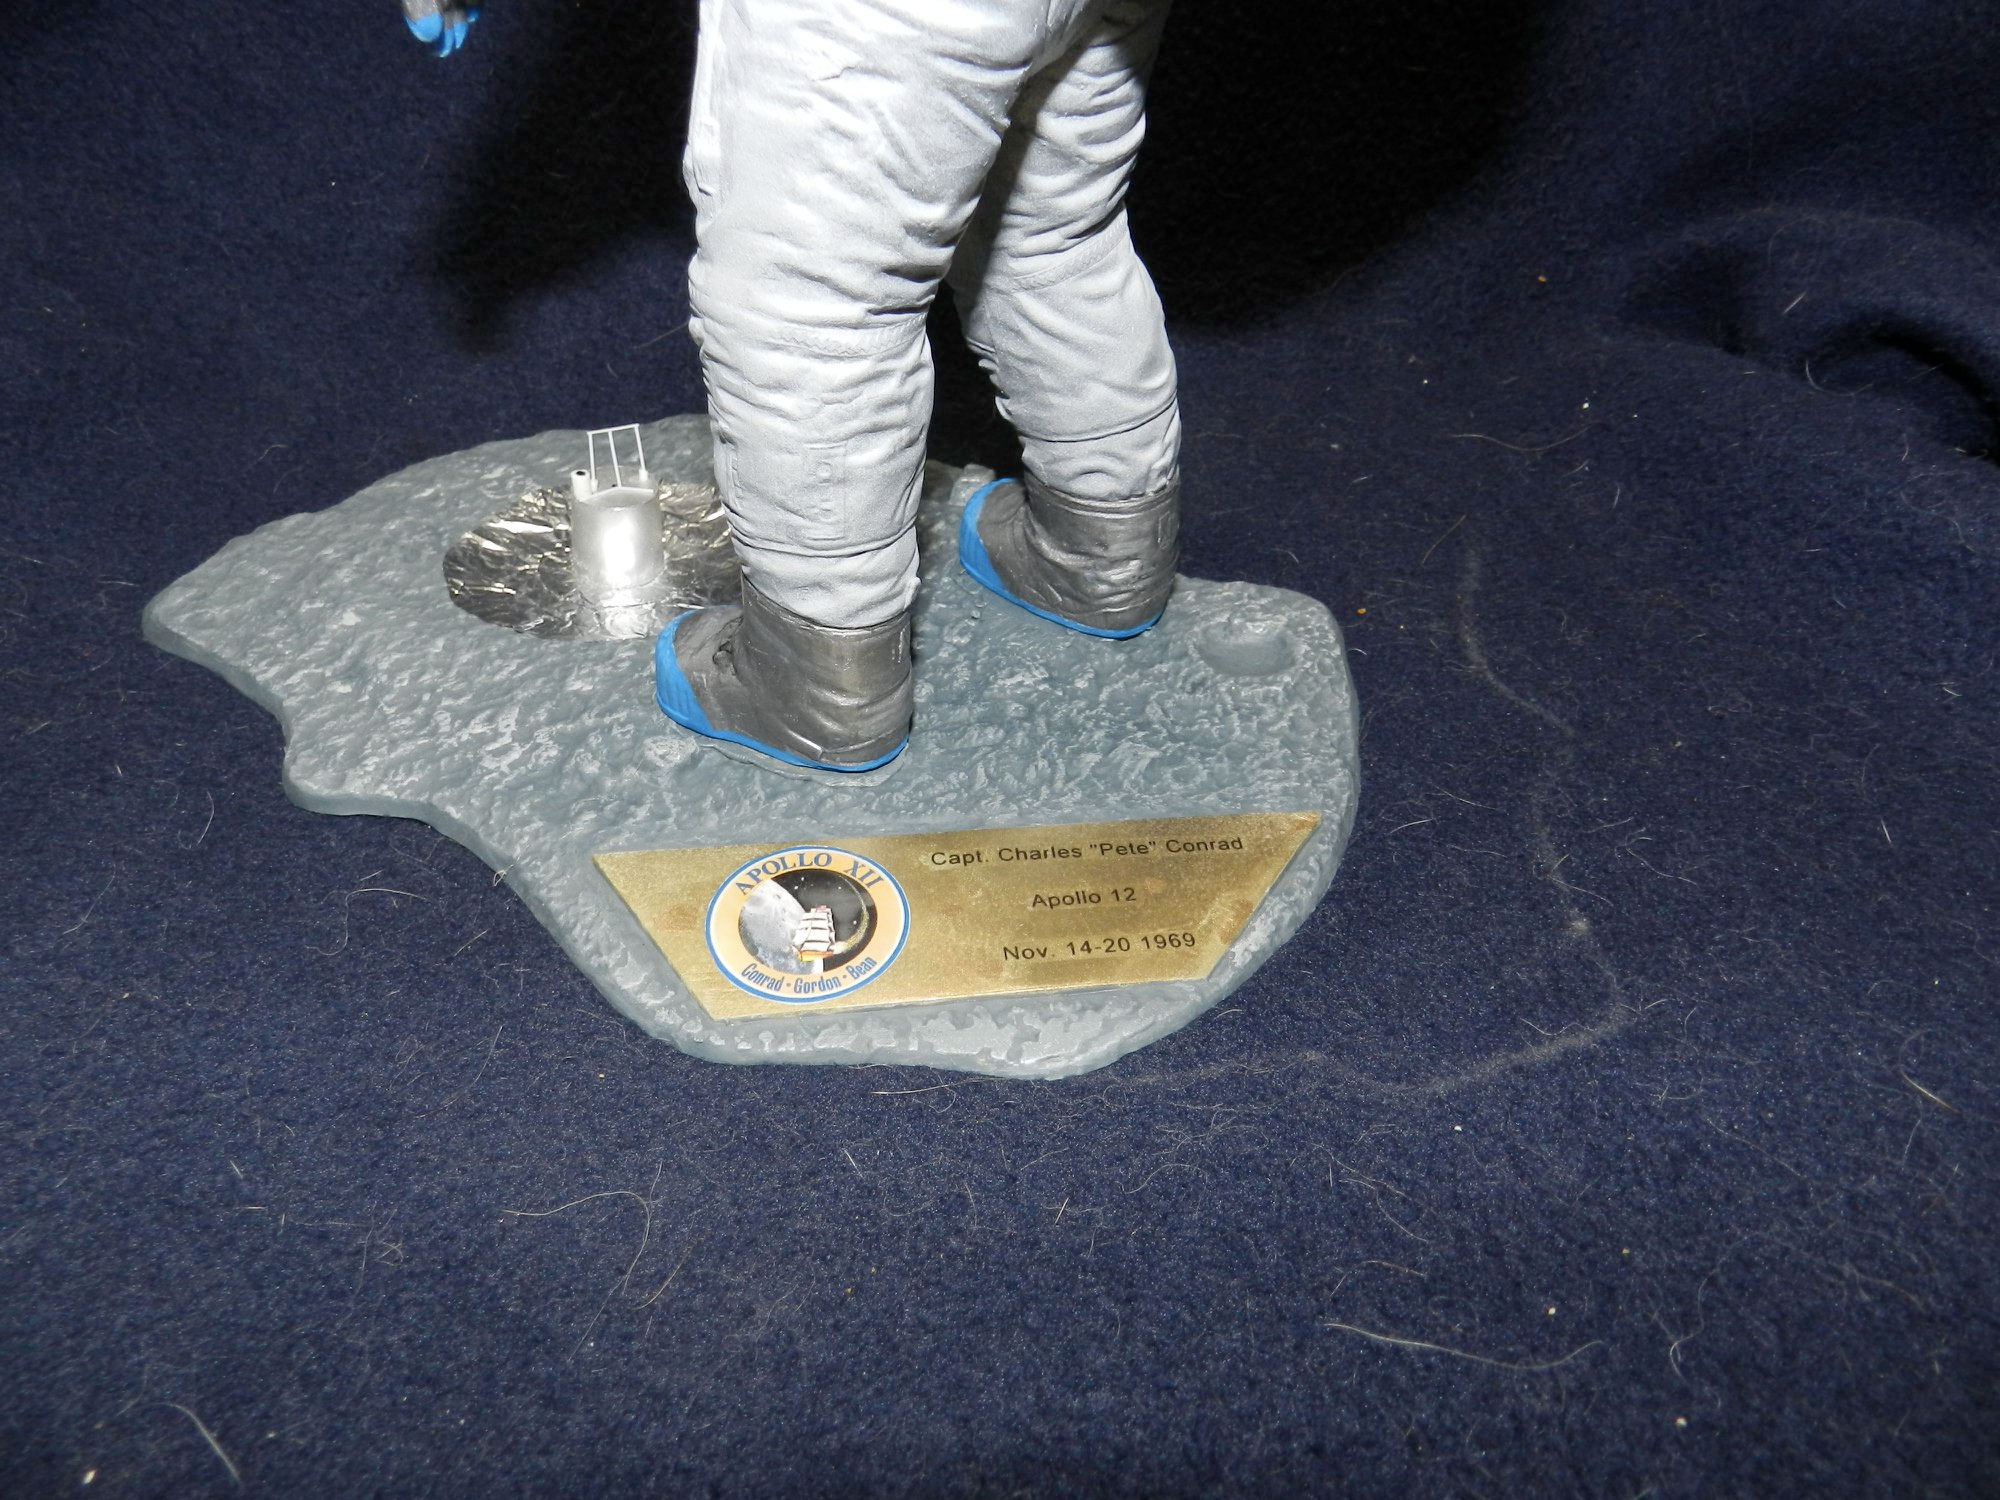
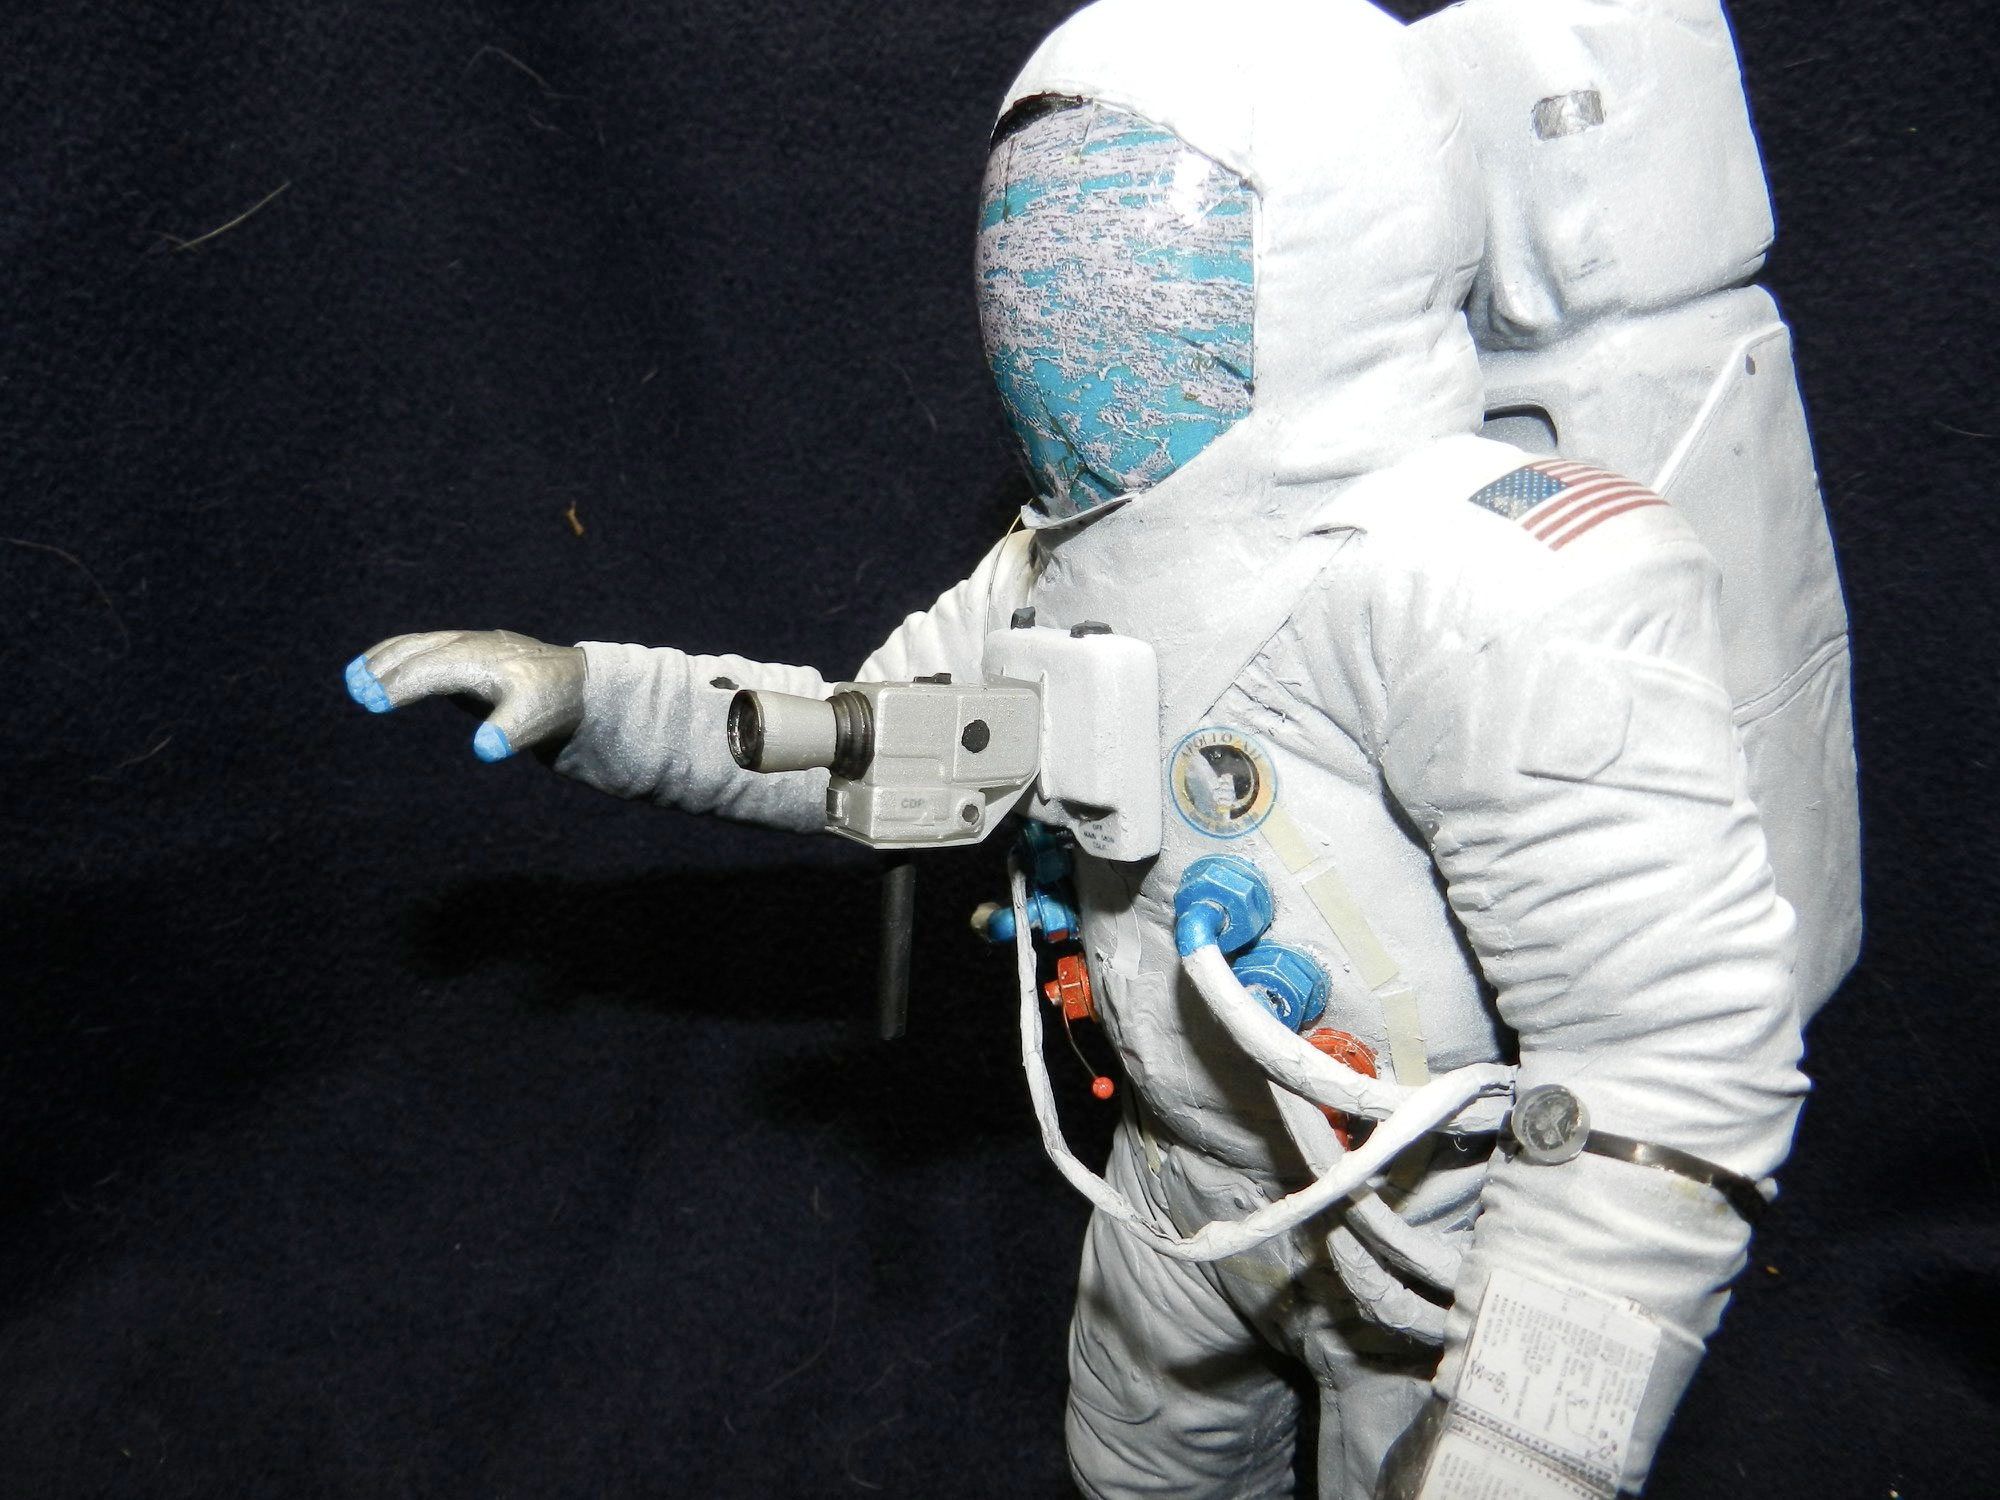
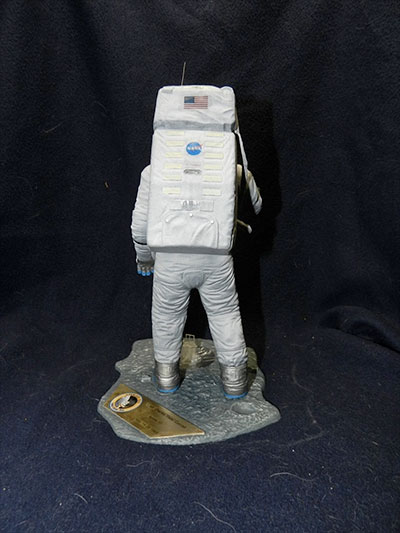
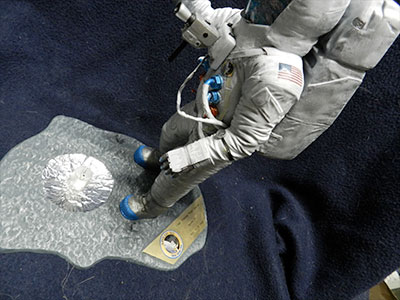
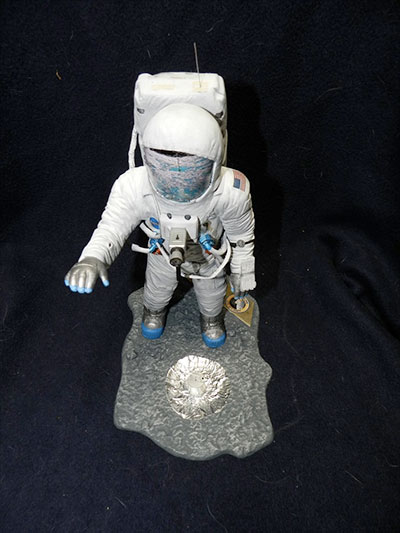
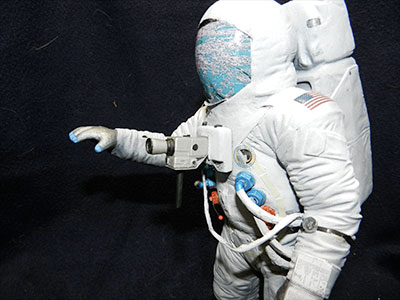
I used the 50th anniversary reissue to build up the Astronaut on the Moon kit as Apollo 12 CDR Pete Conrad during his photo documentation of the ALSEP. Corrected the umbilical connections with nylon nuts and washers for the suit connections, tissue wrapped electrical wire for the hoses. Reshaped the LEVA fisor with Apoxie Sculpt, added the chest chinch strap and pouch from wine bottle foil. Added velcro strips around the umbilical connectors and top of the OPS. The Hasselblad camera is a 3D test print from Glenn Johnson of RealSpace Models. The cuff checklist was built up from scaled images of the ALSEP pages printed on regular paper and trimmed to shape. The Omega watch was made from acrylic rod with a small print of a watch face on the underside to show through. On the base, I covered the landing pad area with a scratchbuilt Passive Seismic Experiment. The decals I printed with a color laser printer onto clear film, except the large Apollo 12 patch on the base which was from a set of Apollo patches I had previously done on white film. The visor refection is a mirror image decal of one of the ALSEP pan photos. Got a few wrinkles that I had to flatten out and had a kind of happy accident with a bit of color shift that I think hints at the color distortion caused by the gold on the visor. 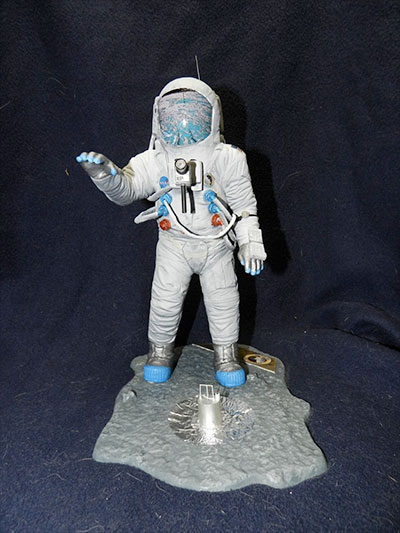 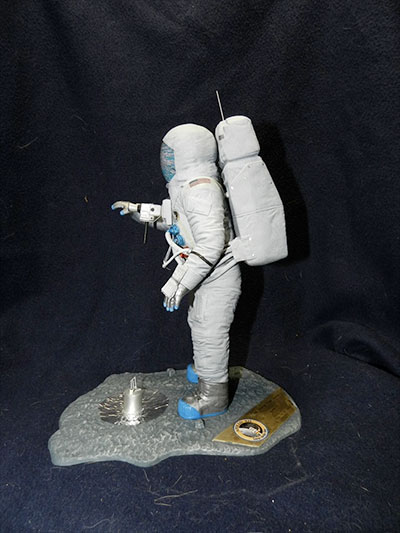


|
davidcwagner
Member Posts: 843
From: Albuquerque, New Mexico
Registered: Jan 2003
|
posted 10-20-2019 12:38 PM
Looks like you used this image as a model. Suggest top checklist page with the Playboy photo for maximum accuracy. |
rlobinske
Member Posts: 167
From: Crawfordville, FL
Registered: Oct 2014
|
posted 10-21-2019 09:05 AM
The photo used for the visor set the scene at the PSE and the cuff checklist is the ALSEP page. Neither of the Playboy images was on those pages. |
rlobinske
Member Posts: 167
From: Crawfordville, FL
Registered: Oct 2014
|
posted 12-06-2019 09:20 AM
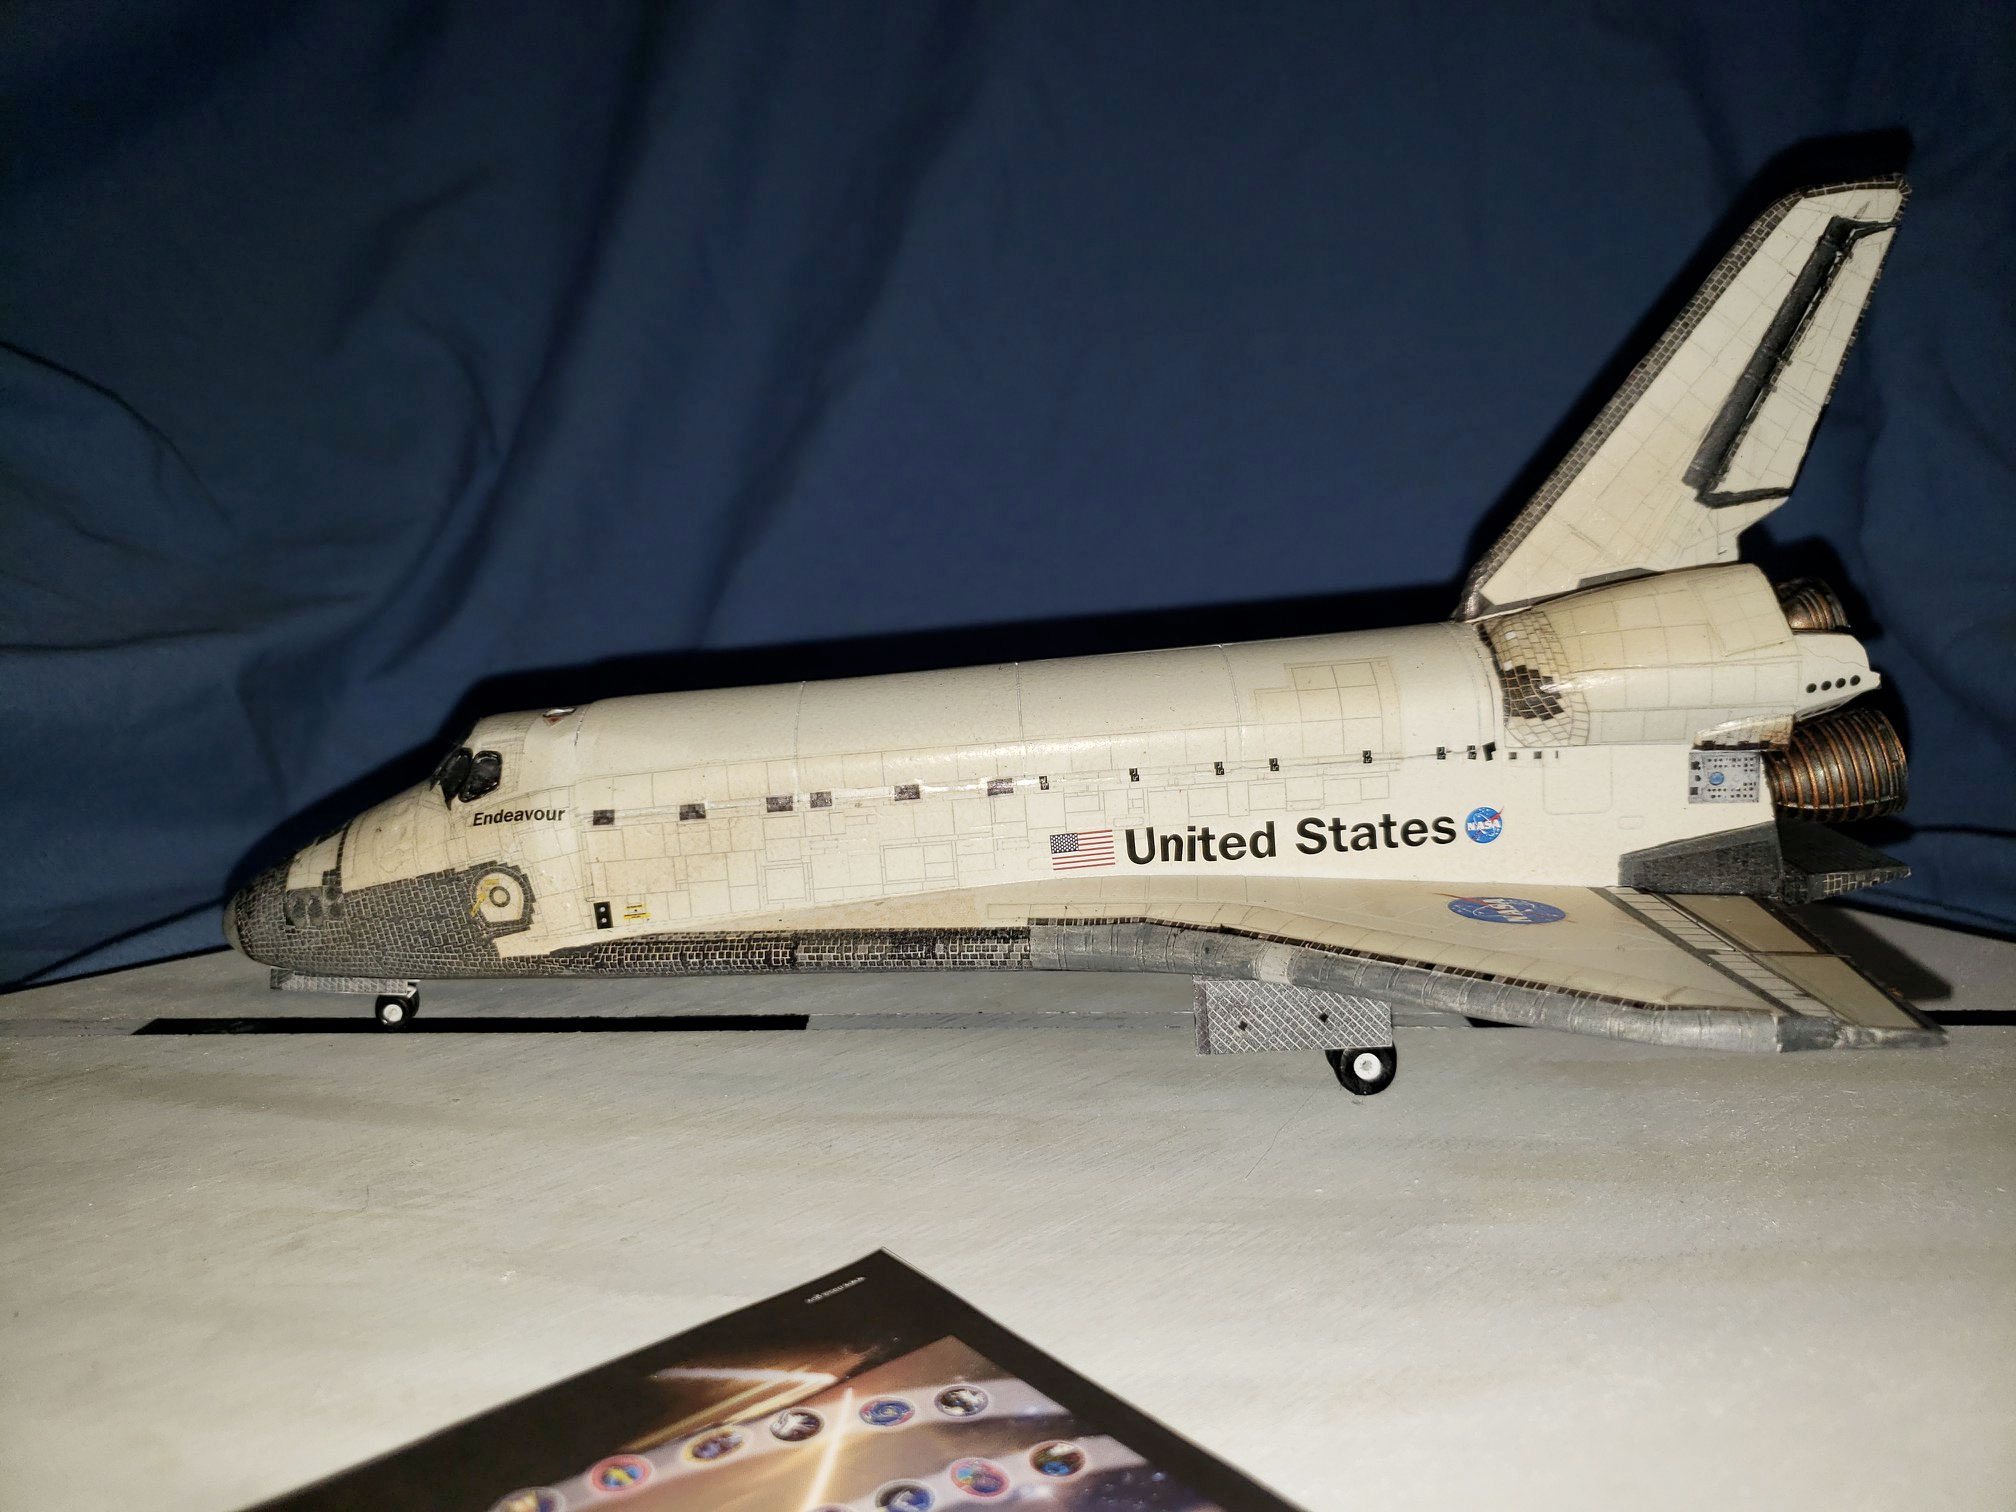
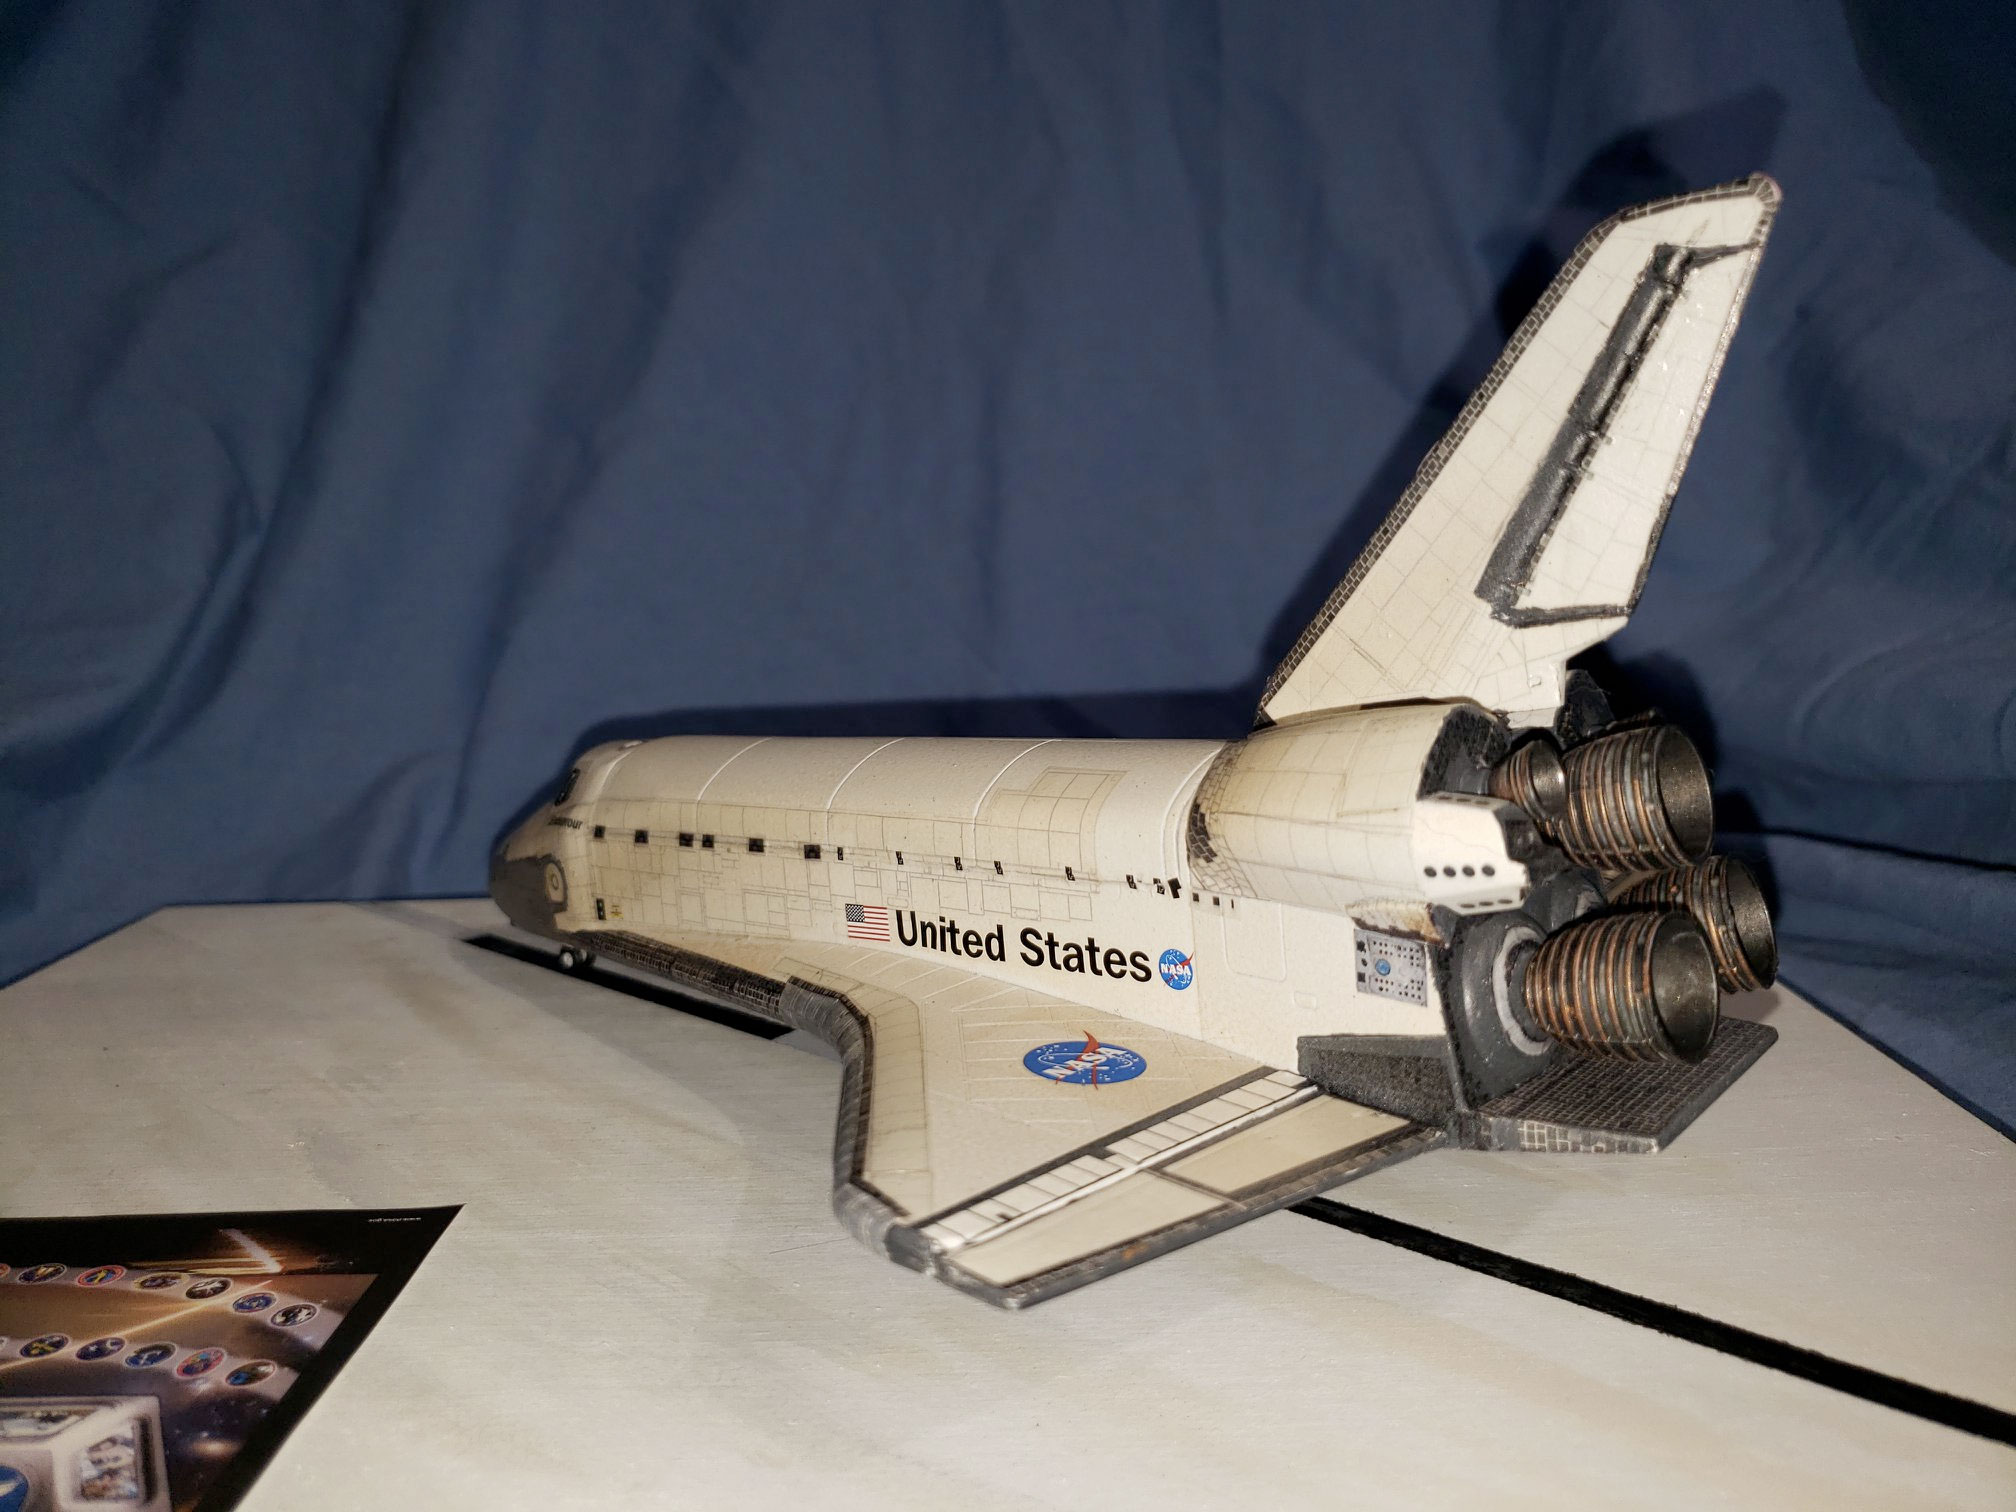
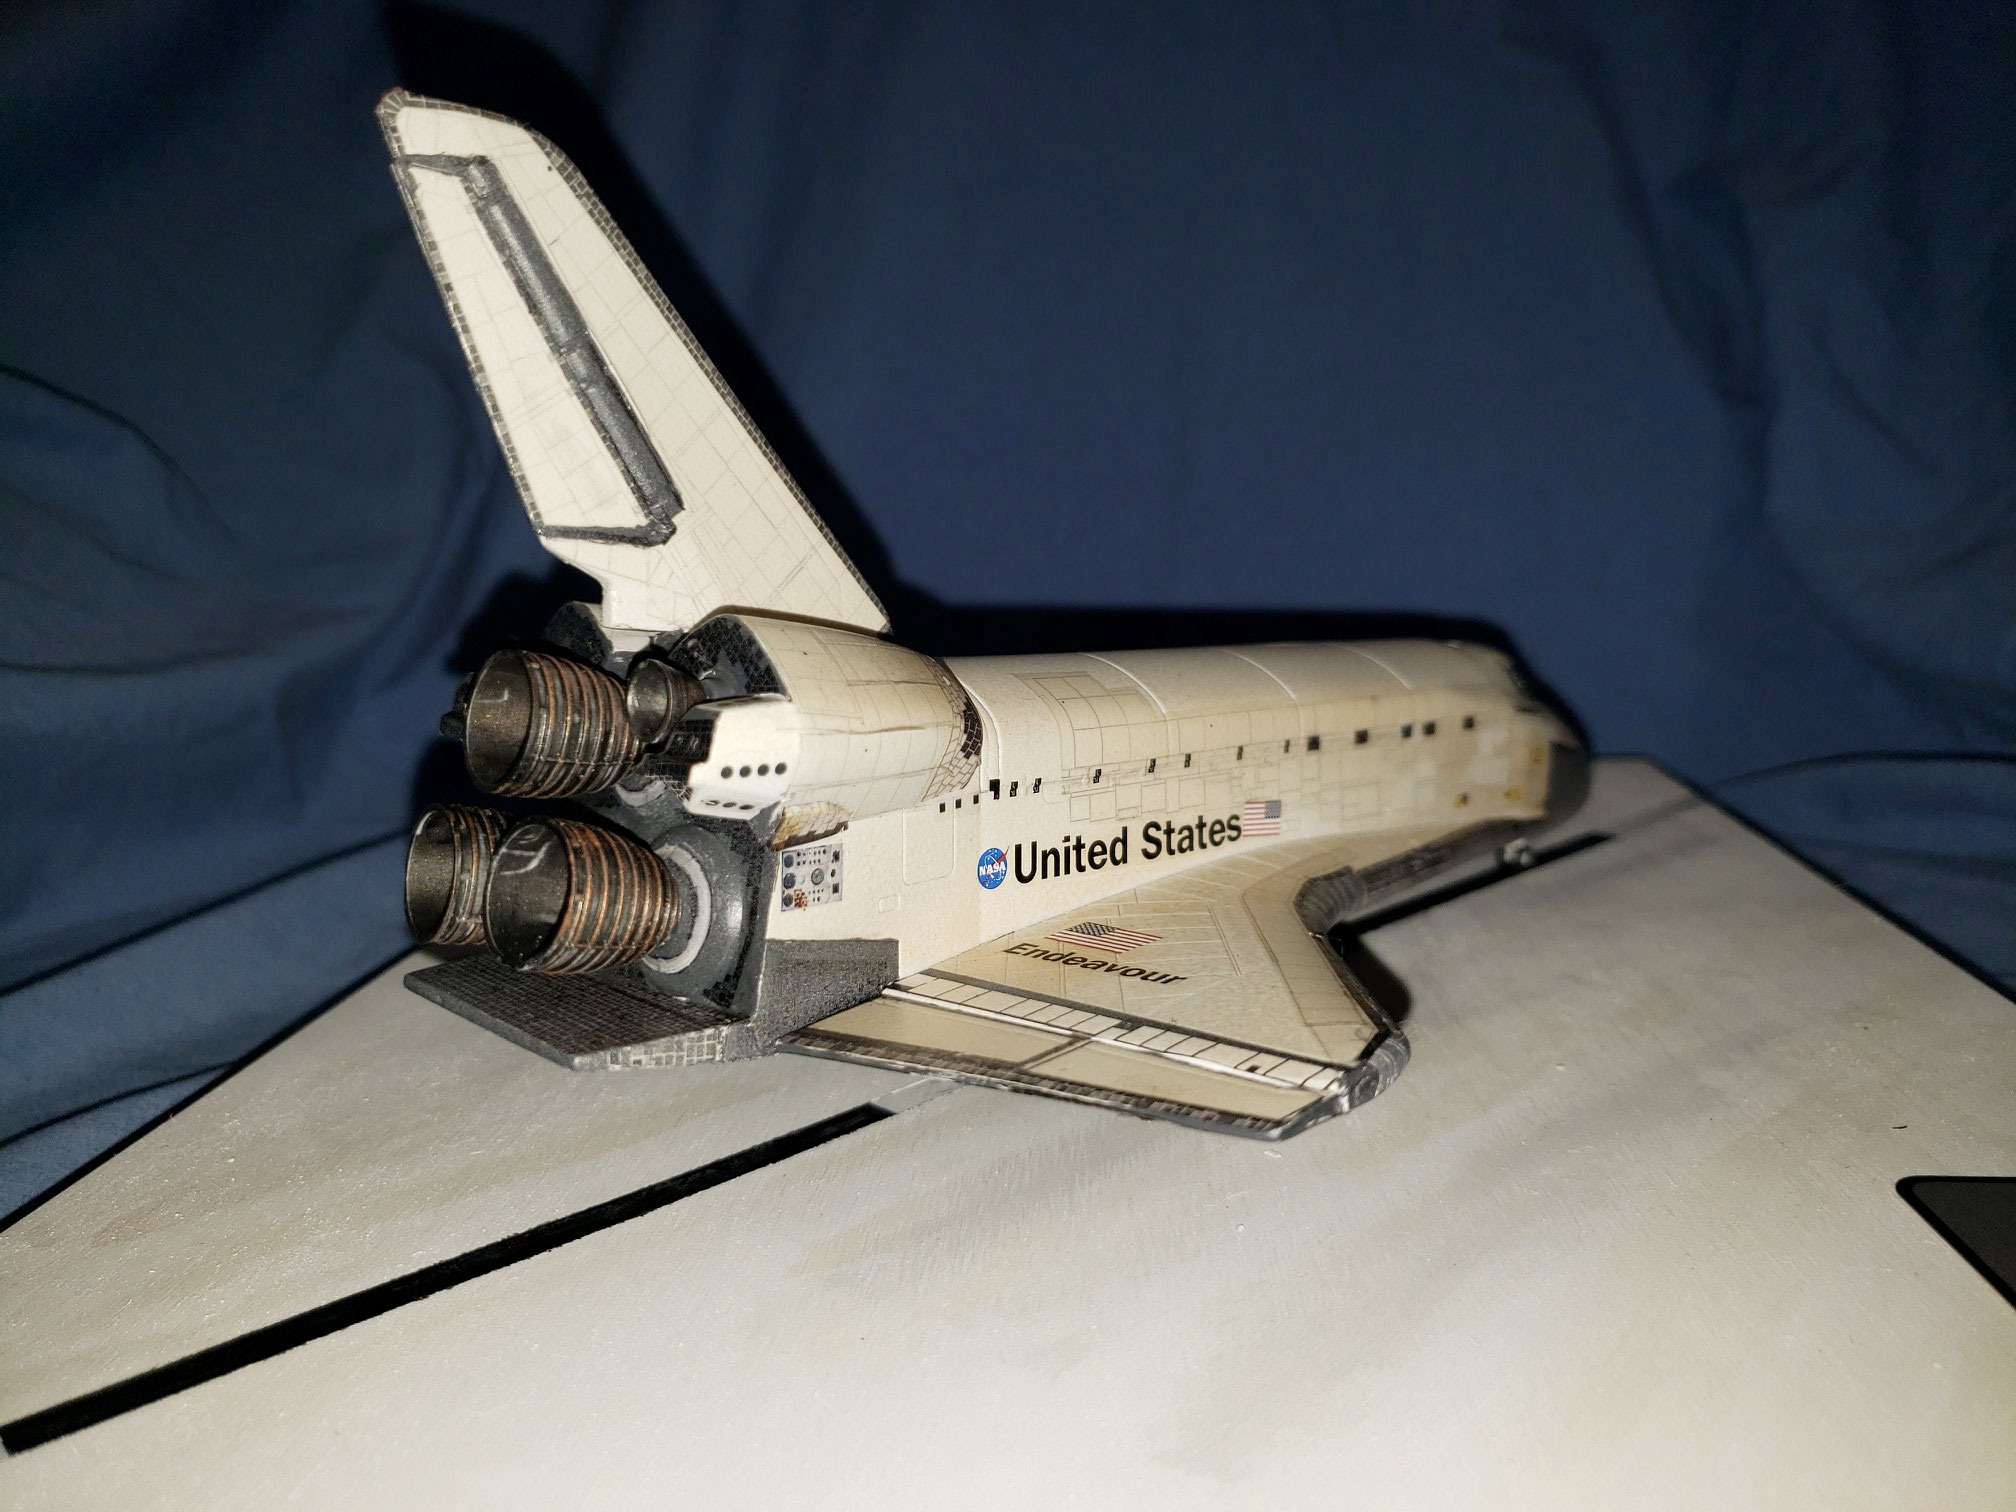
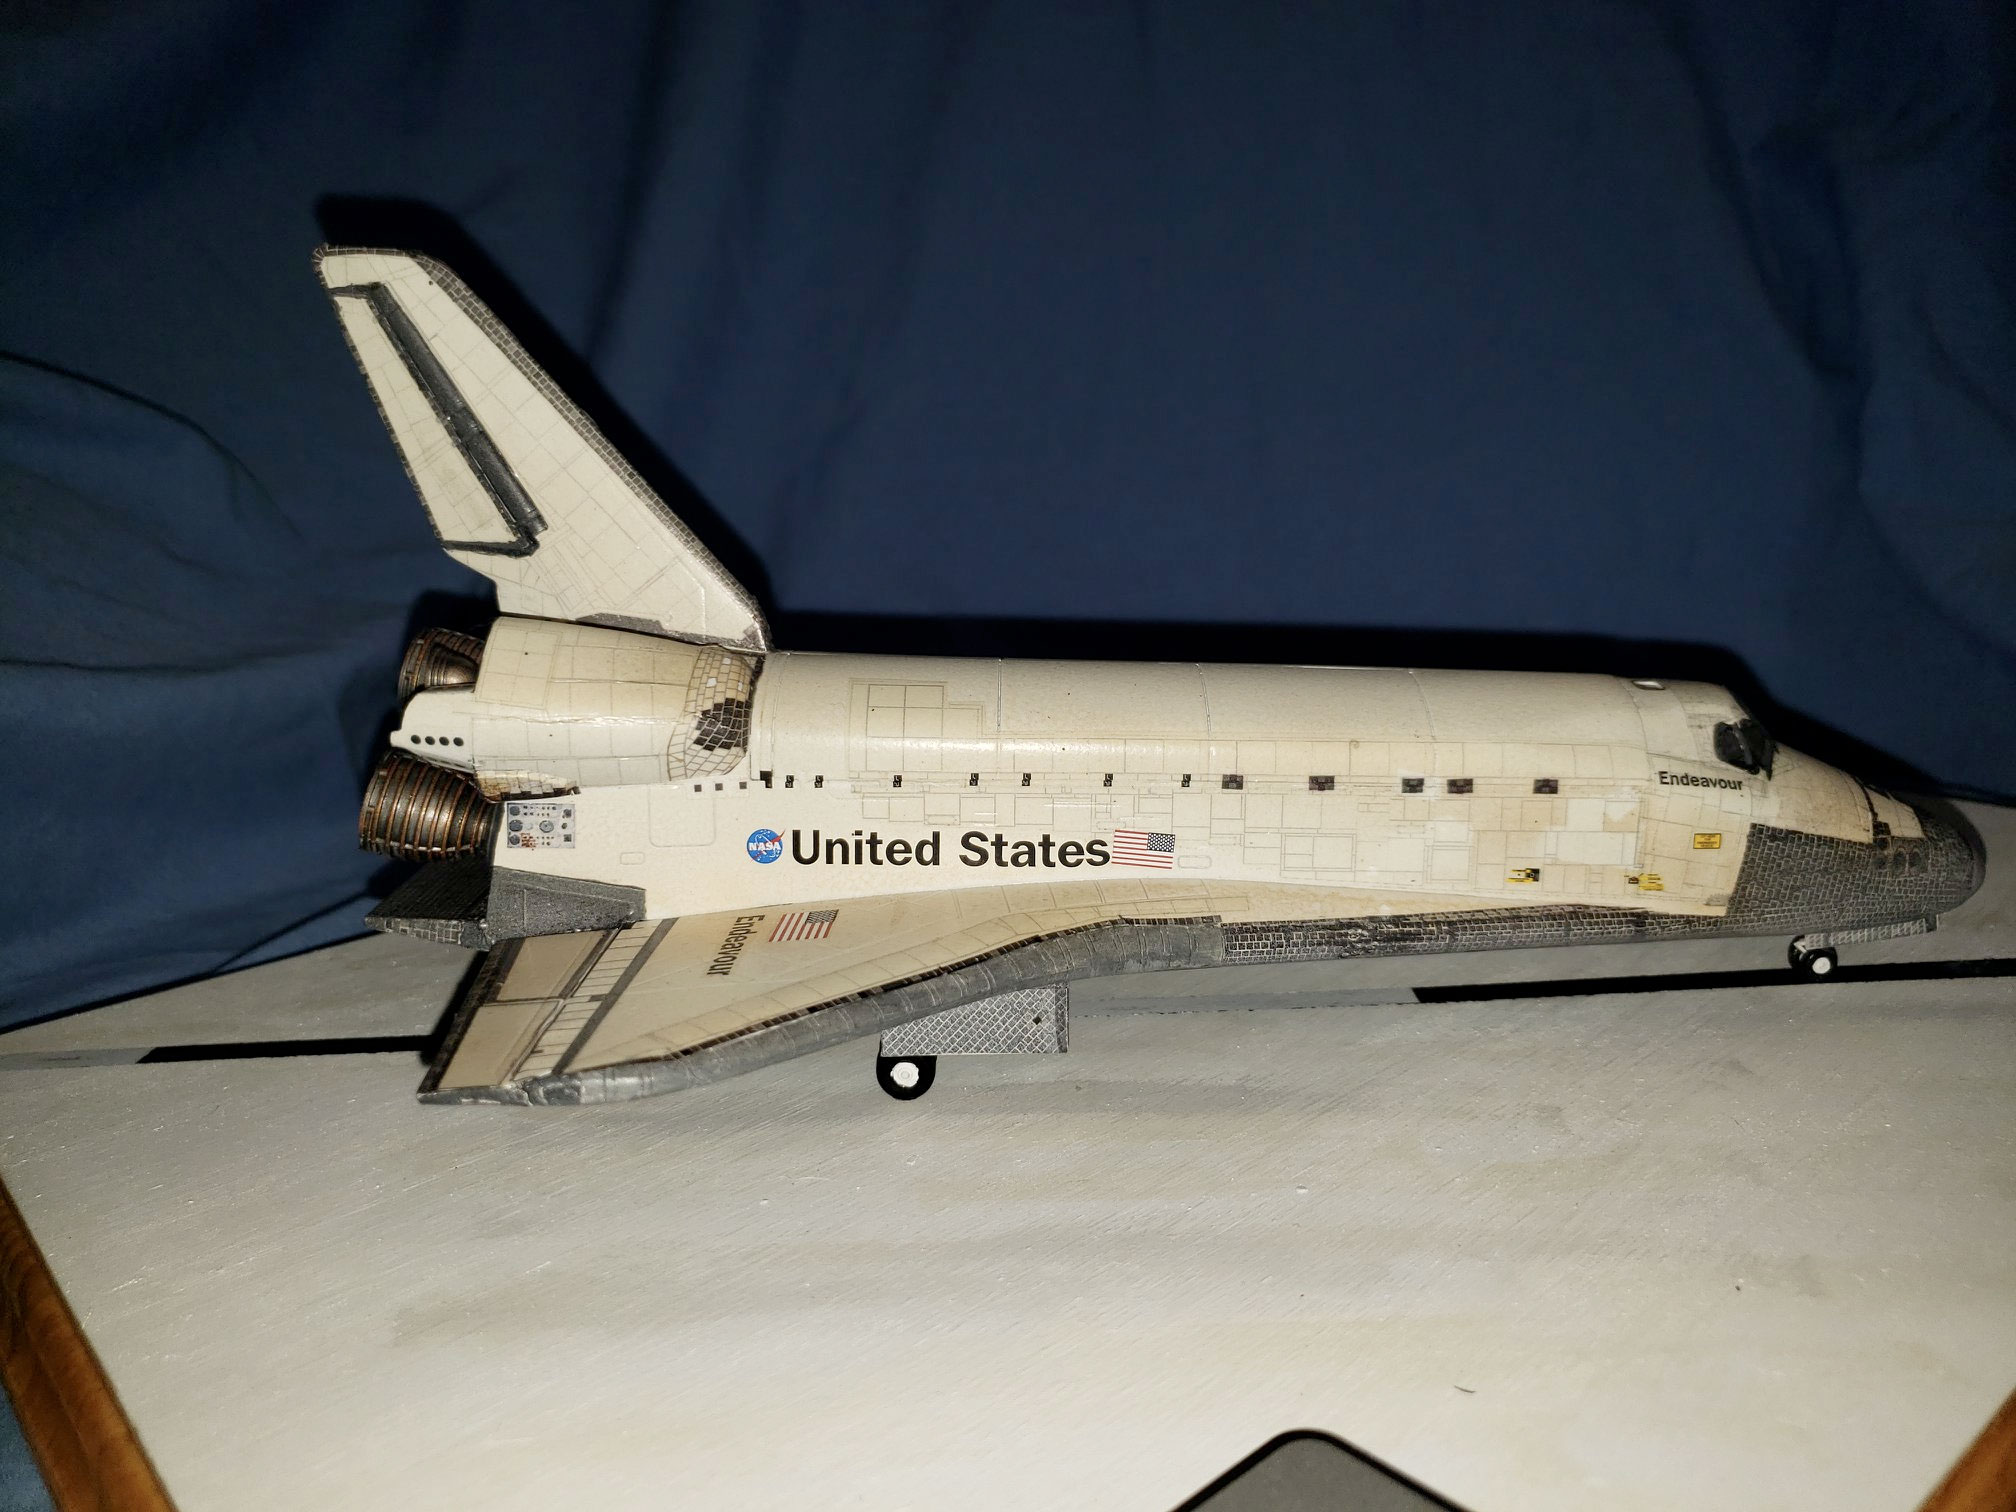
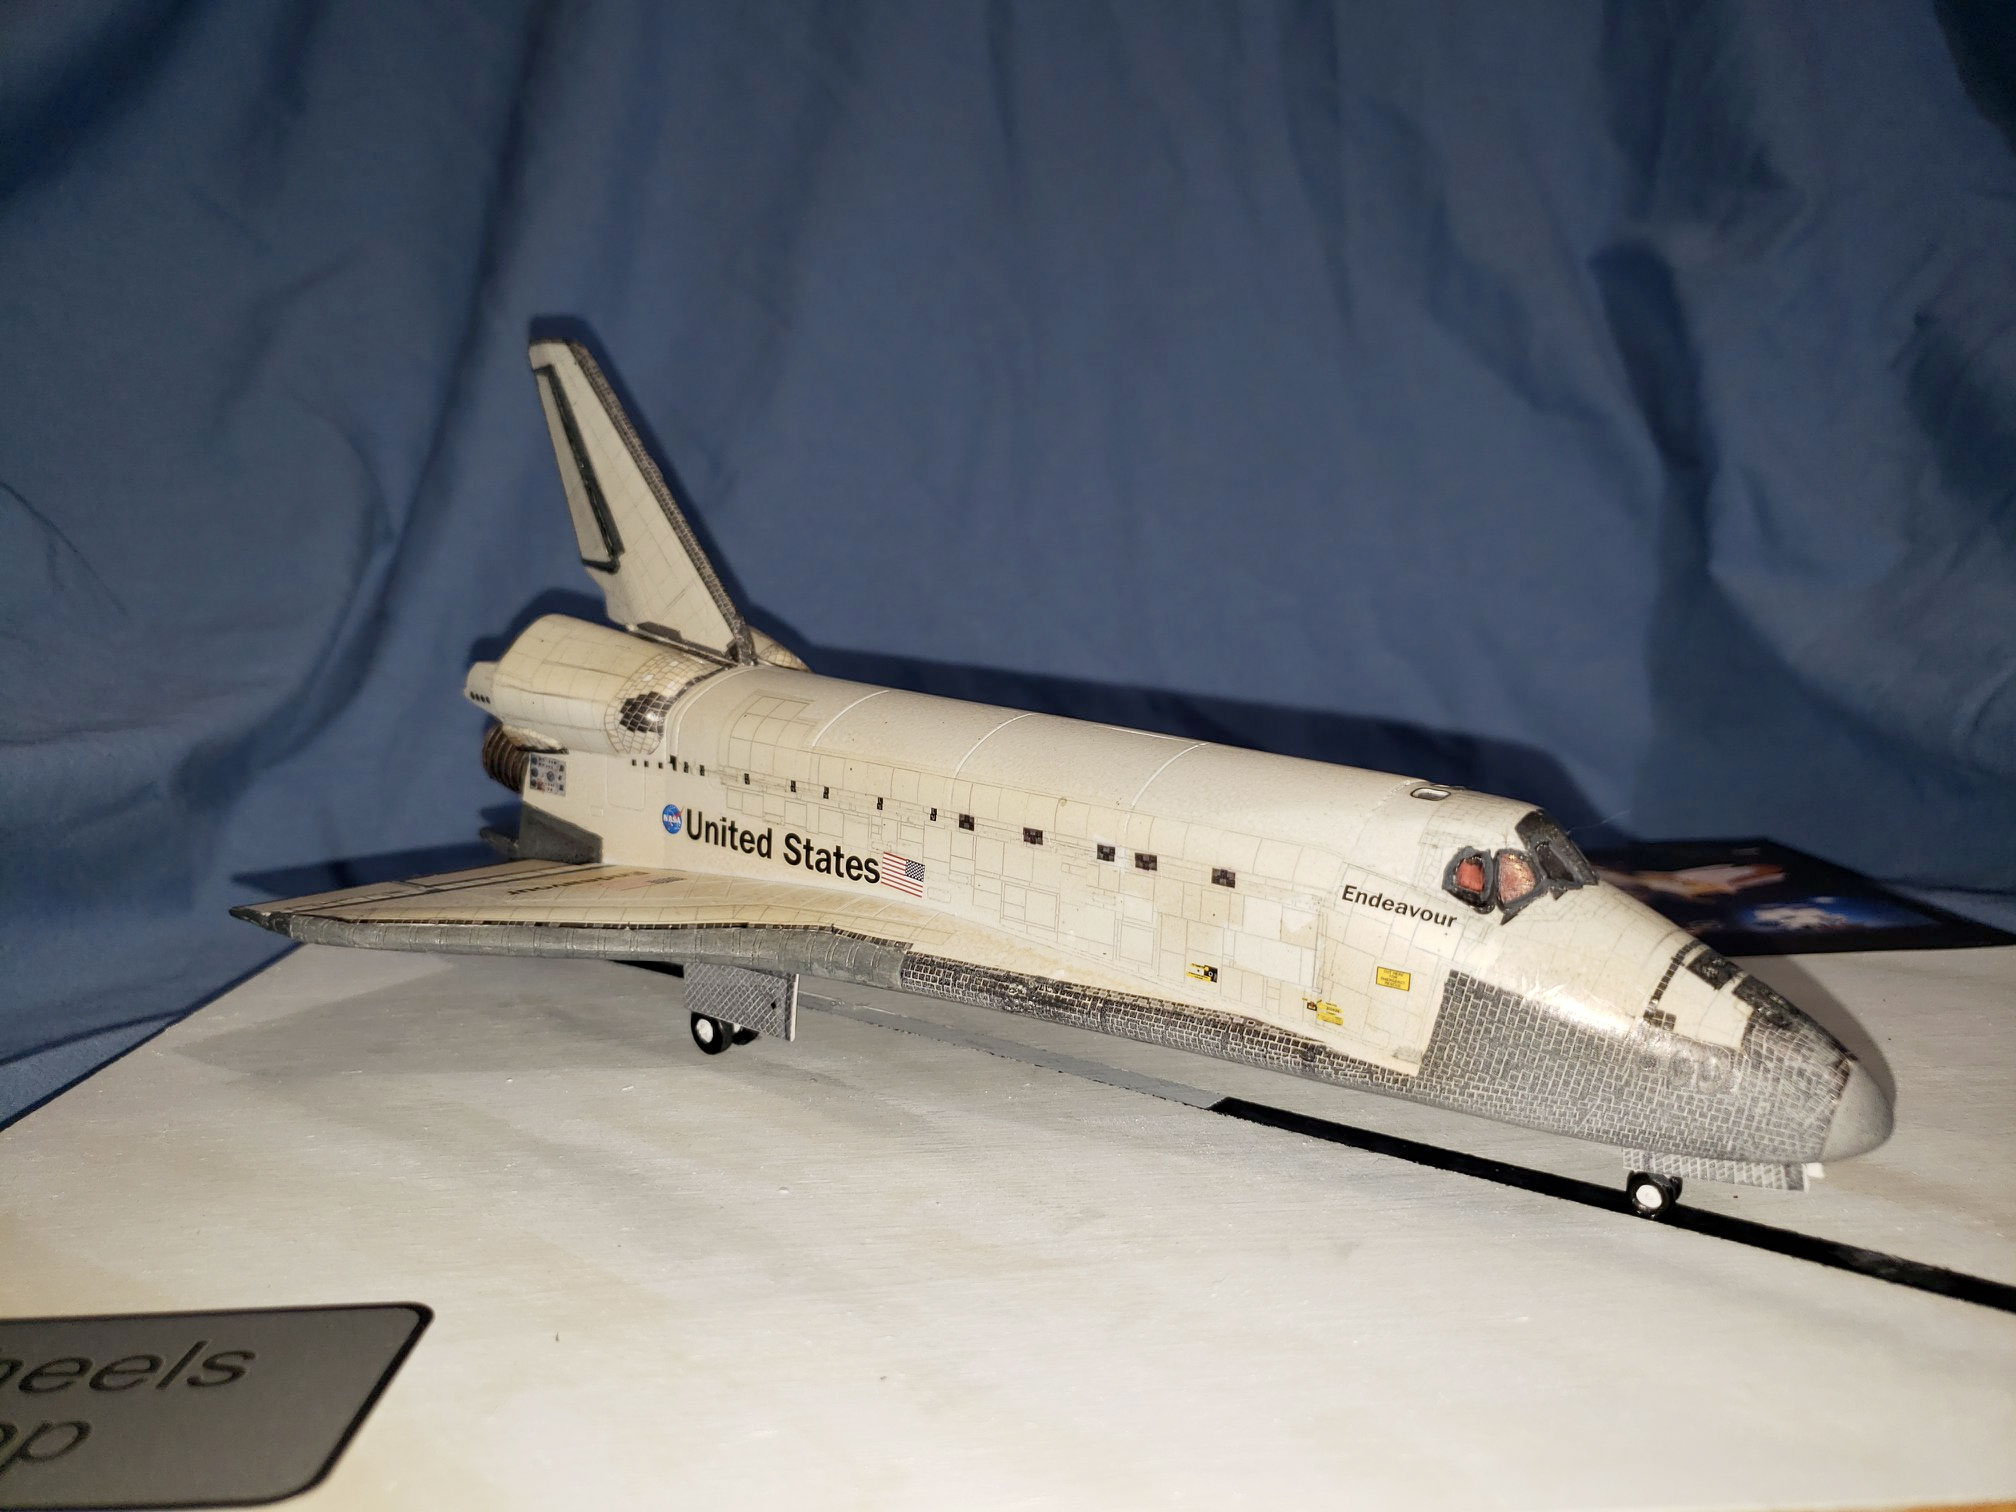
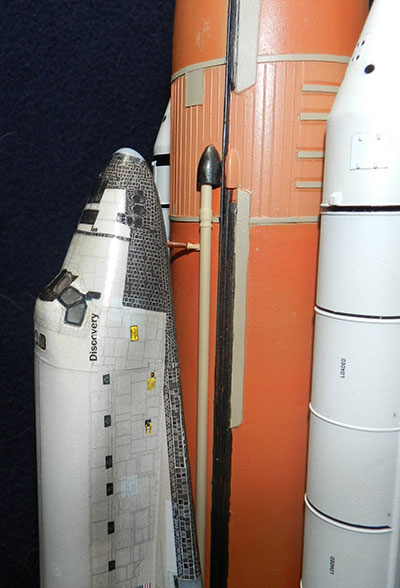
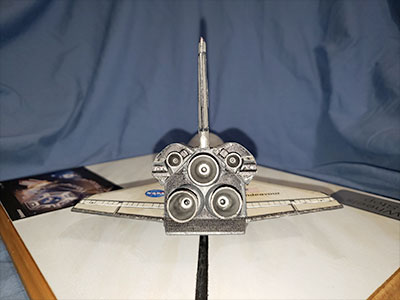
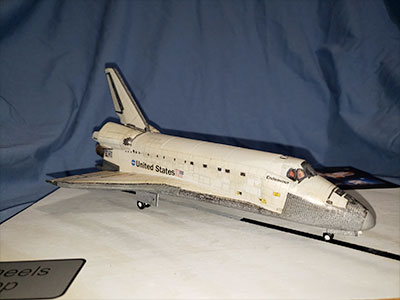
I built the Dragon 1/144 shuttle kit as Endeavour at the end of STS-134. I used the Lake County Spaceport wallpaper decals for tiles and blankets and the RealSpace Models markings decals. The barely visible crew members are from Max Grueter's Shapeways store. Yes, I hate it when I see glitched decals after I seal them. Oh well.  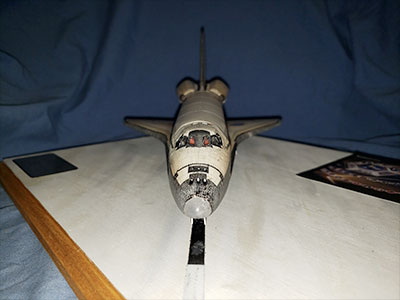


|
rlobinske
Member Posts: 167
From: Crawfordville, FL
Registered: Oct 2014
|
posted 01-23-2020 07:47 AM
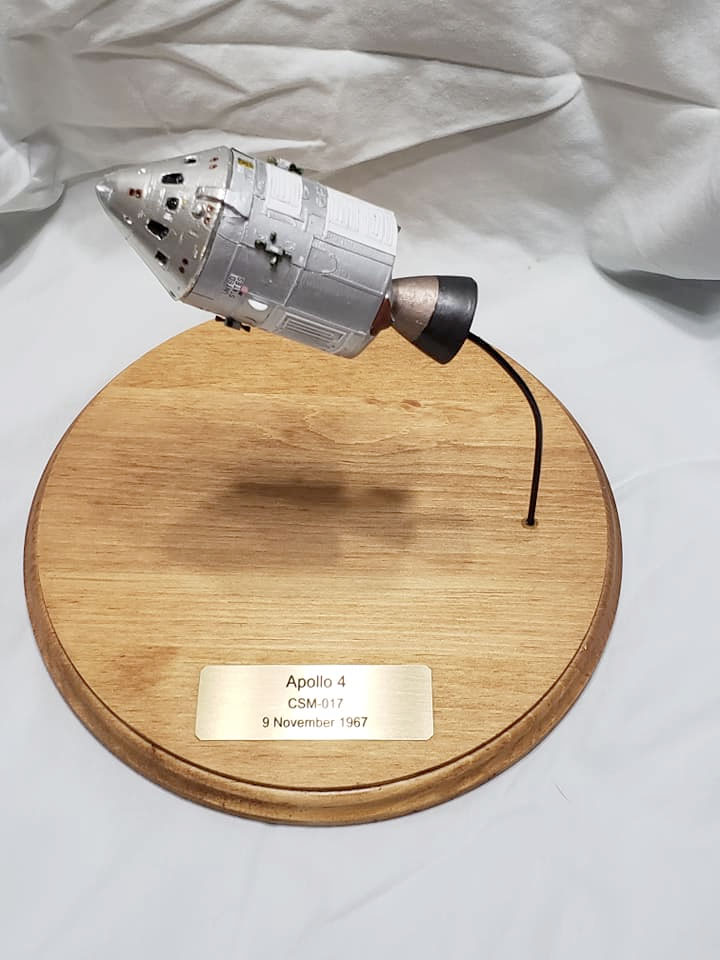
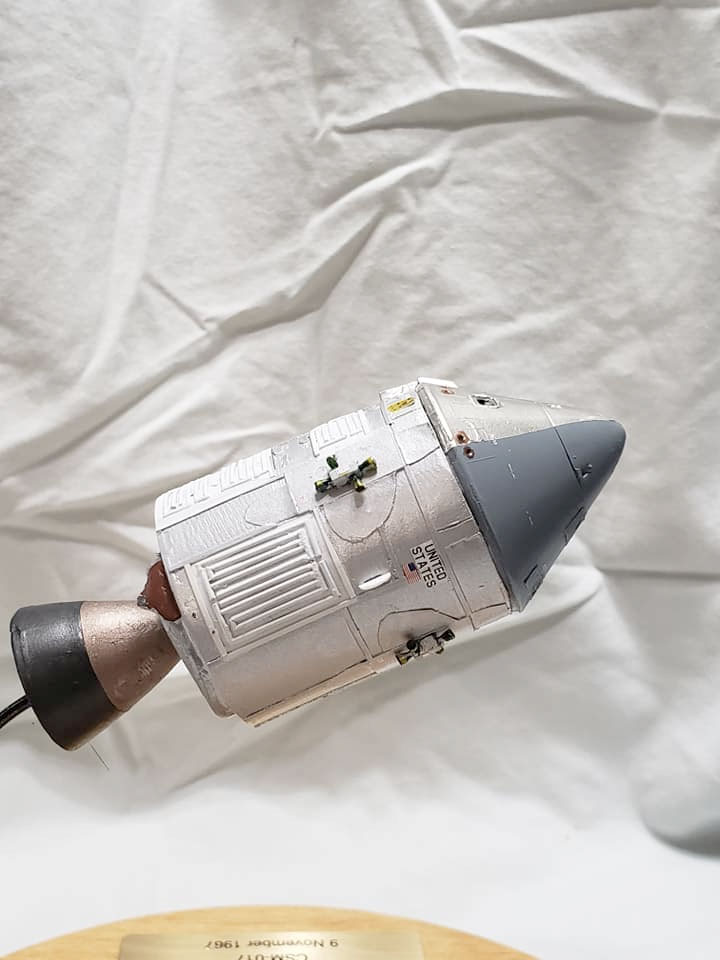
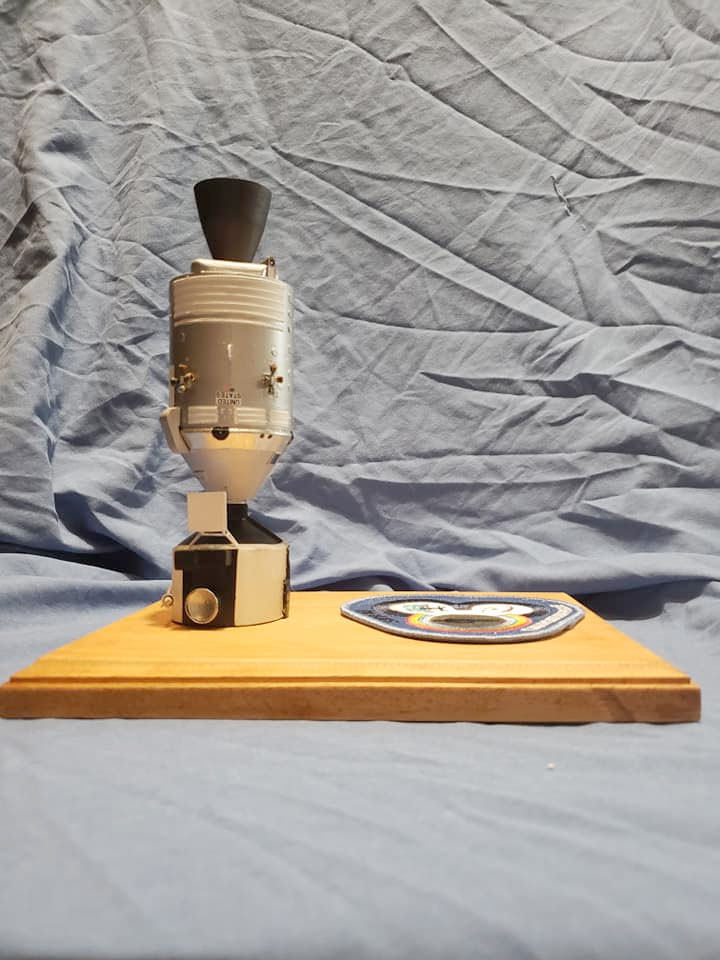
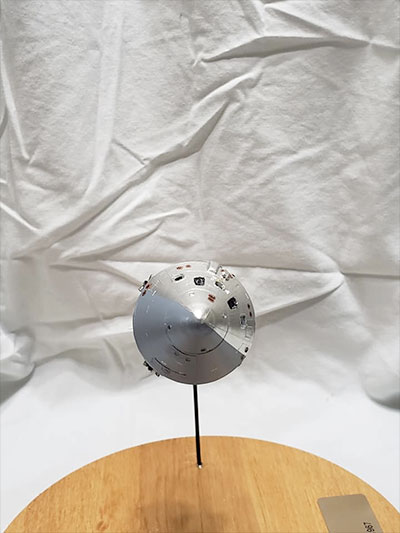
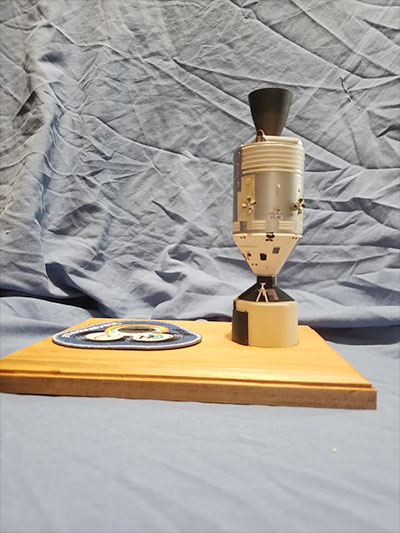
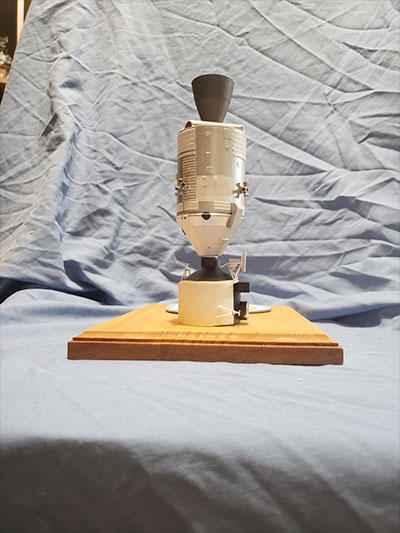
Apollo 4 CSM-017 converted from the classic Revell 1/96 kit. Stripped the surface detail from the service module and replaced with plastic stock and paper. Built up the aft heat shield with styrene sheet and Apoxie Sculpt. Reshaped the SPS engine bell. Added the navigation optics and +z panels to the command module, plus the lift ring housing. The mylar finish half of CM done with Bare Metal Foil while the gray side is Tamiya Haze Gray. The SM is Tamiya flat white and flat aluminum. The SPS engine bell was a custom mix of black and metallic gray for one half and metallic gray/copper on the other.  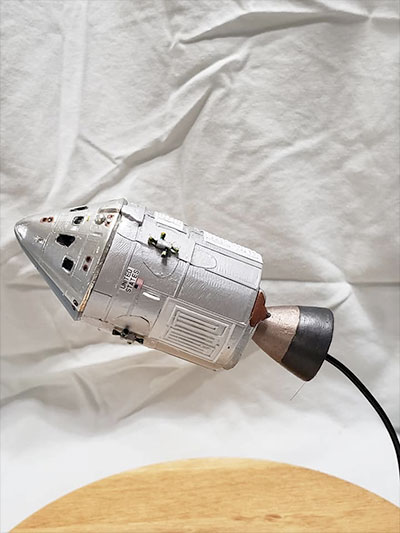


|
rlobinske
Member Posts: 167
From: Crawfordville, FL
Registered: Oct 2014
|
posted 05-04-2020 09:39 AM
I modified the Monogram 1/48 First Lunar Landing to Apollo 15 Eagle with Dave Scott at the top hatch for the Standup EVA. Scratchbuilt most of the new details. Wheels for the lunar rover from Shapeways. Dave Scott figure from Max Grueter's Shapeways with repositioned arms and a 3D printed Hasselblad printed by Glenn Johnson as a test article. Kit base was reworked with Apoxie Sculpt to remove molded shadows and give new texture. 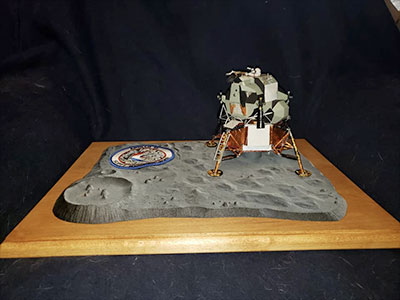 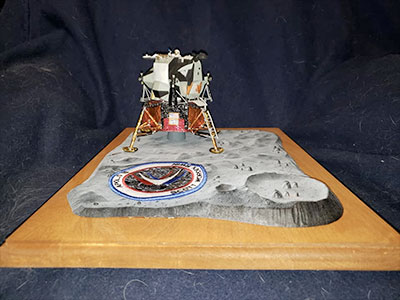

|
rlobinske
Member Posts: 167
From: Crawfordville, FL
Registered: Oct 2014
|
posted 10-04-2020 12:00 PM
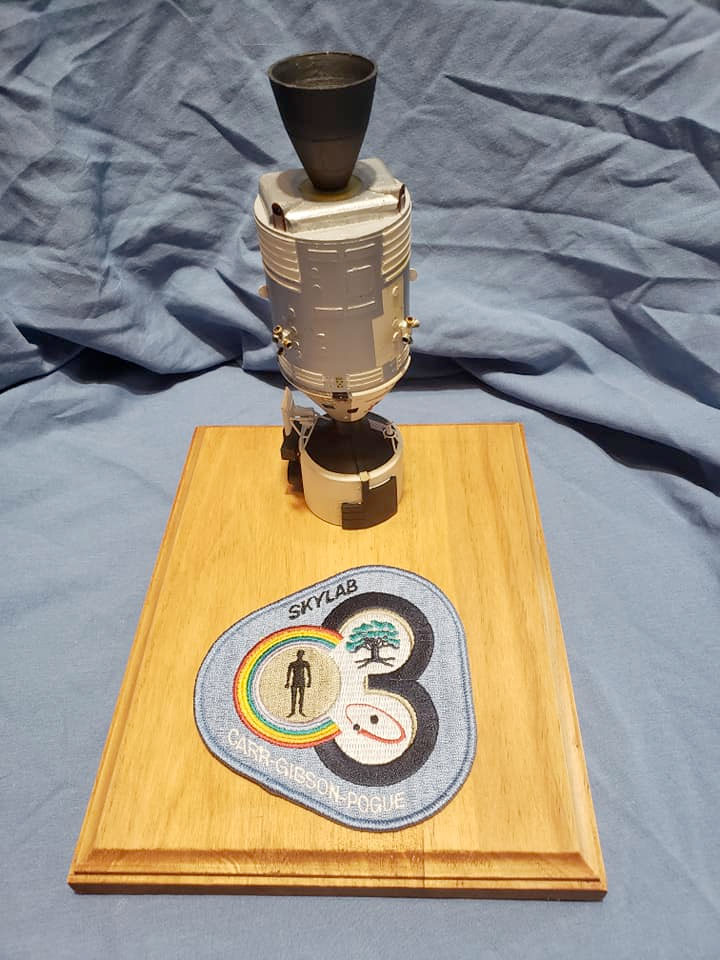
Skylab 4 command and service module (CSM) with multiple docking adapter (MDA). I used the Realspace Models 1/72 scale resin CSM kit. I modified the SM surface details to match the Skylab configuration and removed the steerable high gain antenna. The Space Model Systems decals were used. I bought it secondhand with some of the RCS nozzles missing, which I replaced with shaped plastic rod. The Multiple Docking Adapter was made from 1.5" ID PVC pipe as the core shape. The forward cone is sheet styrene. The docking collar is 9/16" brass tubing that runs the full height of the unit. A half-inch of the end was filled with Aves putty and a 1/8" brass rod run through that was long enough to go 1/2" into a base and 3/8" into the CSM as a support. The remaining details were built up from plastic stock. The Space Model Decals set included LM markings, so I used two of the docking targets as templates to cut sheet and strip styrene and then attached the decals. The base is basswood with a simple stain and a patch from AB Emblem.  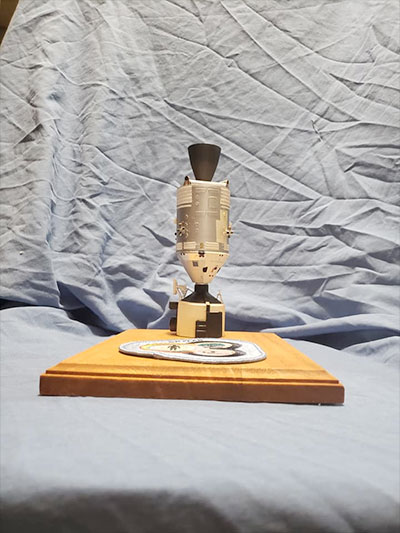

|
rlobinske
Member Posts: 167
From: Crawfordville, FL
Registered: Oct 2014
|
posted 10-04-2020 12:01 PM
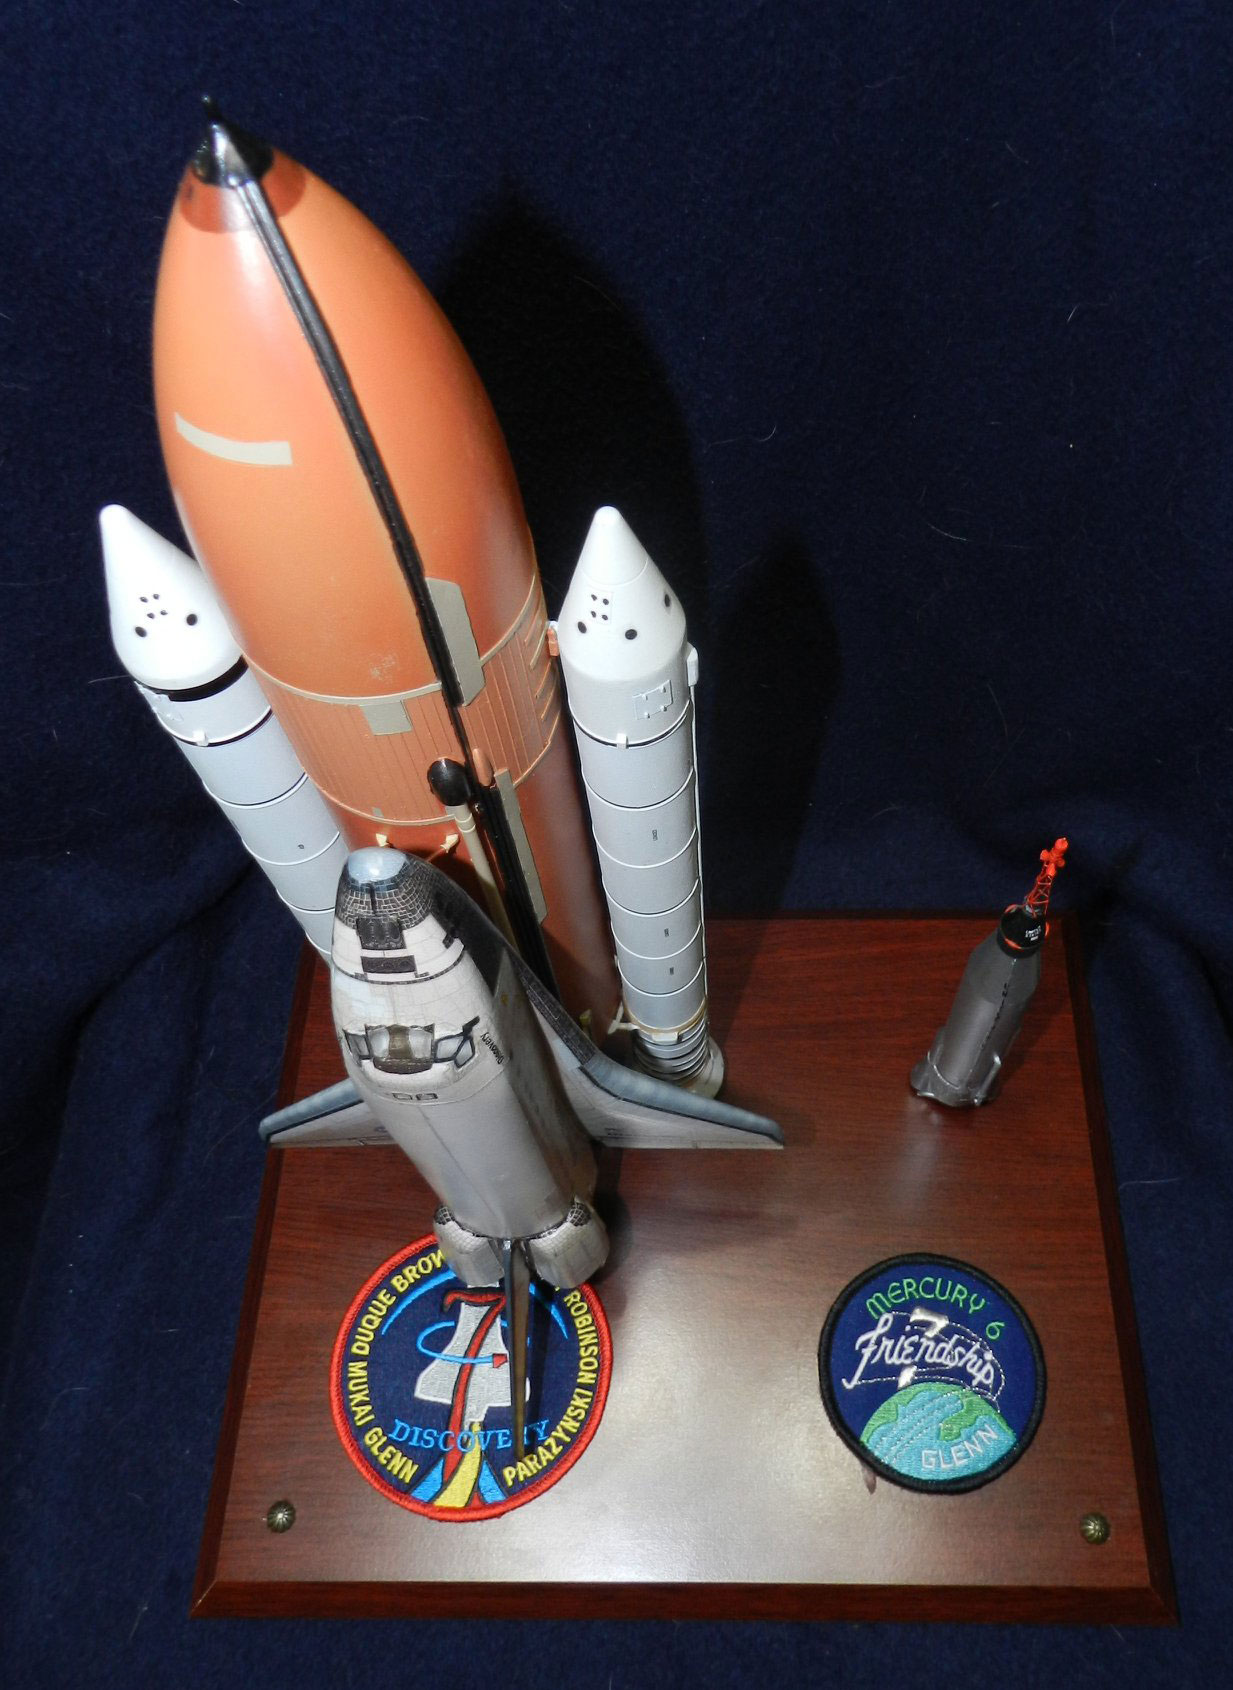
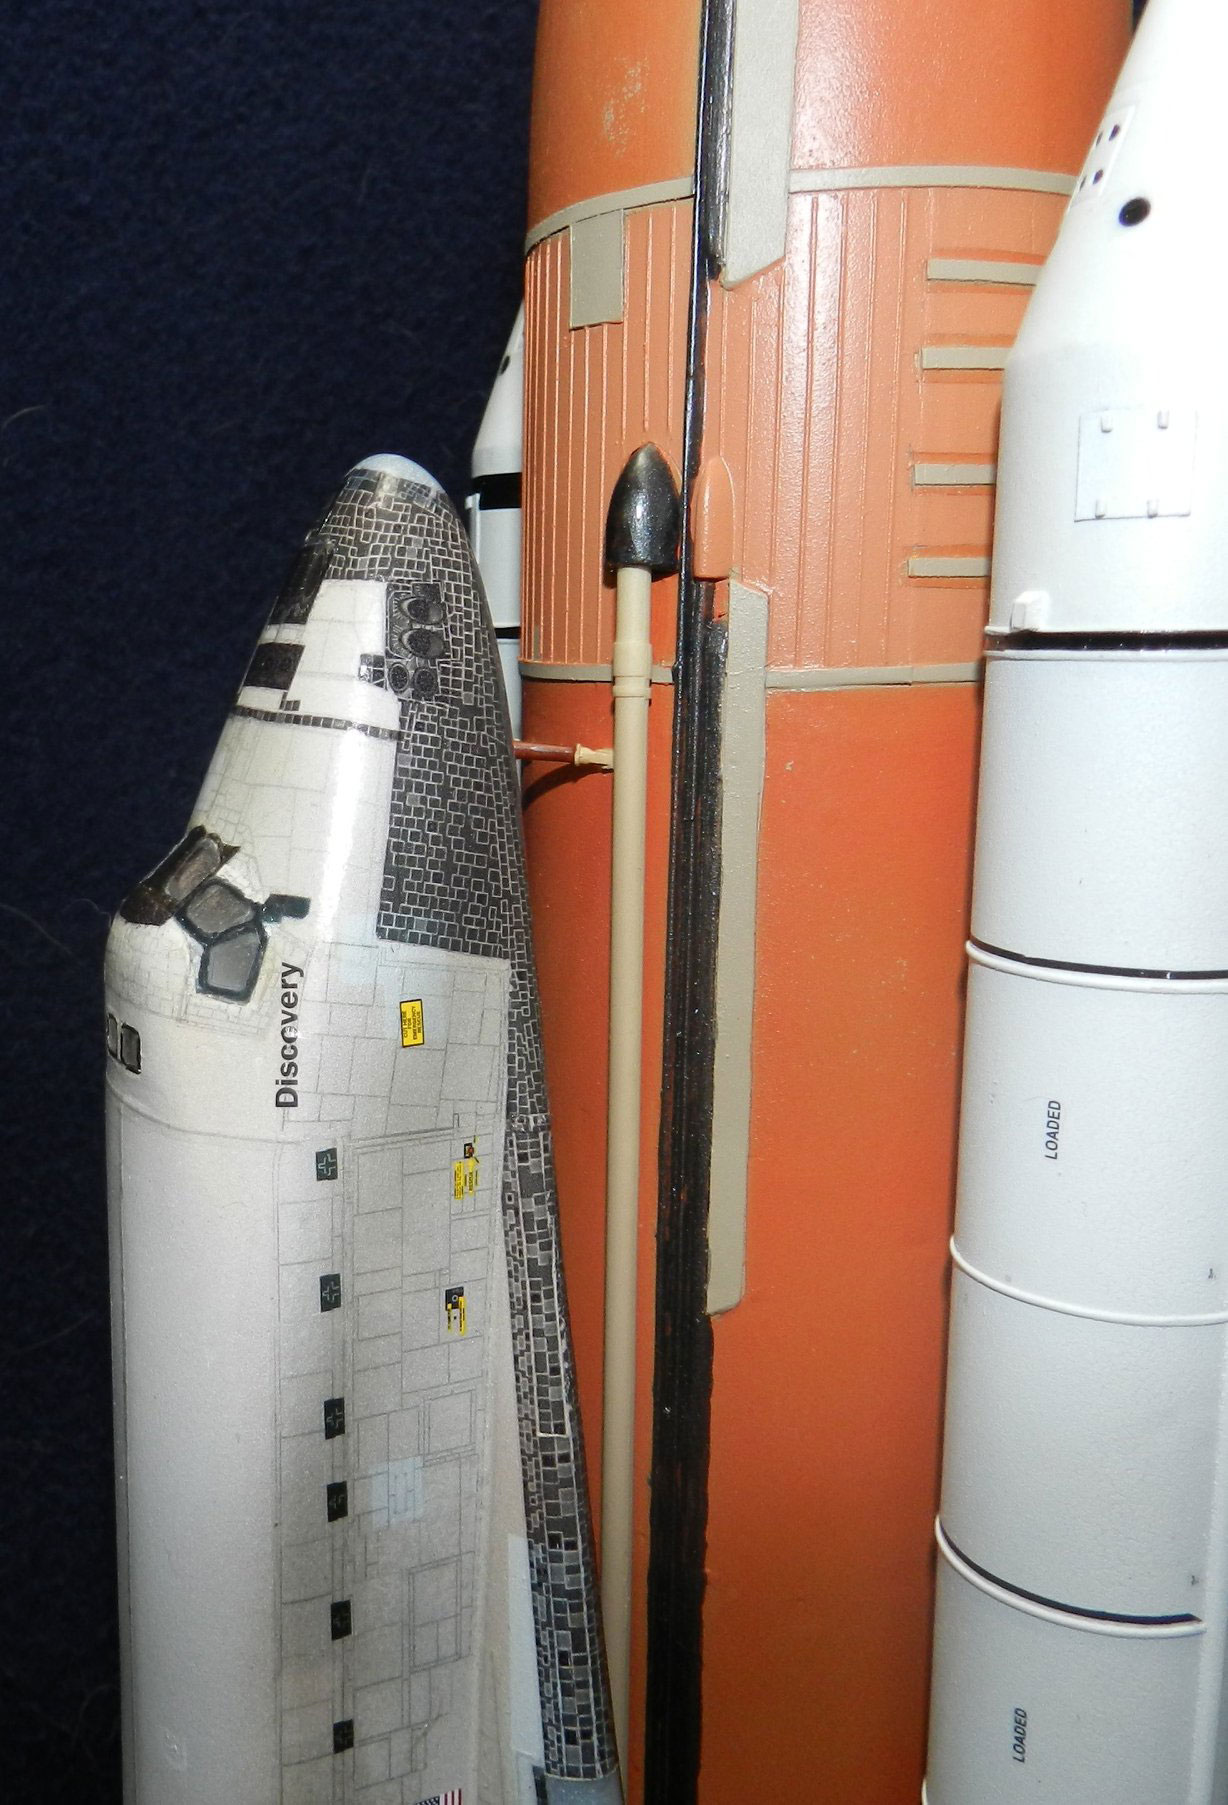
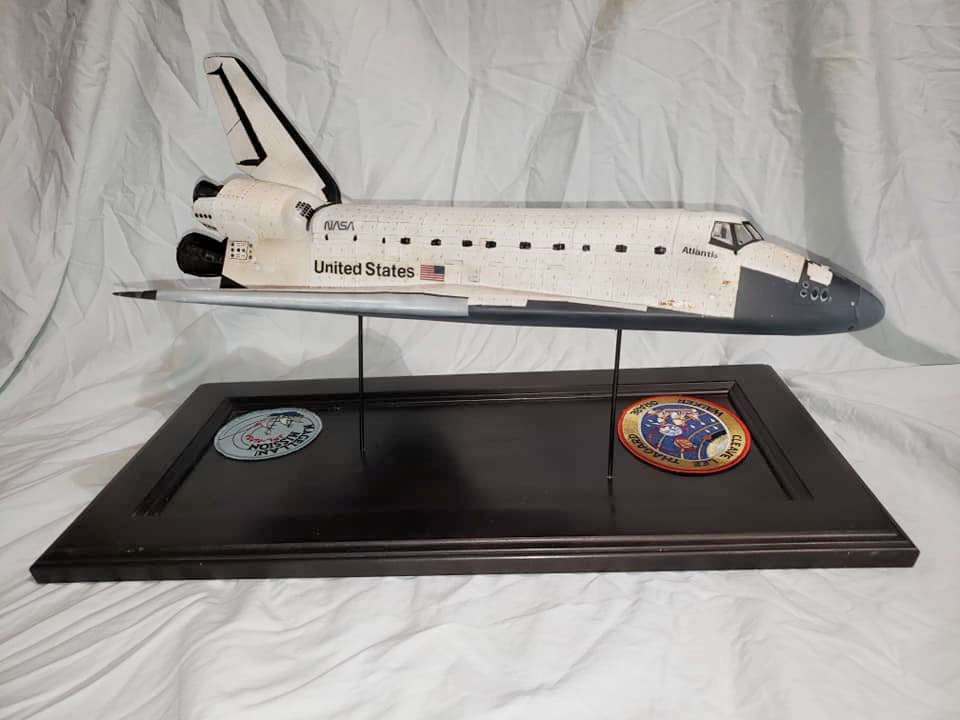
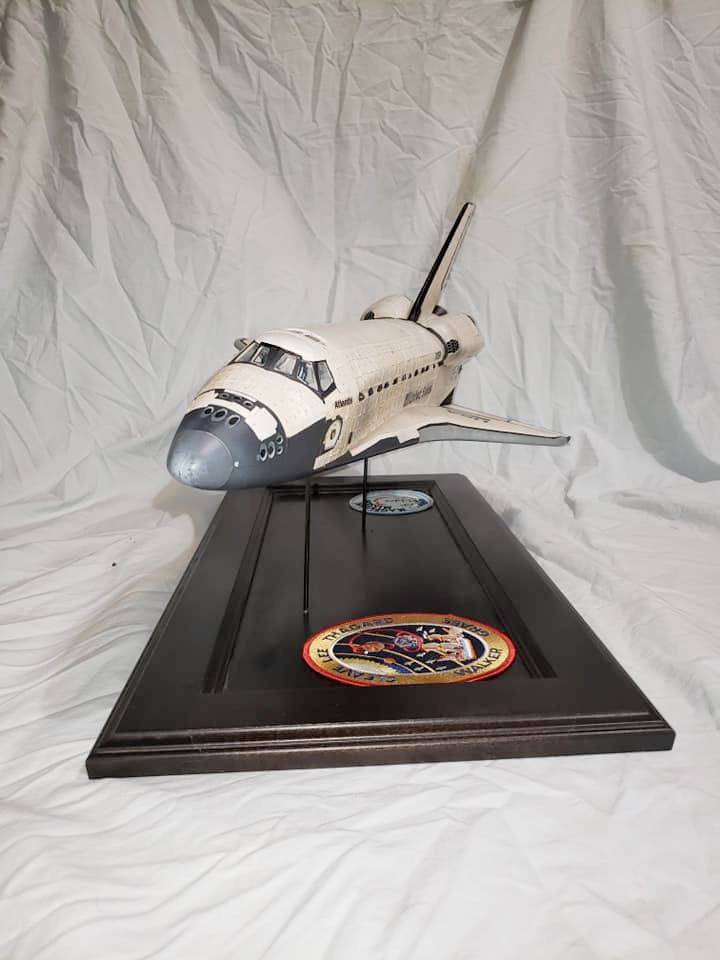
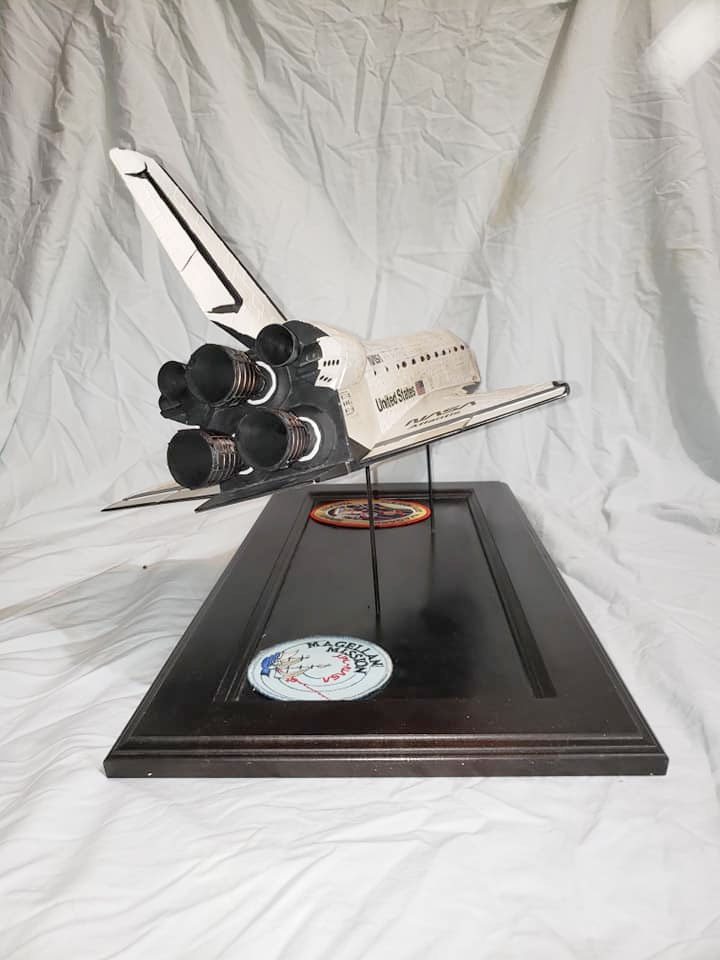
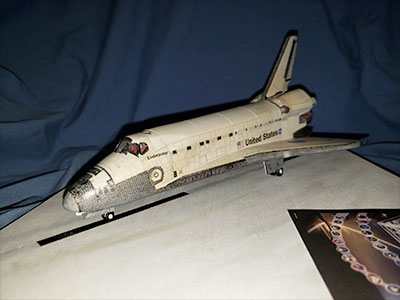
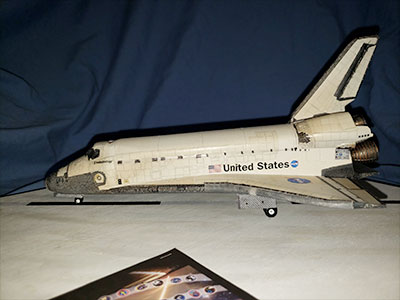
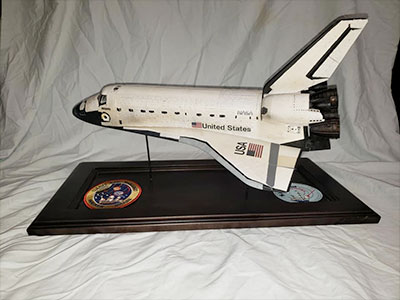
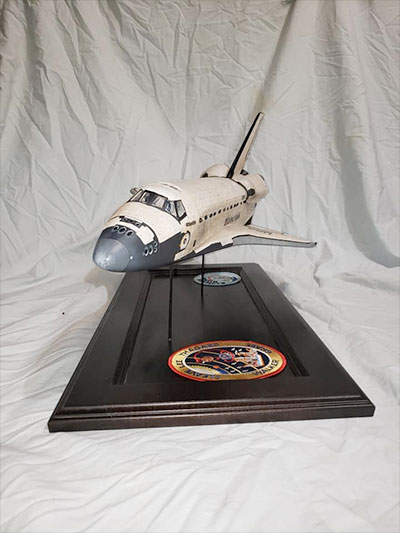
After hanging in my office for 8 years until I retired, my Atlantis needed dust, spiderwebs, spider droppings and old decals cleaned away and placed on a proper base. I replaced the flexible insulation blankets with cloth medical tape using the method at Lake County Spaceport. Each was given a smudge of gray pencil to replicate the ID stencil. Paint damage was cleaned up. A mix of RealSpace Models and home printed decals were used to replace the damaged items. The SSME and OMS nozzles were replaced with the new 3D printed versions from RealSpace Models. The base is a panel from a scrapped cabinet with 1/8" brass rod for supports. The mission patch is from AB Emblem and the Magellan payload patch is one I picked up at KSC when I watched the launch. 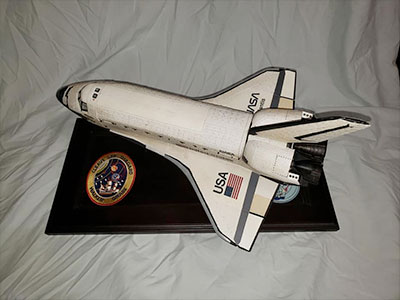 

|
GACspaceguy
Member Posts: 2602
From: Guyton, GA
Registered: Jan 2006
|
posted 10-04-2020 12:49 PM
Great models! I love the Skylab CSM display, wonderful display idea there. |